I’m sorry. I did it again. I painted a thing. Is this get boring? Correct answer: NO.
The relentless humidity we’ve been experiencing here in Ottawa broke last weekend and in a burst of energy, I started to organize our front hallway. One of the many updates I’ve wanted to make to our hallway was to add a storage trunk of sorts that could hold our hats, mittens and scarves in the winter and store our shoes in the summer. I also wanted it to be cushioned so we could sit on it, but it could be no wider than 40 inches as that’s the exact width of the small alcove-type space in our hallway. So I did what I do best and logged in to Kijiji to see what I could find.
It took me a long time to not only find the right size storage bench, but one that hadn’t already been taken by someone with a car that could pick it up sooner than I could. I’m talking like 10 months of searching to find something, but F I N A L L Y last weekend I found a storage bench that no one wanted, that would fit our picky hallway nook and the owner offered to deliver it to me for free. Yassss.
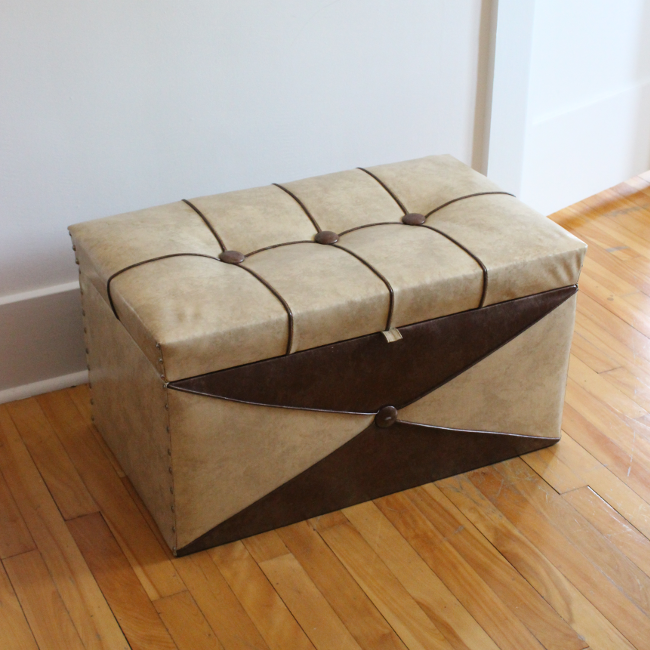
It was a storage bench only a mother could love. It was made almost exactly 51 years ago [according to the stamp on the inside saying “October 1967”] and was covered in brown and beige faux leather material. It was pretty fugly, but I could see its potential.
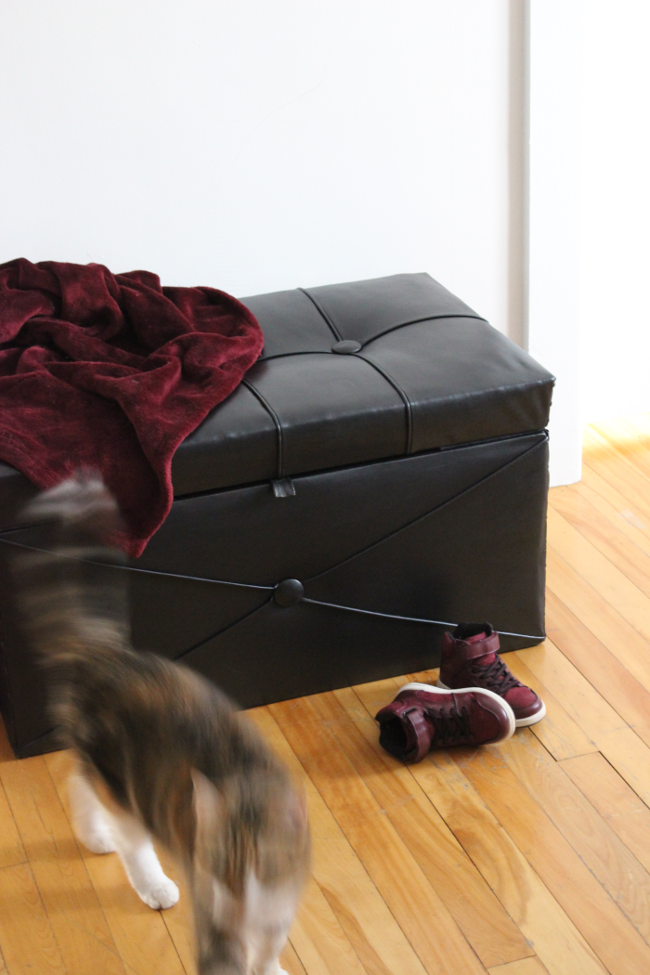
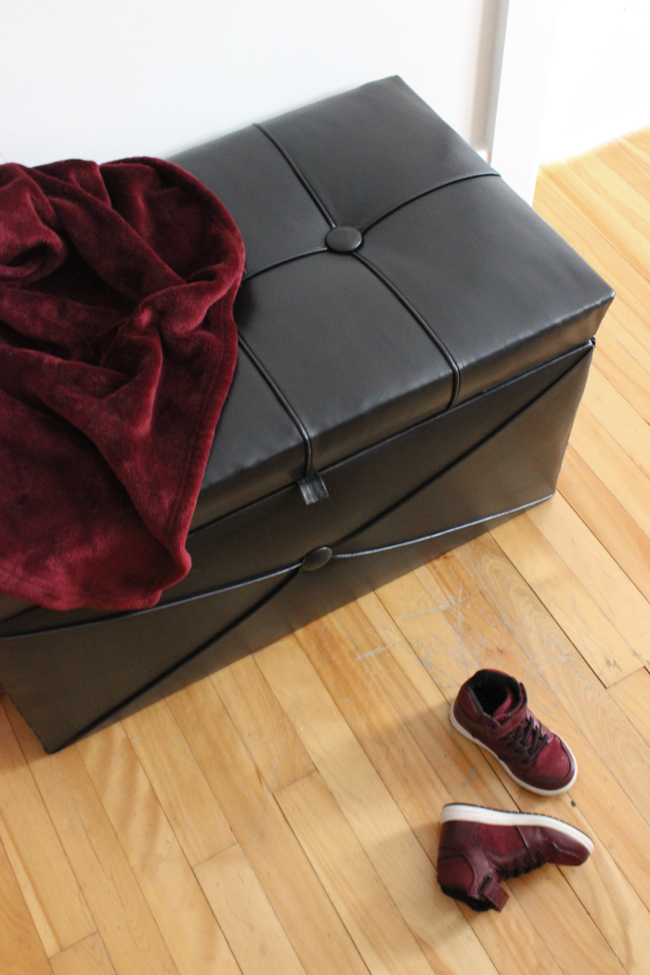
It is very well made and has some heavy-duty hinges and for $40, it was a total deal in my mind. A few hours after it was delivered I was painting it with my now very reliable Fusion Mineral Paint. The storage bench isn’t going to be a major focal point in our hallway, so I wanted it to be in a dark colour that could hide the scuffs and scrapes that come with an entryway, so I painted it in Coal Black from Fusion Mineral Paint. Just like our painted tufted leather armchair!
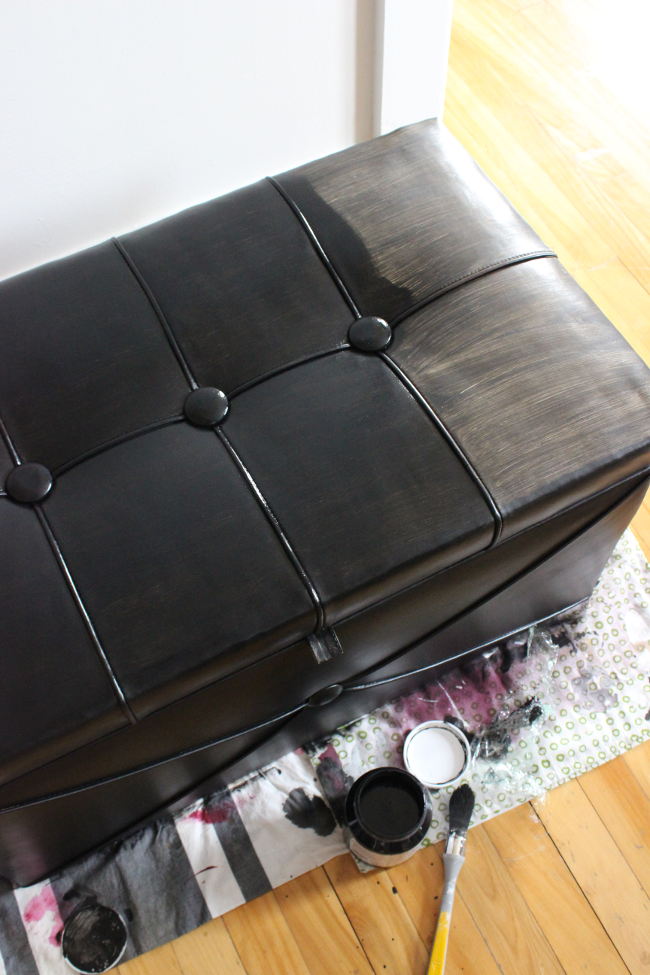
I painted two coats of Fusion Mineral Paint’s “Coal Black” on the dark brown sections and three coats were needed to cover the lighter beige [in the photo above you can see the difference between two coats of paint on the beige vs. one coat of paint on the right. The two coats were good, but still streaky so a third coat was needed]. I took my time and left the bench for a few hours between each coat.
After the three coats were painted, I left the storage bench open overnight [so the paint on the seams wouldn’t seal shut] and by the next morning it was ready to be used.
I continue to be amazed by how well Fusion Mineral Paint works on leather [and faux leather alike]. The coverage is perfect and you honestly cannot tell it’s a piece that has been painted. I’m not just saying this because Fusion Mineral Paint sent me paint. I’m saying this because I feel more people need to know that the DIY possibilites with paint are becoming more and more endless. If you see a secondhand piece of leather [or faux leather] furniture for sale but the colour isn’t your favourite and the thought of having it reupholstered is making you gently weep, know that painting it with Fusion Mineral Paint is 9,000% an option.
Our hallway is still a WIP, so it’ll be a few weeks before I’m able to properly photograph our storage bench in its new home. But for now, I’d like to thank Fusion Mineral Paint, again, for providing me with paint to do this project [and a few more coming soon!]. It means a lot to this busy working mom who is barely holding it all together 💕
DISCLOSURE – while this post is not sponsored, I did receive this paint free of charge from Fusion Mineral Paint in exchange for a blog post. I only work with brands that I like and of course, think you will too. Thank you for supporting the companies that support The Interior DIYer.