
I’ve been putting a phenomenal amount of pressure on myself to do and make new projects for our first Christmas in Canada as a little family. Reality, however, always has different plans. The reality is that we moved into our apartment less than 2 months ago and there is SO MUCH I didn’t realise would be involved with starting from scratch with everything. I’m working on cutting myself some slack [and will be trying my best to actually relax over the holidays], but I still wanted to spread some Christmas cheer, so today I’m sharing a roundup of my favourite Christmas projects. And luckily, 50% of them are edible [my kind of project].
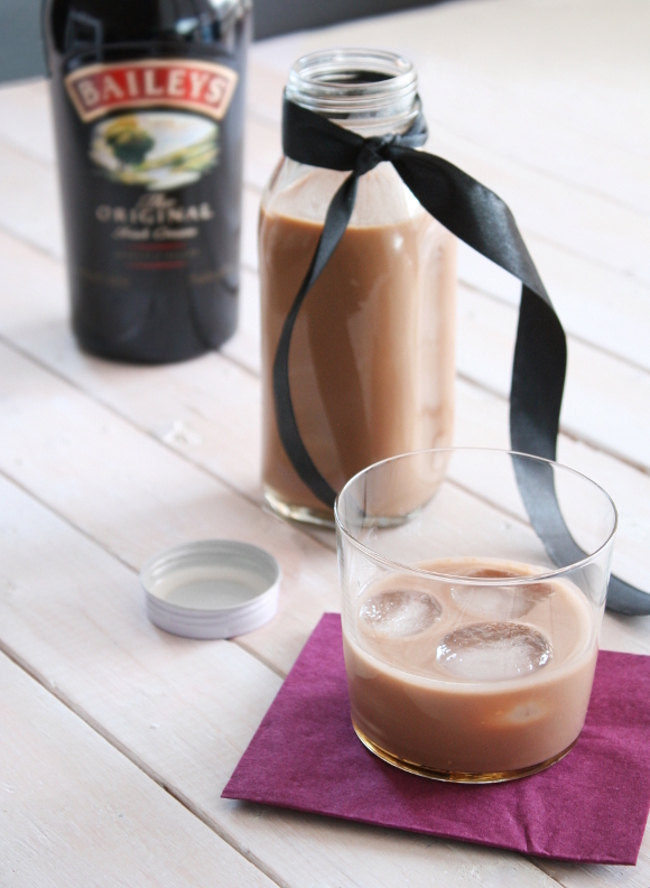
VEGAN BAILEYS – I made this recipe two years ago for Sadhbh of Where Wishes Come From’s Christmas Craft Advent. I promise this recipe legit tastes like Baileys. It was sooo good. But if the whole vegan thing isn’t your thing, two years previous to that I published my Nannie’s Knock-Off Baileys recipe.
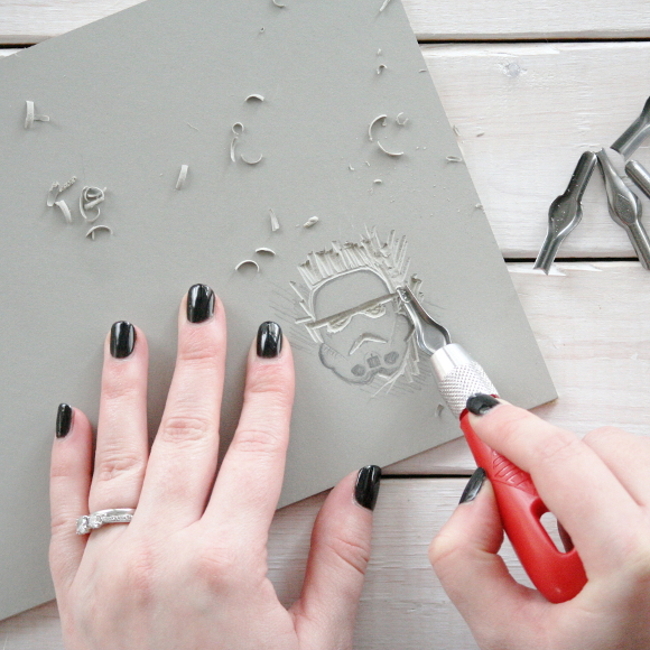
STORMTROOPER STAMP TUTORIAL / STORMTROOPER WRAPPING PAPER – a really fun project I made for Wayfair a few years ago combining Star Wars and my affinity for wrapping paper. You could very easily use this stamp tutorial to make a stamp to create a wallpaper effect!
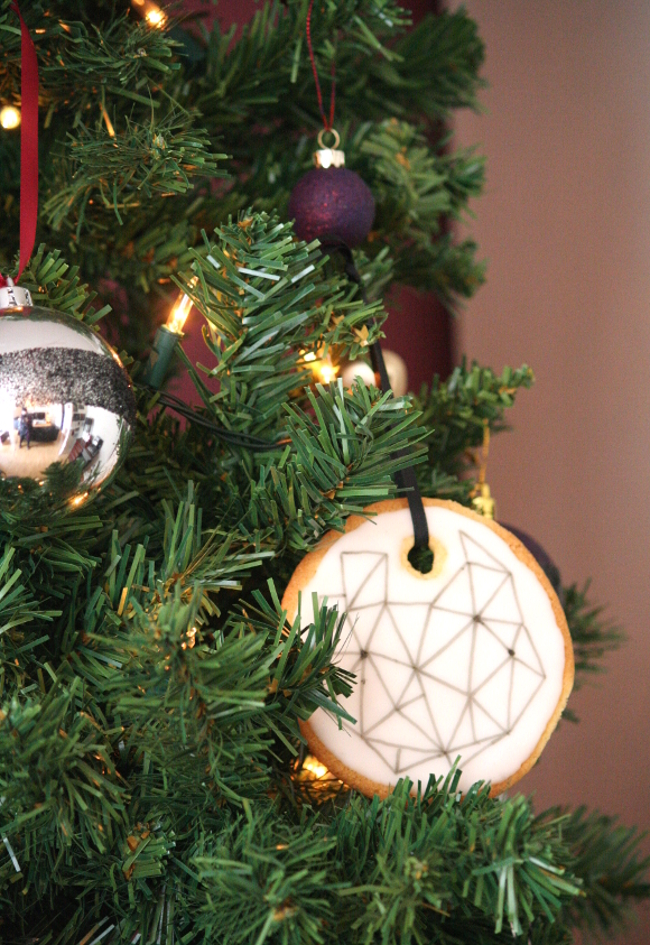
EDIBLE ORNAMENTS – another one of my favourite Christmas projects that I was hoping to recreate this year but never got around to it. I’ve made these zesty lemon Christmas ornaments a few times and they do not disappoint. They’re very easy to make and even more fun to eat straight off the tree.
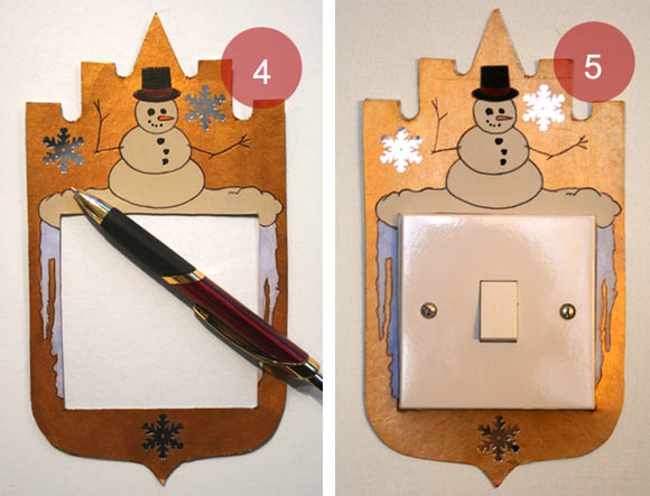
SEASONAL SWITCH PLATES – this is an oooooold project [as noted by my photography ‘skills’], but making these seasonal light switch surrounds were one of my favourite projects years and years ago. I can’t wait for them to arrive in our container. Actually, I might have to make more to suit Canadian light switches as they’re a different shape … ANY EXCUSE RLY.
Those are my strictly Christmassy projects, but if you’d like to see all my DIYs, just check out my DIY tab. Merry Christmas / bottoms up!
DIY Friday – paper storage bag for toys
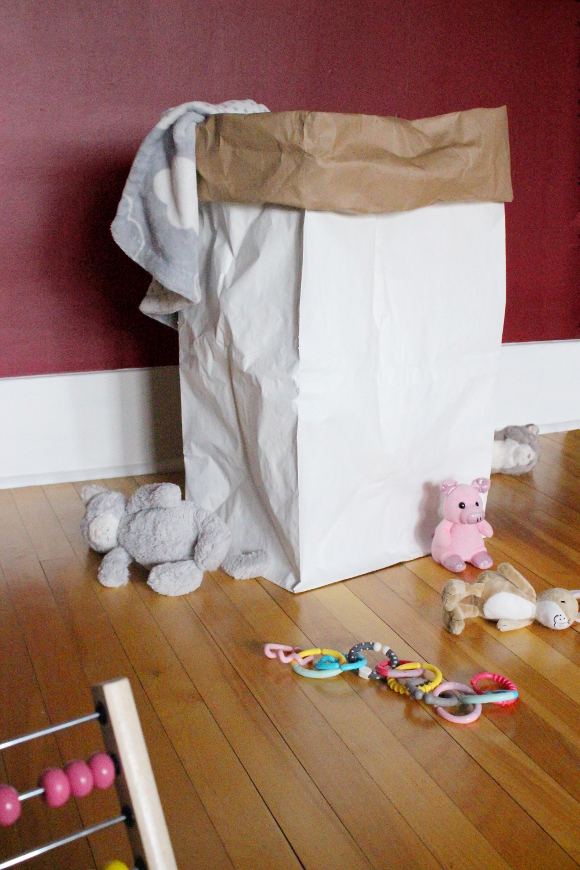
Since immigrating to Canada, as you’d expect, we’re starting from the beginning with everything. Furniture, accessories and food [like, spices. You don’t realise how long it takes to build up your cupboard until you have absolutely nothing]. We’ve been here 2 months and while it’s going to take a lot longer to get everything we need, I am able to start thinking about small projects to work on. One of them was some kind of storage for Cora’s toys.
I looked online for secondhand trunks and storage boxes but I didn’t fall in love with anything so I continued tossing Cora’s toys into the corner of her room. Then through an ad on Instagram, I was suggested a paper storage bag for toys. I thought it was cute, light and soft but at $30 [plus tax and shipping], I was unfortunately put off a bit [see first paragraph about how expensive the past few weeks have been].
A few weeks passed and on our way home one day we passed a driveway with paper yard waste bags from Canadian Tire waiting to be collected. I saw them and immediately thought, “How perfect would they be for storing Cora’s toys! If I painted one white, it could sit unassumingly in our living room and chaos would be restored to every aspect of our lives.” Perfect.
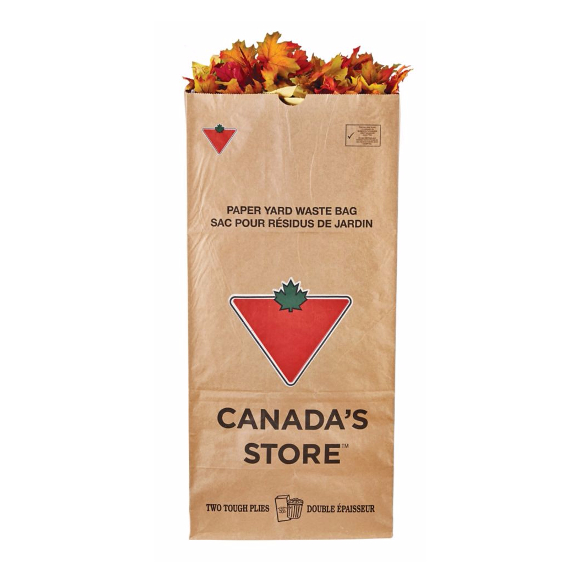
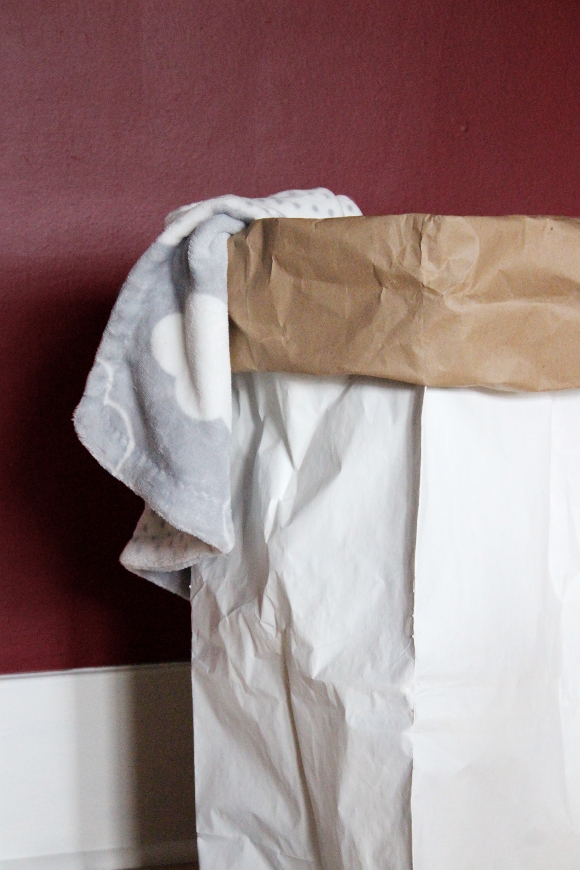
The next time I visited our local Canadian Tire I bought a pack of 5 bags for $2.69, headed home and began painting one white [which, by the way, was A LOT harder than I thought it would be]. That’s when I realised I was basically just making one of those paper storage bags I saw online a few weeks earlier. I was hesitant about sharing my project because it looks so simiar to the branded versions and I didn’t want it to seem like I’m copying them, but at the same time, I did think of the idea by myself too. After an overwhelming response to my Instagram stories poll and 100% of the vote going to “YES! BLOG IT!” [vs. “NO, YOU’RE A BAD PERSON”], I decided to blog it!
I’ll be honest in that it was pretty tricky at times trying to paint the bag [it continually collapsed while I was trying to paint the sides and I had the added bonus of teething toddler hanging out of me], so I wouldn’t blame you for wanting to buy one online and save yourself some hassle. BUT, if you’re like me, and like doing stuff yourself, my version cost me $0.53 for one bag [I used white paint I already had]. Not bad for something that Cora might literally tear through one day.
How blogging taught me to do things the right way vs. the easy way
I’ve been blogging for 7 years now and I will be the first person to admit that in the beginning my projects were terrible. I used regular wall paint on furniture, I glued things together instead of buying the hardware it needed, I wouldn’t wait the recommended time between coats [because I want it done NOW], I’d skip steps to speed up the process and I went for the cheapest option vs. the option that was most suitable and would last the longest. It was definitely a mix of my age at the time and inexperience, but I’m quite proud of how far I’ve come these past years.
A lot of how I now treat projects I owe to two of my favourite bloggers; Anna Dorfman of Door Sixteen and Nicole Balch of Making it Lovely. I started following both women around the same time I started my own blog. Two [of the hundreds] of their projects that stand out the most was one of Anna’s posts about updating the cast iron radiator in her kitchen and a post of Nicole’s was when she was updating the sink nook in their walk-in closet. I don’t know why, but these posts stand out the most out and from time to time I think about them. Effort and research went into both [seemingly straight forward, but not] projects. They took their time and weren’t done in a day. If they needed more time, they took it. They didn’t take the fastest route. I remember being so interested in both posts and their surrounding projects. Both Nicole and Anna often do research into the history of whatever piece their working on and manage to make the intricate updates and processes interesting. I mean, radiators and filler don’t particularly scream ‘exciting’, but I was captivated by both projects [and about 1,000 of their other projects] and the underlying theme of doing something properly.
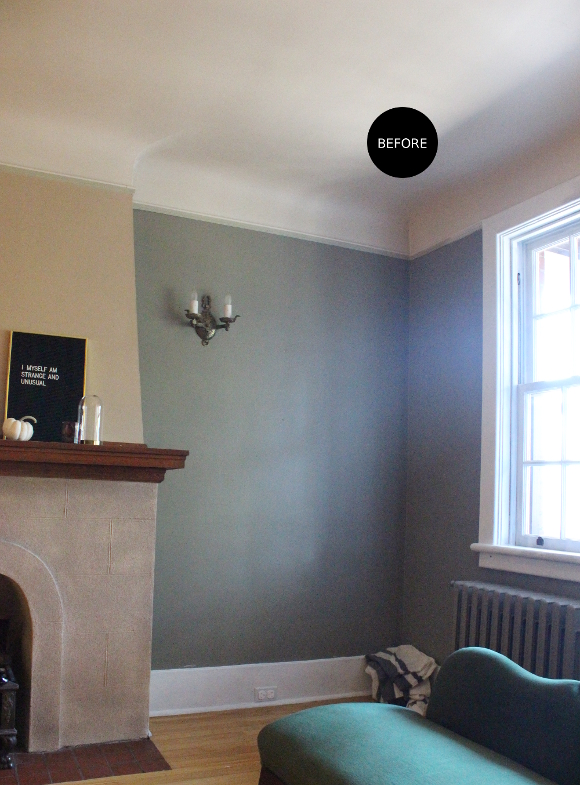
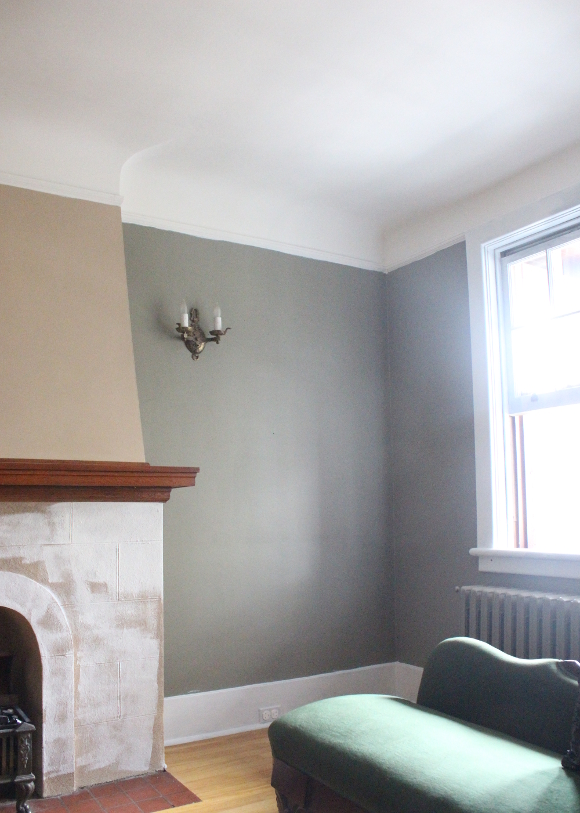
It’s not a great example because it’s the only project I’m working on right now, but case in point – our living room. When we moved in it had a beige ceiling, grey walls, two shades of grey on the picture rail, grey painted trim, windows and doors. For a few weeks I considered what colour to paint the walls and on Friday I bought paint for the living room. Knowing it will make the biggest impact, I want more than nothing than to paint the walls. But another part of my brain reminded me there’s an order to things – the ceiling should be painted first because it makes the most sense [working from the top down etc]. So on Saturday I painted two coats of white paint on the ceiling. It was exhausting but it looked fantastic compared to it’s previous beige! However, on Sunday morning reality hit and I realised it needed another coat.
Did I want to climb up that step ladder, pinch my hip countless more times and crane my neck for another 4 hours to paint another coat on the ceiling? HELL NO RIGHT HERE 🙋 But I did it because I knew it wouldn’t be done properly otherwise. Yes, the ceiling looked good after two coats but it had ever-so-slight shadows of uneven paint. I painted another coat and it now looks immaculate compared to its previous self. Yes, it was annoying as fuck having to do that last coat and on a Sunday. But which was worse? A few hours of extra painting, or the next X-number of years looking up at the blotches of uneven paint that irked me? During those few hours on Sunday morning before I painted the third coat all I kept doing was looking at the damn blotches so I knew if I didn’t do another coat, my eye would keep getting drawn to them.
What I’ve learned over the years is to take your time and think about the right way something should be done. If you’re not sure, ask in your local hardware store or Google it. If it takes another week to get a project done, it takes another week. I had to learn a lot about patience over the years and I’ve learned to appreciate not taking the easy route. And I have Nicole and Anna to thank for that.
- 1
- 2
- 3
- 4
- …
- 41
- Older Posts