DIY Friday – chuck it bucket*

Like most projects, this weeks DIY project started from habit. Our living room gets the most use, and therefore all of the things end up there. I’m a little bit of a neat freak {I can already hear my husband when he reads this – “a little?!“}, and if I’m sitting among chaos for too long, I can feel the crazy build up. When I gather all the stuff in our living room that’s to be redistributed back throughout our apartment, I noticed I was always dumping said stuff on the corner of our couch or by our living room door.

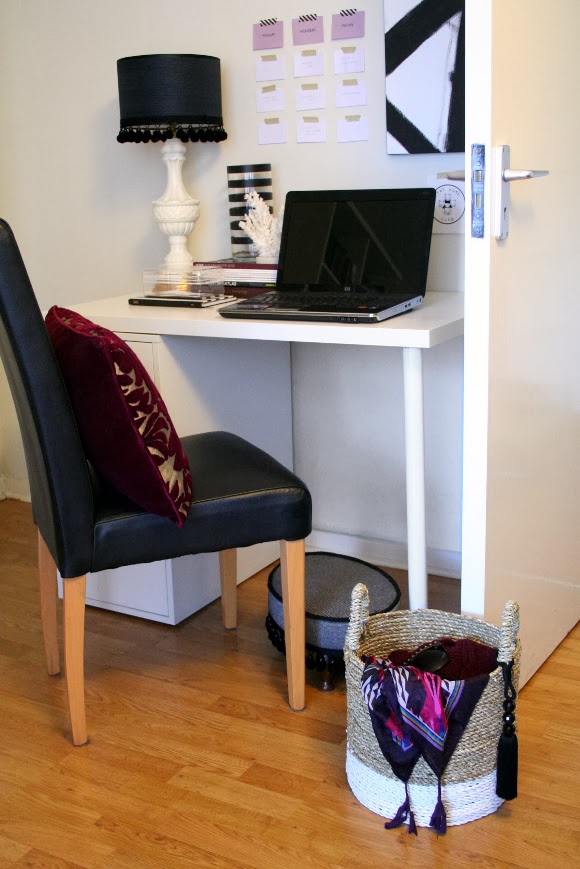
After a while, I started using a reusable shopping bag hanging on the door to collect said items, but to be honest, I wanted to gouge my eyes out from looking at it. That’s when I came up with the idea of having a basket on the floor which could easily accumulate our crap, and I could pick up and zip around the apartment with. Thus, the chuck it bucket was born.

I’m not claiming to be the inventor of this idea, but it’s something I’ve found immensely handy when it comes to tidying up, and thought it was an idea too good to keep to myself. But hold up, “where exactly does the DIY come into play, Alex” I hear you say. Well, I’ll tell you. I had seen Kirstie Allsopps dip-dyed basket DIY earlier this year and I had it firmly planted in my brain. When I was on the lookout for an appropriate basket / vessel, I had a plain, circular, woven basket with handles in mind. I was on the lookout for a long time, and finally found the perfect one in TK Maxx! But wait – it was too perfect. It was already dip-dyed white. Yes, I battled with myself – do I just pretend I dip-dyed it myself? Incredibly tempting, but no.

I had this dip-dye project in mind for so long as a DIY Friday, and now I can’t do it. But alas, my only justification is Kirstie’s link I included above which has thee most painfully easy DIY; just shove a basket in paint and you’re done. But, I still wanted to share my spiffy new basket. I jazzed it up a little bit by adding a mini black curtain tie-back from Home Focus at Hickeys. And lord knows, I like a little jazz.

I’ve had this basket for a couple days and already it has come in so handy just lugging stuff around our apartment. Chuck it in. Lug it around. End of story.

*Yeah, it’s a basket, not a bucket, but c’mon ‘chuck it bucket‘ sounds so much better.

DIY Friday – fall wall

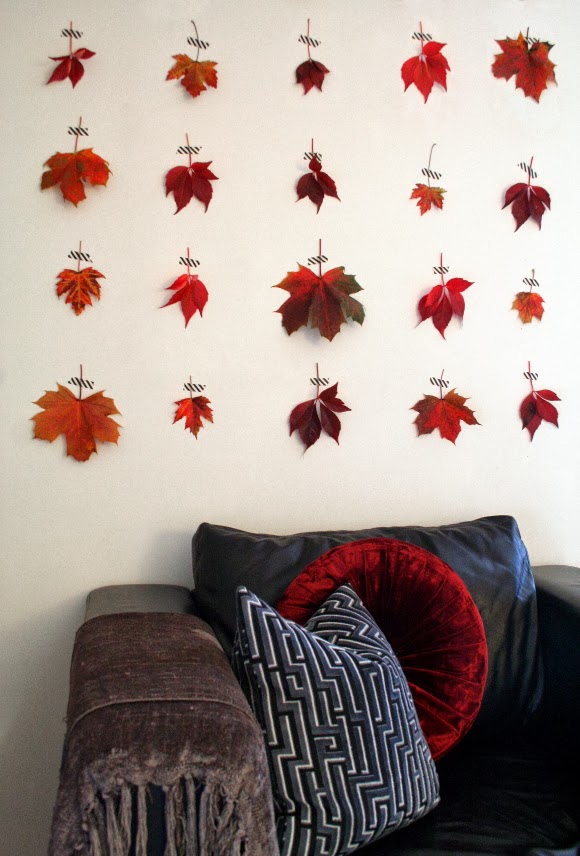
Some of the trees near us have finally started turning really lovely autumny reds last week. I just couldn’t resist, so while embracing my social awkwardness at full capacity, on my way home from work I started collecting my favourite leaves, which attracted some interesting glances. Once I got home, I lazily taped them all in one bundle to the wall over our TV and then that little light bulb sound went off – create a leafy gallery wall and my own little ode to autumn. A super simple DIY Friday that doesn’t require mad craft skills. 

All you need are leaves and washi tape. Just head outside, or even better – if you have children that still consider picking up leaves fun, send them outside to collect their favourite ones. I used my favourite black and white washi tape and taped them over the chair in our living room which currently doesn’t have a focal point. I didn’t get technical, just eye balled it and stuck the leaves in no particular order. 
TIP: I would advise pressing and drying your leaves in a heavy book for a couple of days before you tape them up. It prevents your leaves from rolling up as they dry, and they will look much more manicured on your wall. Two days in a book will do the trick. I didn’t have time to do this, so I have some backpedaling to do. I blame the eager blogger bug. 

I’m really happy with how it turned out and I can wholeheartedly say the {blurry} pictures do not do it justice. Once I’ve properly pressed and dried my leaves, I’m hoping to keep them up from now through to Halloween, Thanksgiving and right up until I switch things up for Christmas. A perfect little autumn accent me thinks.
That’s it really. Nothing more to add. Happy Friday, peeps! I got a ridiculously good deal on some monk fish today, so we will be dining like frugal kings tonight. I hope you have an autumny weekend lined up. xx A 

DIY Friday – dapper dresser

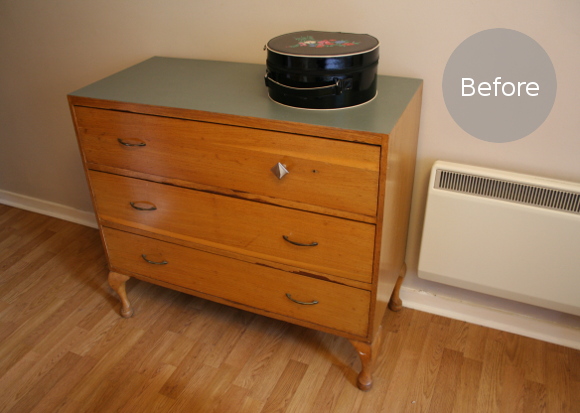
I’m not sure if you could call this week’s DIY Friday technically a DIY, but it’s a revamp no less to a piece of furniture I bought 4 years ago. Our apartment didn’t come with storage for one’s small items in our bedroom, so I went online and bought this old wooden dresser. It was cheap as chips and did the trick. It held my garments, husbands manly stuff, and a drawer dedicated to pyjamas. Perfect. 
In the early years of my apartment designing, I painted the top of the dresser with leftover paint; it was a weird greeny-grey paint, and I don’t know what the hell I was thinking to be honest. I quickly gave up on doing anything with our dresser and then 4 years happened. Yeah. For 4 years it sat like this in our room … 

I think the word you’re looking for is ‘fugly’. I hated it and it was such an eyesore in our bedroom. Last month I finally had enough, so I got on my bicyclette, cycled to Rua on Capel Street and picked up a tin of Annie Sloan Chalk Paint.

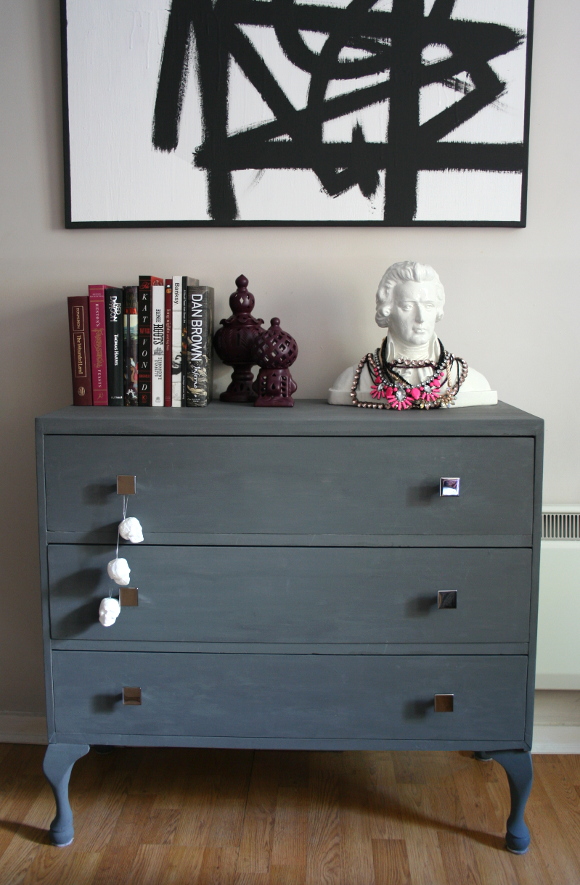
Back in the day I had a major crush on the EDLAND line of furniture from IKEA. I daydreamed of having a house and filling it to the rafters with beautiful EDLAND armoires and dressers. Sadly, that line became extinct, but I was lucky enough to swipe a little EDLAND bedside table in their final sale {sadly, it was the only piece we had room for}. To date, it’s still one of my favourite IKEA pieces. I adore the dark grey, and it inspired me to pick Annie Sloan’s moody warm ‘Graphite’ grey.

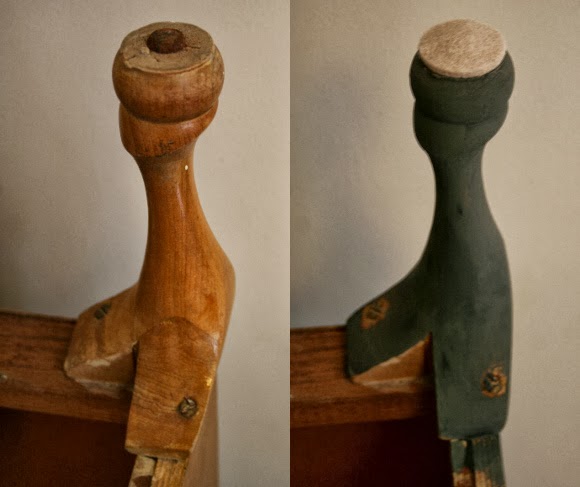
Enough of that. Onto the makeover! I cleaned the dresser of any dust and whatnot, took out all the drawers and flipped it over to start. He was in bad need of a pedicure, so I sorted that out while I was down there. Yes, I’m claiming this dresser to be man as no woman would let her feet look like that.
After two coats of paint on the feet I turned it right-side-up and gave the body two coats. Pretty straight forward.

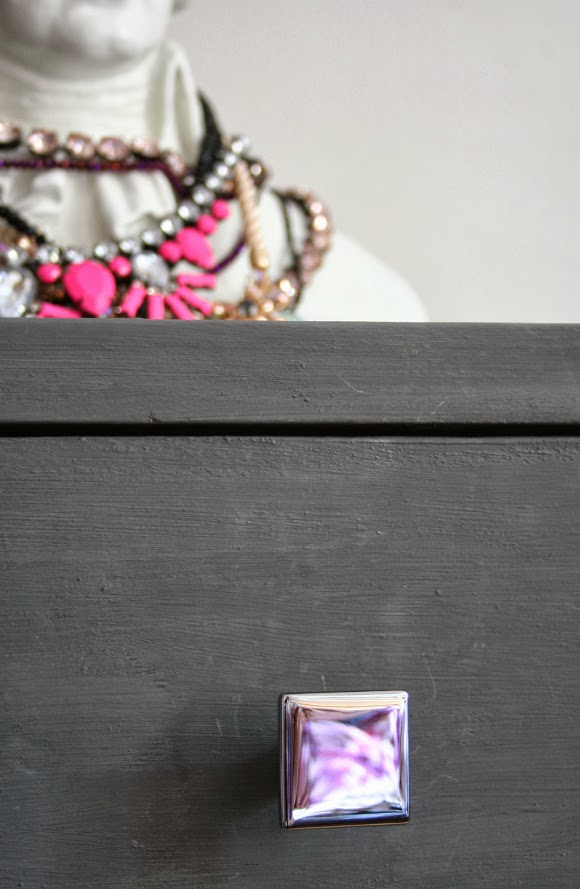
While I was at it, I updated the drawer pulls as well. I’m afraid I picked these up years ago in IKEA – they’re from the GLIRA range which is also now extinct. You can actually see one of these drawer pulls in the ‘before’ photo that I replaced years ago in premature revamp excitement. Our dresser kind of looked like it was winking for a very long time …

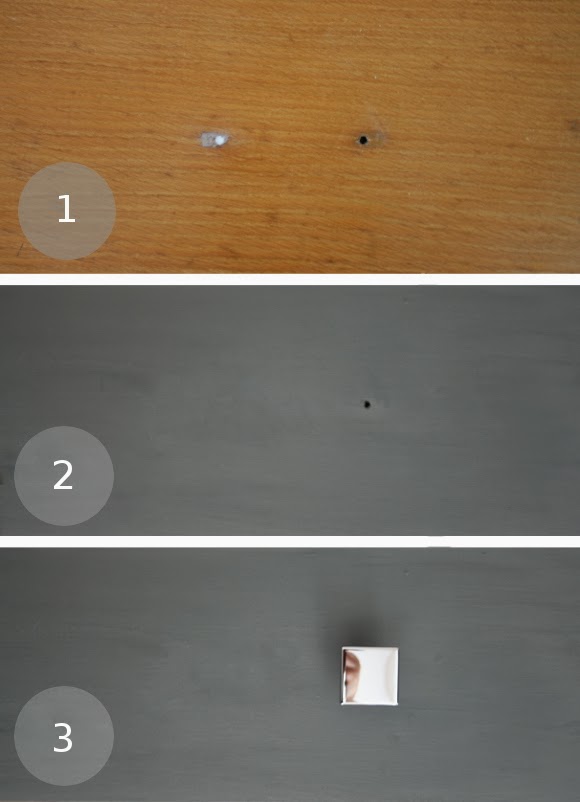
I took the old rusty drawer pulls off, filled the holes with decorators calk, let it dry, painted the drawers with two coats of paint and finally added my ‘new’ GLIRA pulls. And ta dah! It was much easier project then I thought it would be.

I’m so happy with the result and I really don’t know why I didn’t tackle this project sooner. I guess it was just one of those things you keep reminding yourself to do, and after years of mental torment, you break down and do it eventually. Please tell me I’m not the only one with ‘guilt projects’ that eat your brain like a zombie?
Anyways homies, it’s Friday and I cannot wait for the weekend to hurry up and get here. Happy Friday! xx A