DIY Friday – seam wars

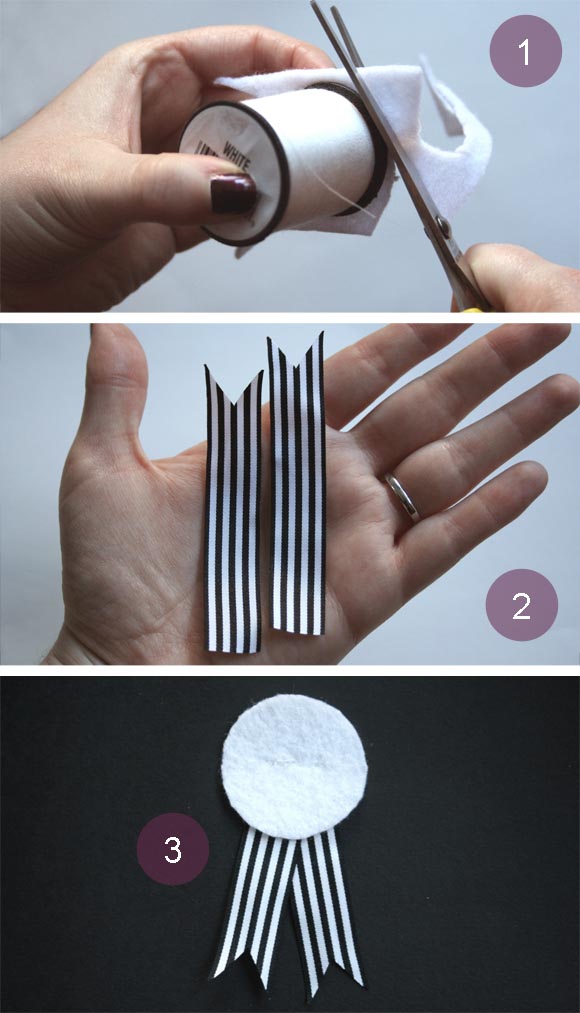
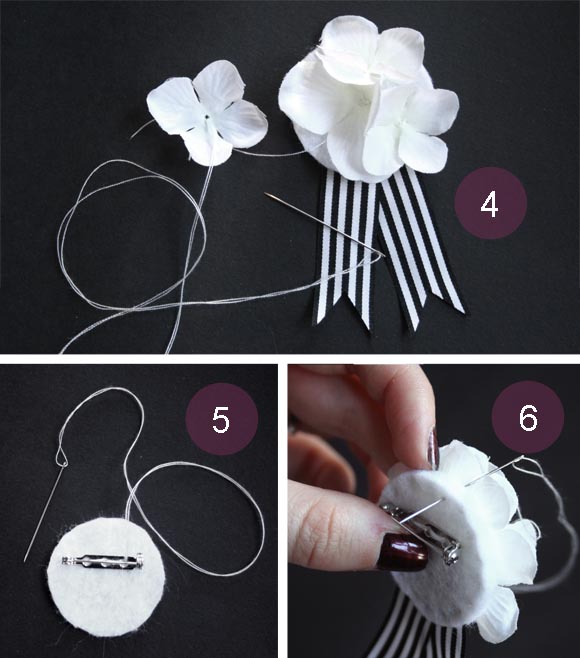
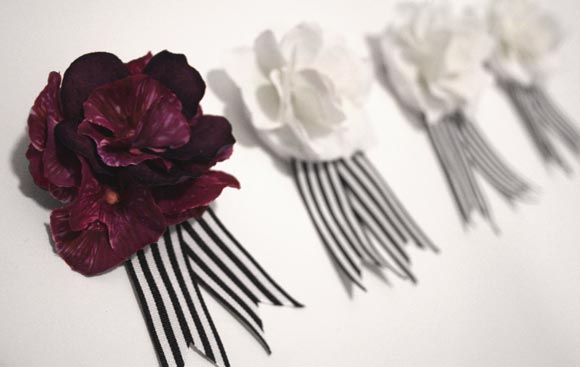
Friday you sexy beast, we meet again. And it couldn’t have come sooner as it means I can finally show you what I’ve been up to this week! 
But before I jump into today’s DIY, I will first say sewing is not my forte. My most sincere apologies in advance as I did not include progress pictures for today’s tutorial. I normally don’t sew beyond the basics of repairing clothes, but I managed to successfully sew up this little number for today’s DIY Friday, and it ended up being a fairly straight forward job. Which literally translates to – if I can do it, anyone can. 

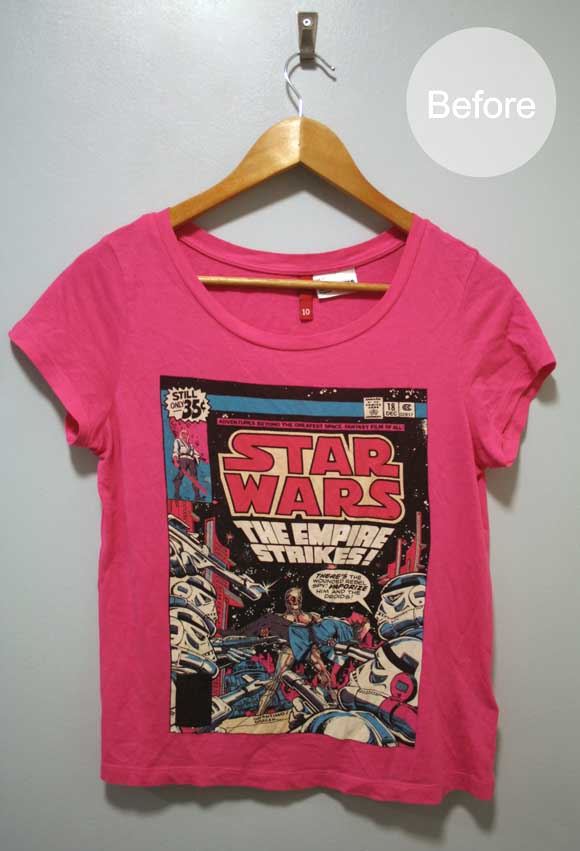
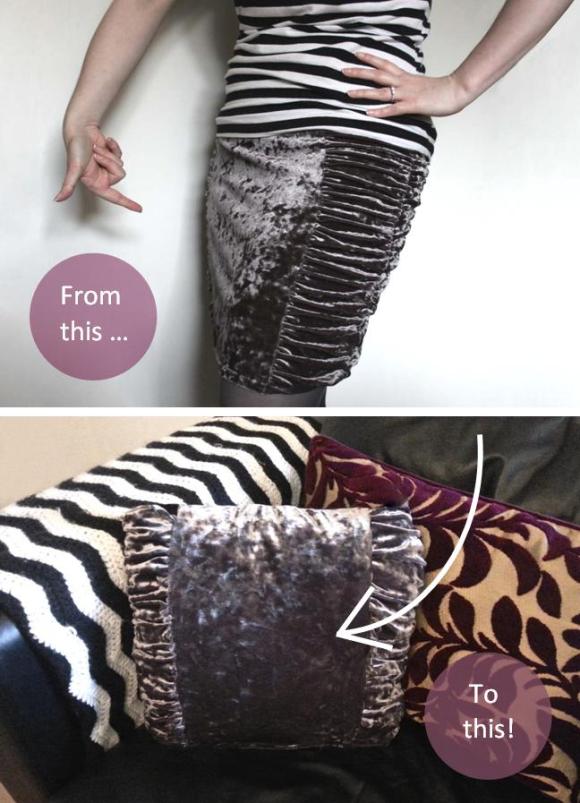
It all started with a Star Wars t-shirt I saw it in H&M and had to have. More so for husband’s benefit than my own since he is the fan, and my eyes start to glaze over if someone talks about Star Wars for more than 4 minutes. Unfortunately, after one wash said t-shirt warped and is now too short in the torso for my liking {do not want muffin tops hanging out}. I didn’t have the heart to give it away, so I immediately thought of transforming it into a pillow {I’ve done something similar before with a skirt}. 

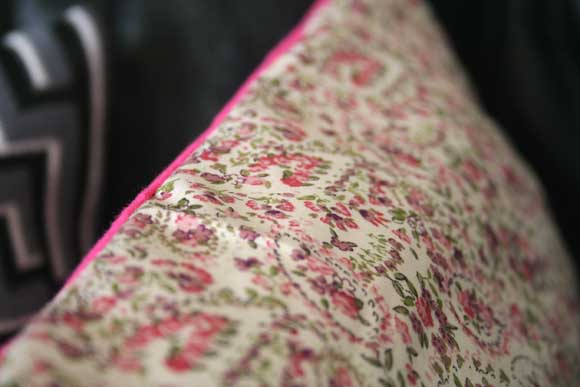
Luckily, I had a pillow insert that was the perfect size. Keeping the image centred, I drew the dimensions of the pillow. I cut it out including an additional inch border along all four sides. Since the t-shirt fabric was thin and a bit too stretchy, I used some fun, flowery fabric of my own as the pillow backing to give a bit of structure. I sewed the two pieces together and voilà! 

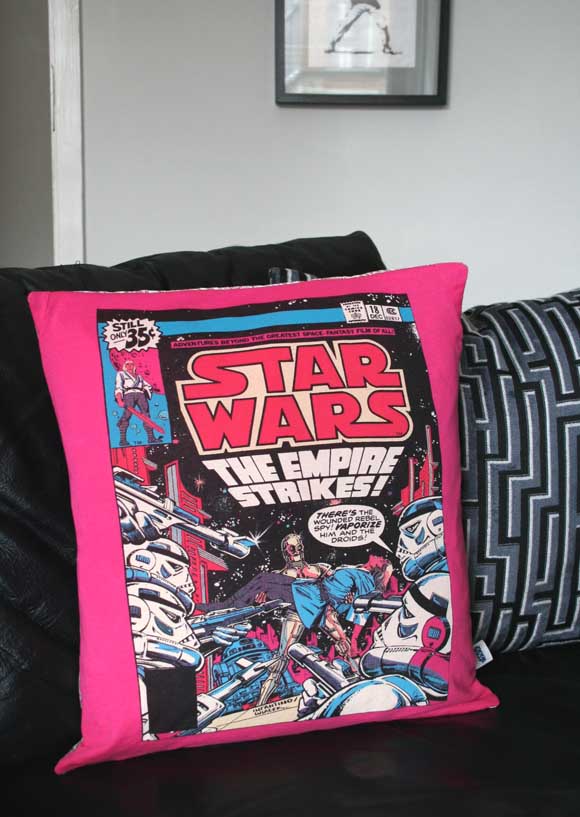
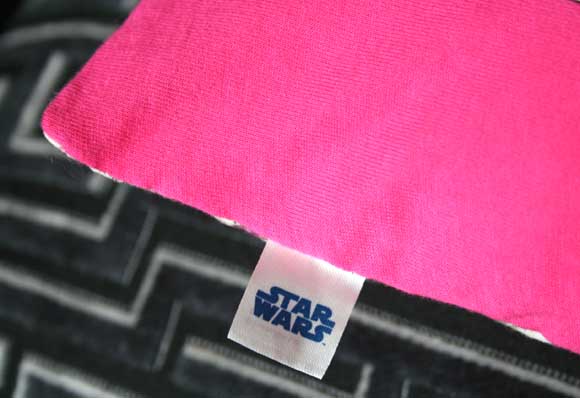
It was a pretty straight forward and I channelled my elementary school quilting techniques {drawing a line with a ruler, sew along said line}. And to further trick people into thinking it’s a real pillow, the t-shirt had its own little authenticated Star Wars label sewn in so I seam-ripped that baby out and incorporated it into the finishing pillow seam. Legit. 
Happy Friday, friends! I hope this week treated you well, and you have a totes awesome weekend lined up. xx A

From skirt to pillow

Here’s a pillow cover tutorial that will have you keeping your eyes peeled for discounted skirts …

I bought this skirt three years ago because – 

   a) I liked the colour.
   b) I really liked all the rouching it had going on.
   c) It was velvety and I like velvet.
   d) It was on sale for €1. Hells yes.

Too bad I never tried on said skirt before purchasing it. It fits, but it’s a bit disastrous. So, the reason I upcycled this skirt is – 
   a) I really adore the fabric so I’m not ready to part with it. Yes, it was dirt cheap, but I think it would make a fabulous pillow.
    b) When wearing this skirt, this particular fabric makes my thighs look like two sea lions fighting on a beach. Hand me the scissors.

What you’ll need : a skirt you no longer wear {or a super-cheap one you spot on sale}*, a pillow the same size or slightly smaller than your skirt, scissors, a needle and thread – or if you’re fancy, a sewing machine. Alas, I do not have one. Woe is me.

* This really only works if your skirt is the same width from top to bottom – i.e. a pencil skirt of sorts.

Step 1 : turn the skirt inside-out. Sew across the top leaving a bit of space from the edge. This particular skirt had an elasticated waist, which I cut off before sewing.


Step 2 : turn the skirt right-side out, and stuff with a pillow. From here, you can gauge if the sides need to be taken in a bit to better fit the pillow. If they do, turn your skirt inside-out again, and sew where necessary. Step 3 : once the pillow snugly fits inside the skirt, turn it right-side-out, stuff pillow inside, and sew the pillow closed using a ladder stitch. There is the option to sew  this opening a third of the way closed from either side while your skirt is still inside-out and has no pillow in it. This gives a cleaner line on the outside, and once you feed the pillow through the remaining opening, it means you have less of a ladder stitch to do.

Et voila! This will hopefully feed my pillow obsession for the next week or so. And I hope I’ve otherwise saved some skirts from the skip 🙂

p.s. It was complete coincidence that I paired skirt / pillow with black and white stripes in both the before and after pictures. I nerded out over that a little once I noticed it. Because I’m big time lame.

Our wedding – boutonnieres

From day one, I knew I would make the boutonnieres for our wedding. I wasn’t 100% on what they would look like, but I knew they would have an element of stripes. Little ideas came and went, until I came up with this simple idea. An ever-so-slight take on war medals, since my man and said groomsmen are of the combat Playstation era.

I have to thank Laura ‘Lupin’ Howard as I used her Felt Butterfly Brooch tutorial as an assembly guide for our boutonnieres. Thank you, Laura. You sew crafty.

What you’ll needfaux flowers, felt in a colour of your choice, scissors, ribbon, 3 hole brooch pin, thread to match your felt, and a  cutting template {I used the thread bobbin as a circular template}.

Step 1 : using your template, cut out two felt circles. They don’t have to be perfect since they’ll be covered. Step 2 : cut two lengths of ribbon roughly 6cm long {length of your finger}. Fold the end in half and cut at a sassy angle to spruce them up. Step 3 : overlap the ribbons a little, and sew them onto the ‘back’ of one of the felt circles. About 6 stitches will keep the ribbons in place. Trim off any excess ribbon.


Step 4 : on the ‘front’ of that same circle, sew between 6 and 8 faux flower petals using a similar colour thread. Don’t be too precise with the spacing otherwise it looks stuffy. Step 5 : with your second circle, sew the brooch pin in place using a double thickness of thread. I sewed mine above center, so the top of the boutonniere won’t droop or fall forward when eventually pinned on a lapel. Step 6 : sew the two circles together with matching thread around the circumference, and there you have it! Cuteness in under 20 minutes.

These delights cost me next to nothing since I had most of the supplies already. I ordered in the ribbon from Press Gang Supplies especially for our wedding details, and the brooch pins were picked up at the local craft store. I had some scrap felt from a previous project, and of course, I had faux hydrangeas balls-to-the-wall all over my apartment. Easy peasy. {Pictured below – the groomsmen boutonnieres along with fiance’s dark hydrangea boutonniere. I customized that little number with markers to get the colours just right and a little more realistic.}

I cannot express how much these little guys cheered me up. I haven’t had the time to make anything in the past three months, and without realizing, it was making me uber upset. I sat on the couch the other night and made all four of these delights in one go, and I felt so much better doing what I do best. Can’t wait to share more wedding craftiness.