Custom Christmas colours – part 2

In keeping with my project ‘less 365‘ purging, this year I decided to revamp our existing Christmas decorations in stead of buying in new sets and adding to the overall shower of shite in our apartment. Also contributing to the greater good of ‘reduce, reuse, recycle‘. 
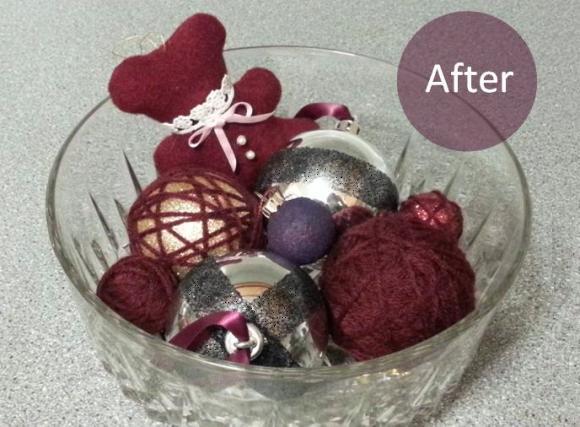
I however, will warn you in advance – the pictures are a bit crap. Have you ever tried taking pictures of Christmas decorations, sans Christmas tree? It took me three attempts to arrange them, before shoving them into a crystal bowl . Onwards to my shitty kitchen pictures!

In keeping with our burgundy, aubergine and metallic decor, I wrapped, taped, sprayed and vajazzled our existing ornaments to give them a little holiday face lift. Nothing too strenuous. Something that could be tackled whilst in front of the TV and wine glass in hand. Well, I set it down at times.
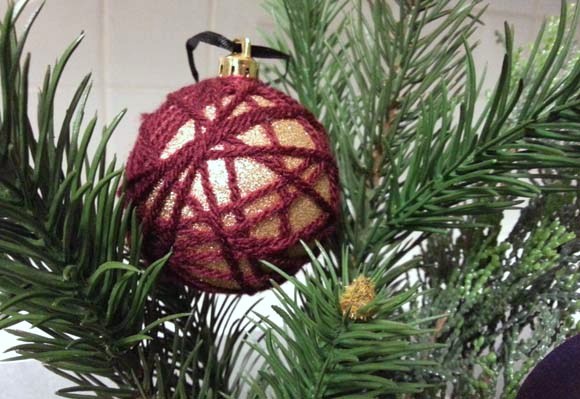
Since I have a plethora of yarn at hand, the above was the easiest approach I took to my baubles. It works great on glittered baubles, as they have a bit of a sandpaper-esque texture, and the yarn stays on with no fuss. I have varying degrees of yarned balls, from completely covered, to bits of gold peeking through. 
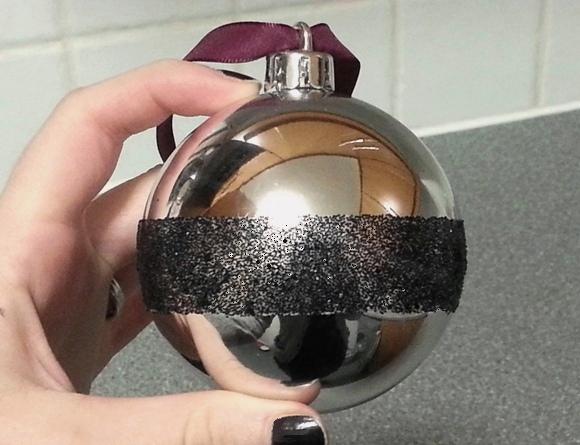
I’m quite proud of this one as it gives the most impact for least amount of effort. I took a plain silver bauble, secured a piece of double-sided tape around the middle, and smooshed black glitter onto the tape. And voila! Instant glam, and no glue involved. Top that baby with some lovely ribbon, and there you have it.
I have a couple more ideas for our decorations, but I didn’t get around to making them all just yet. 
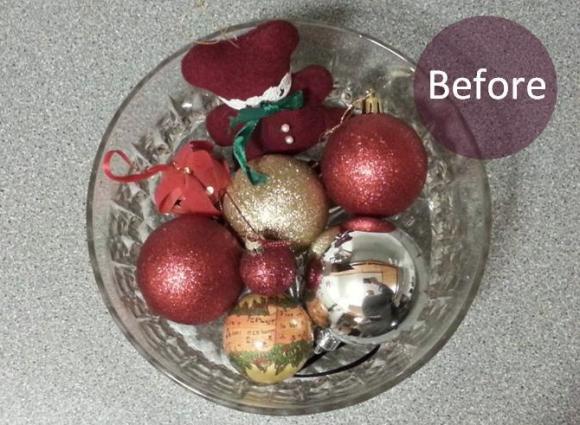
For the record, here’s what our decorations looked like before. Nothing wrong with them, and they’ve served us well for a number of years, but they’re your standard department store decorations and I wanted something new this year. Even old treasured Christmas teddy gets a new pink bow. 

More pictures and ideas to come once we decorate this weekend! Really looking forward to it as I heart Christmas so much. Classic tunes, National Lampoon’s Christmas Vacation, and a bit of mulled wine never hurt anyone. 
Happy Friday everyone! xx A

Custom Christmas – part 1, part 2, and part 3.

Our wedding – flowering favours

These little delights were a labour of love. I’m not going to lie to you. This took a lot of planning and effort, but I think they’re worth it. It started off with a blog post and some voting on the idea of flowering tea as a wedding favour, and thanks to the reinforced results {18:1 in favour}, I had my mind set and we were on it like a car bonnet.

Our wedding so far will have a light theme of tea – fiance is a tea-a-holic, and I adore old tea cup sets [the older, the better]. We’ll be using old teapots to house hydrangeas and other dark flowers, as well as dainty teacup sets as tea light holders. Juxtaposed against our palette of dark berry hues and a hit of black and white stripes, I hope we get the look right. I’m getting v. excited. Anyways – onto the favours!


It began with the flowering tea itself. I ordered half-and-half Unity and Celebration flowering teas from Solaris Botanicals – I thought the names of these two teas were the most suited for the occasion.

Up next was the aesthetics side of things. I knew I wanted to tie in our strong contrast of black and white stripes, so the hunting online for the right paper bags began …

I found cute paper bags {not too big, not too small}, and what was even better, they were cheap and under budget. Hells yeah. I picked up these delights online from Fern Mae Sweet Shop & Packaging

Since the flowering teas came individually sealed in foil, they needed to be transferred into plastic zip-lock bags {for freshness / longevity reasons}. The hunt began for a zip-lock bag that would fit inside the paper bags. That was laborious to say the least. At long last I found a shop that sold the perfect size. Score. Props to Terenure Office Supplies.
Next on the list were the instructions. I’m not about to hand people something that looks like a massive wad of pocket lint without explaining what to do with it. I concocted a two sided instruction set and description of each flowering tea, and cut them all out {god bless paper cutters}.

Next I designed a tea sticker to slap on the outside to give a hint of what lies inside, as well as tying in with our tea theme. More cutting out …

On to the assembly line, and after a couple months of logistics, they came together nicely this past weekend. I’d like to take this moment to EXHALE. Can’t wait to see what our guests think of them. And of course, what do you guys think of them? What did you have as parting favours at your wedding? Or, do you think parting gifts are a stupid idea?

In case any of you are curious, our favours worked out at €2.40 per person. That’s including tea, zip-lock bag, instructions, paper bag and tea sticker. Not bad me thinks … 

Our wedding – boutonnieres

From day one, I knew I would make the boutonnieres for our wedding. I wasn’t 100% on what they would look like, but I knew they would have an element of stripes. Little ideas came and went, until I came up with this simple idea. An ever-so-slight take on war medals, since my man and said groomsmen are of the combat Playstation era.

I have to thank Laura ‘Lupin’ Howard as I used her Felt Butterfly Brooch tutorial as an assembly guide for our boutonnieres. Thank you, Laura. You sew crafty.

What you’ll needfaux flowers, felt in a colour of your choice, scissors, ribbon, 3 hole brooch pin, thread to match your felt, and a  cutting template {I used the thread bobbin as a circular template}.

Step 1 : using your template, cut out two felt circles. They don’t have to be perfect since they’ll be covered. Step 2 : cut two lengths of ribbon roughly 6cm long {length of your finger}. Fold the end in half and cut at a sassy angle to spruce them up. Step 3 : overlap the ribbons a little, and sew them onto the ‘back’ of one of the felt circles. About 6 stitches will keep the ribbons in place. Trim off any excess ribbon.


Step 4 : on the ‘front’ of that same circle, sew between 6 and 8 faux flower petals using a similar colour thread. Don’t be too precise with the spacing otherwise it looks stuffy. Step 5 : with your second circle, sew the brooch pin in place using a double thickness of thread. I sewed mine above center, so the top of the boutonniere won’t droop or fall forward when eventually pinned on a lapel. Step 6 : sew the two circles together with matching thread around the circumference, and there you have it! Cuteness in under 20 minutes.

These delights cost me next to nothing since I had most of the supplies already. I ordered in the ribbon from Press Gang Supplies especially for our wedding details, and the brooch pins were picked up at the local craft store. I had some scrap felt from a previous project, and of course, I had faux hydrangeas balls-to-the-wall all over my apartment. Easy peasy. {Pictured below – the groomsmen boutonnieres along with fiance’s dark hydrangea boutonniere. I customized that little number with markers to get the colours just right and a little more realistic.}

I cannot express how much these little guys cheered me up. I haven’t had the time to make anything in the past three months, and without realizing, it was making me uber upset. I sat on the couch the other night and made all four of these delights in one go, and I felt so much better doing what I do best. Can’t wait to share more wedding craftiness.