Bedside table makeover {it only took 4 years}

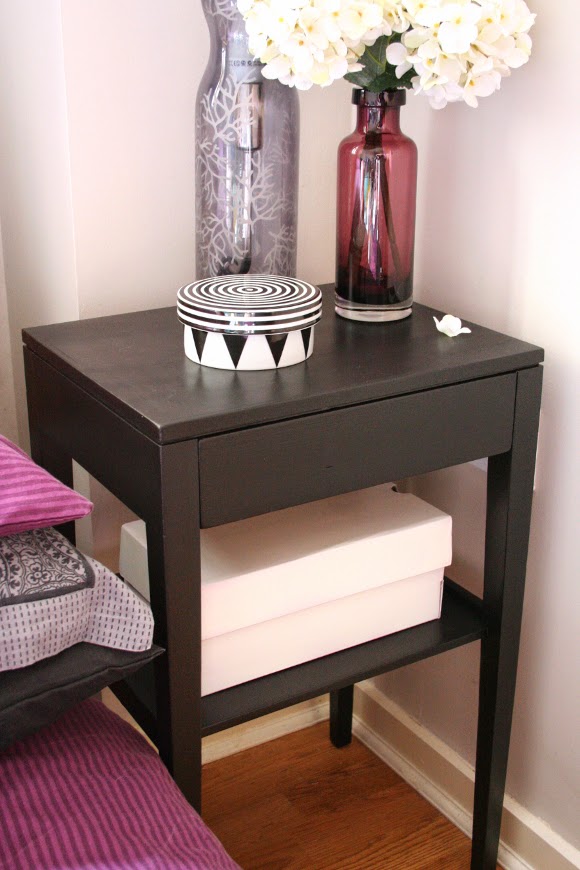
When we first moved into our apartment I was on the lookout for a bedside table for our spare bedroom. It didn’t take too long as I struck gold one day when I spied this little gem on Freecycle. It was cute, had nice lines and was mostly wooden with the exception for the top which had a weird plastic-y layered Frankenstein top {so technical} which you can see a bit better here. I had big plans for this little bedside table. And then 4 years happened. 
Last week while I was taking pictures for my rescue kit for the unexpected guests blog post, I had had enough of looking at Franken-table, so I made it my priority to send some long overdue attention its way. 

From the start I wanted to paint it black, but also have some contrast and a little dose of whimsy. Black, white, and kinda pink.
I first primed the entire thing, let it dry for 24 hours and then started working on the black. I had bought a can of black furniture paint, but once I applied it {to half of the bedside table – there wasn’t enough to cover the whole thing}, it looked awful. It made me feel crap. I left it to dry in the spare bedroom and ignored it until the next morning. 
Luckily, my Montana black acrylic spray paint came to the rescue. I resprayed the whole thing and it looked the business. And I still have half a can left.

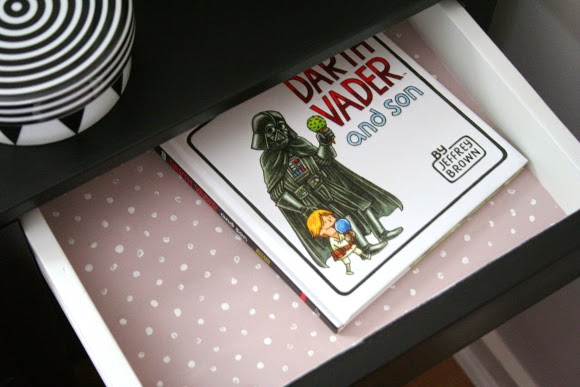
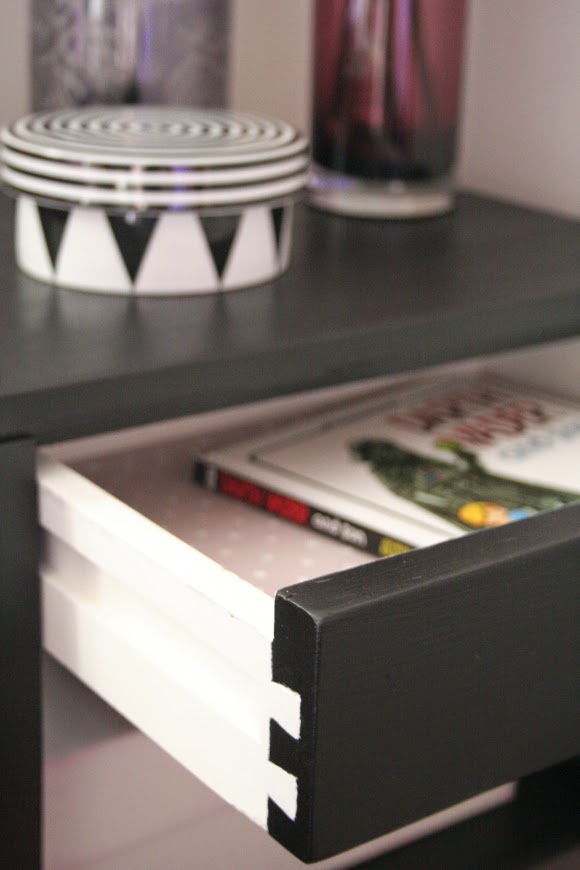
I then painted the inside of the drawer white. I wanted to line the inside with some pretty paper, but then I figued, why not just paint it? I had a smidge of Dulux Ashbury Easycare pink paint leftover from the bedside tables I upcycled for Oxfam, so I painted the bottom of the drawer dusty pink and added a polka-dot pattern by dipping the end of a pencil into white paint and used it as a stamp. I free-handed the pattern which kind of makes it feel a bit less strict. 
I am exponentially happier with how the bedside table looks now. It really anchors the corner of the room and is a strong focal point when you walk into the room. I just wish I had repainted it sooner. 
Black, white and kinda pink. I think I met the brief. 

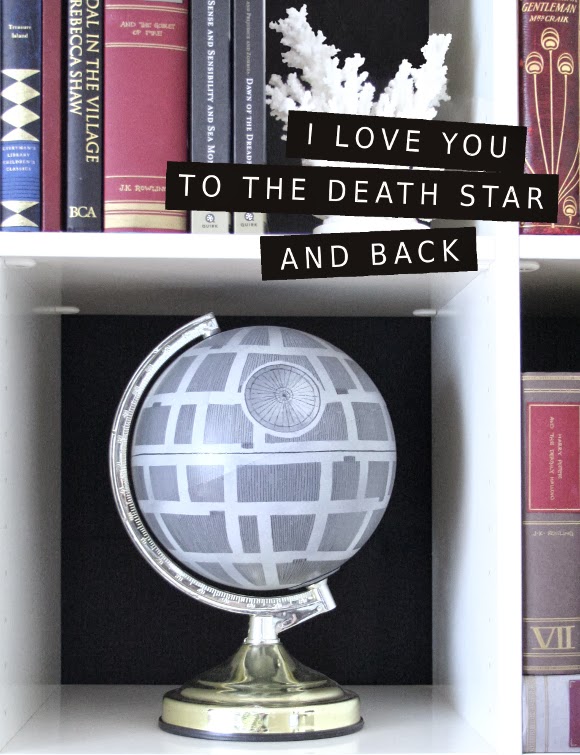
I love you to the Death Star and back

Today is a special day as it is husband’s birthday. He’s turning the ripe old age of 27. The same age I was when we got married. Yep, I’m a cradle robber. Represent. Anyways, I had a very special present in mind for him this year and I had it stored in my memory bank for some time …

Back in April my lovely friend Pat from In My Wheele House blogged a project she had done with a globe, some chalk + chalk paint and blew my mind by drawing the Death Star right onto that baby. I knew it would be a perfect home made present for husband. I found a globe in a charity shop, picked up some spray paint and I was on my way.

First I washed the globe, let it dry then I sprayed it with one coat of Iron Curtain grey paint – how very appropriate. Since it was plastic I went with spray paint to avoid peelage. And of course I went with my good old reliable Montana. I let it dry over night, and the next day I taped it off with washi tape. I used a thinner-than-usual black washi-style tape I got in IKEA. The reason I chose washi tape vs. masking tape is because it’s a lot more gentler when it comes to removing. 

I taped out a grid  of sorts {as seen above}, then sprayed with a darker shade of Montana paint {I cannot for the life of me remember its name right now}, peeled off the tape and again let it dry overnight. And please excuse my incredibly shoddy phone pic above. I was working sneakily in the spare bedroom at night – not the best for taking photos. 

The next day I used a Montana acrylic extra fine paint marker to draw in the details. I free-handed the wobbly and incredibly inaccurate lines and finer details, hoping it would closer resemble the Death Star. Yeah, I know it doesn’t look exactly like it, so if you’re a hardcore fan, please be gentle. If you squint your eyes at it from far away, it’s a dead ringer though. The perfect addition of nerd to our living room if I may be so bold.

It’s about to get sappy all up in here folks. You’ve been warned.

Happy birthday husband. You are the light of my life, always and forever. And as I wrote on your card, I love you to the Death Star and back.

DIY – edible ornaments

I’m so excited today to share with you my first Christmas tutorial of the year – my cheeky spin on edible Christmas ornaments! Today’s tutorial is also part of Lupin’s Christmas tutorial link-up which is going down today and tomorrow. Today everyone involved blogs their tutorial, and tomorrow we share all of the things. More deets on that at the end of this post. 
My idea for today’s tutorial came from my stomach, if I’m being honest with you. I love Christmas treats, except I’m not partial to all the faff that comes with decorating them. I wanted to make something that had a simple enough template, was a little out of the ordinary, while also easily bespokable. Is that a word? Well it is now. Feast your eyes … 

I wanted a light and fresh recipe for my cookies that wasn’t too Christmassy. I stumbled upon a very easy cookie recipe on the BBC website which was perfect, and I added my own bit of zing; Husband is tore up from the floor up about lemon so I added the zest and juice of one lemon to the cookies and icing. I love citrus flavours around Christmas, especially to cut the heavy flavours that usually come with the season. Of course if you don’t like lemon, you can use whatever flavour you prefer, or you can play it safe and leave them plain … 
COOKIES 
100g unsalted butter
100g caster sugar
1 free range egg
275g plain flour
1tsp vanilla
Added pizzazz – the zest of one lemon
ICING
400g icing sugar
Added pizzazz – juice from one lemon
MARKERS
Edible markers in the colour of your choice. I used black and red which I bought from my local cake decorating store, Kitchen Compliments. On to the good stuff … 
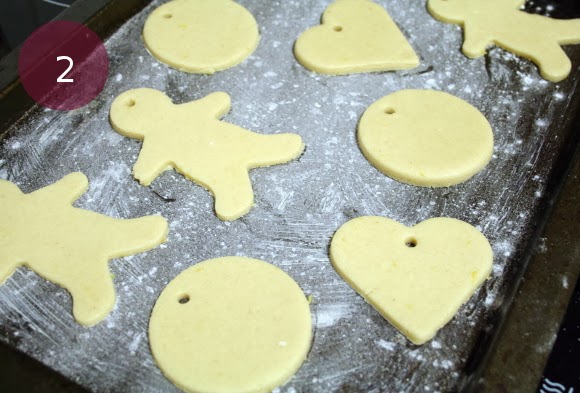
Step 1 – cream together the butter, sugar, egg and vanilla. Slowly add the flour until the mixture resembles a dough. Flour your work surface and roll out your dough to roughly 1cm thick. Step 2 – using your cookie cutters of choice, cut out your cookies and place on your baking tray. To make a hole at the top of each cookie for the ribbon, just poke with a straw. Bake your cookies at 190C / 375F for 8-10 minutes. Remove from the oven and allow to cool.
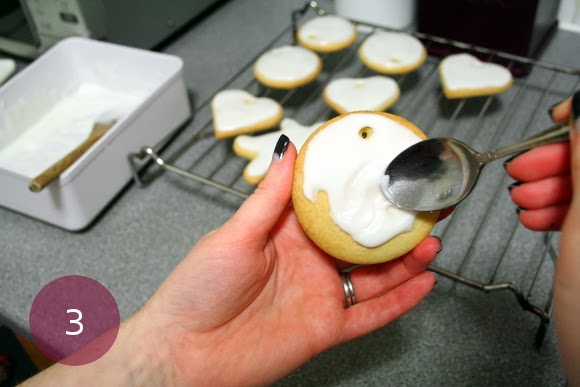
Step 3 – when your cookies are cool {if you’re unsure, leave them for about an hour}, you can begin to apply the icing. You’ll want your icing to be the consistency of custard. If it’s too thick, it won’t level off and dry smoothly, and if it’s too soft, it’ll go all over the place, much like your blood pressure and we don’t want that. Step 4 – leave the icing to completely set. This means no touching for 2 days. TWO. DAYS. I know, I hear your pain. But if you don’t let the icing completely set, the icing will crack and bleed when you draw on your cookies and ain’t nobody wants that. Trust me, the 2 days pass a lot faster than you think. Tuck them out of site. 

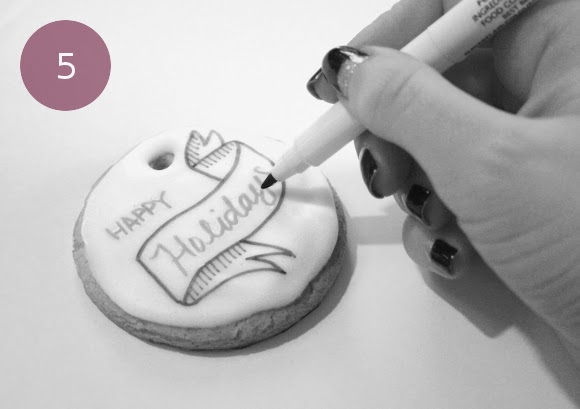
Step 5 – when the icing has fully set, you can start drawing to your hearts content! String a piece of ribbon through the top of each cookie et voila! Hang them wherever you see fit – on your tree, kitchen cupboards, door handles, but I tend to leave them just within reach … You can make them as simple / complex, cheeky / politically correct as you like. 
I drew some of our favourite things onto our cookies; husband’s glasses, Alice in Wonderland references, our wedding vows ‘Always and Forever’ {which is a quote from Napoleon Dynamite}, black and white stripes, a movember moustache and this little guy, but unfortunately this little ‘trooper didn’t make it to the ribbon stage … 

These edible ornaments can be easily changed and adapted to whatever you want, so I hope today I’ve at least set off a couple of crafty light bulbs {I already have loads of ideas for my second batch!}. And the best part – you just shove them in your face whenever you want. Easy on clean up, and you don’t have to pack them away at the end of the season. Winning on all accounts I think. 
So that’s my little contribution to Lupin’s Christmas Linkup! Check back tomorrow Here’s my Christmas tutorial link-up blog post sharing all the tutorials made by everyone involved. A solid dose to get your Christmas brain juices flowing for the season ahead. Happy holidays! Nope, still too early. xx A