
The niche-ness of this blog post is almost too much. Also, I will shortly be changing the name of my blog to The Interior Dollhouse-er because I have a newfound tiny obsession that you may or may not have noticed.
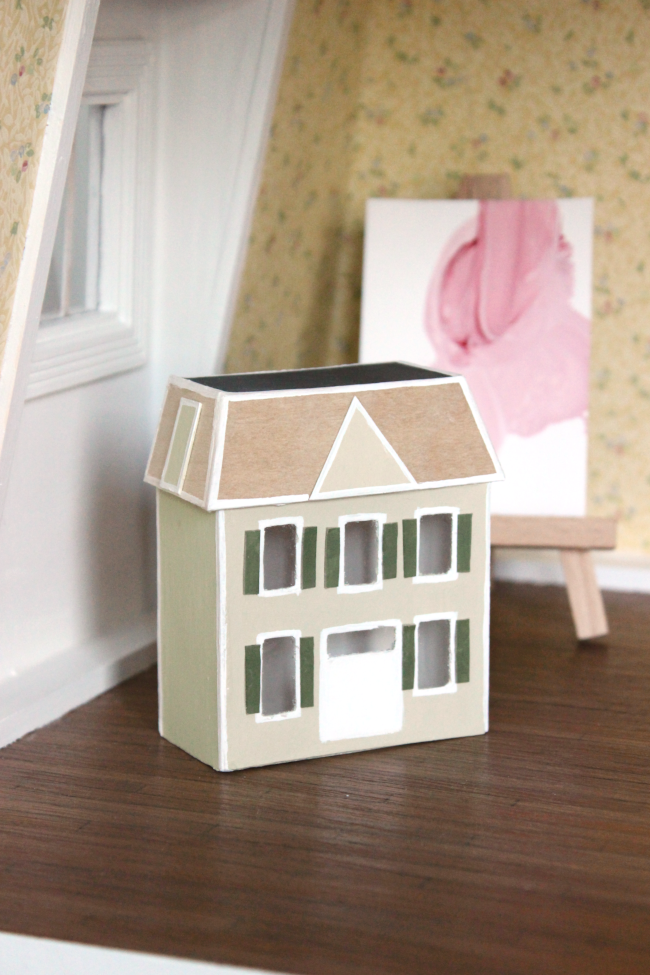
Last weekend there were two special weather advisory’s here in Ottawa; one was for frigid temperatures [-35°C and below] and the other was a snow storm warning so we spent the entire weekend indoors. Did I do anything productive? No. Did I Marie-Kondo our kitchen? Or paint the hallway? Or make batches of dinners for the week ahead? No. I made a miniature dollhouse for Cora’s Lower Town Dollhouse.
So this week I thought I’d share how to make a miniature dollhouse, or, a dollhouse’s dollhouse. Because I just know there are thousands of people out there feverishly Googling this very niche subject right now and I must ensure I reach them through most excellent Search Engine Optimization.
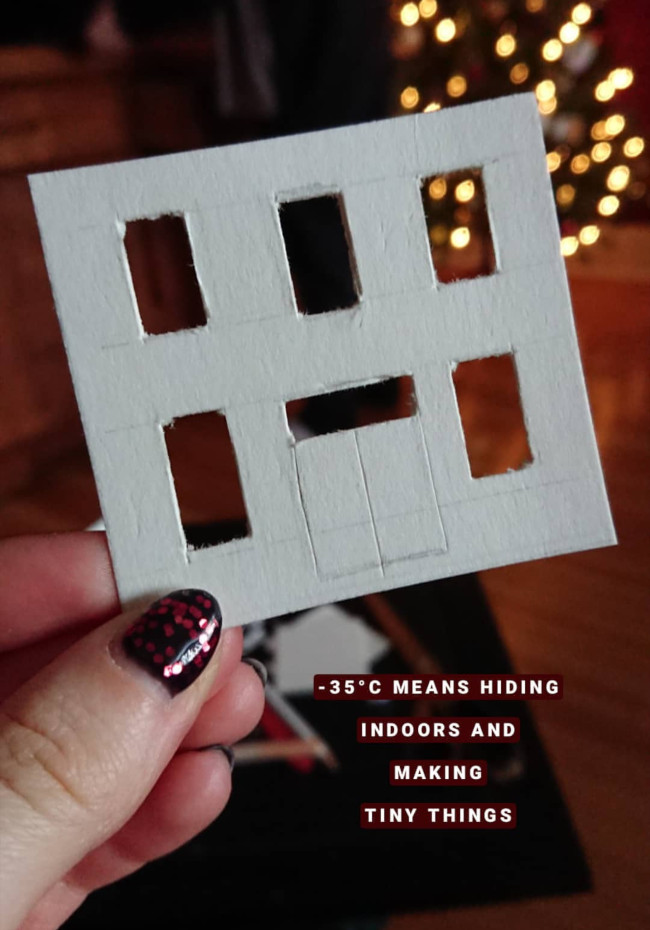
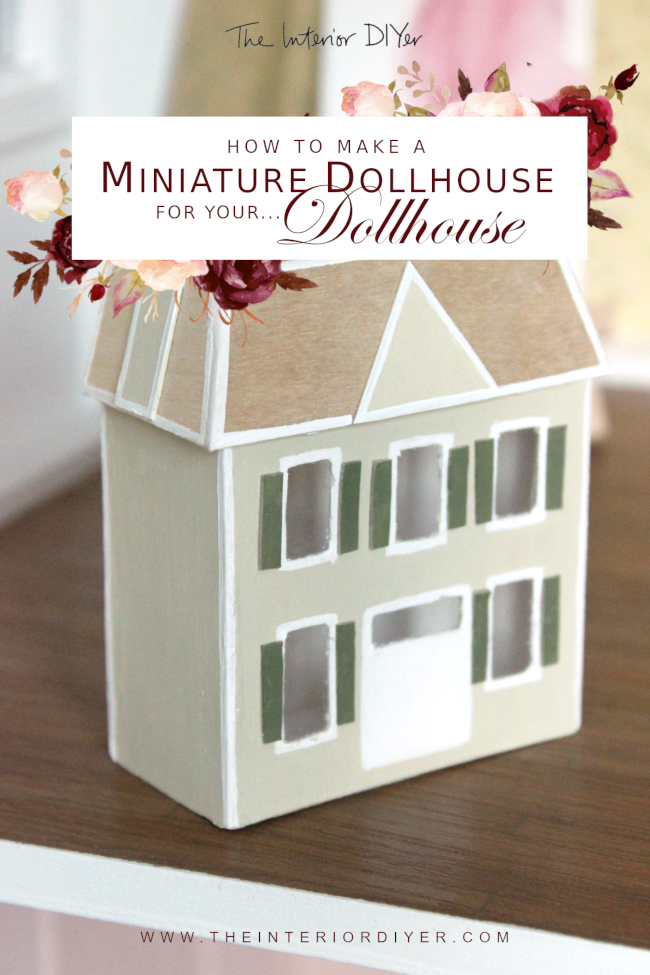
It was actually fairly straight forward making the body of the miniature dollhouse. For the facade, [try to keep a straight face while I use the term ‘facade’ to describe something 8cm tall], I sketched a rough outline of the windows and cut them with an exacto knife [as seen above]. I did the same with a second piece of cardboard [but a lot less accurately] as I was going to sandwich a piece of plastic between the two to securely create plastic windows that wouldn’t budge thanks to tiny toddler hands [you can see the roughly cut inner piece three photos down in the interior of the dollhouse].
For the rest of the body of the dollhouse, I used cardboard, masking tape and Gorilla Super Glue to create the other three sides [Super Glue because toddler].
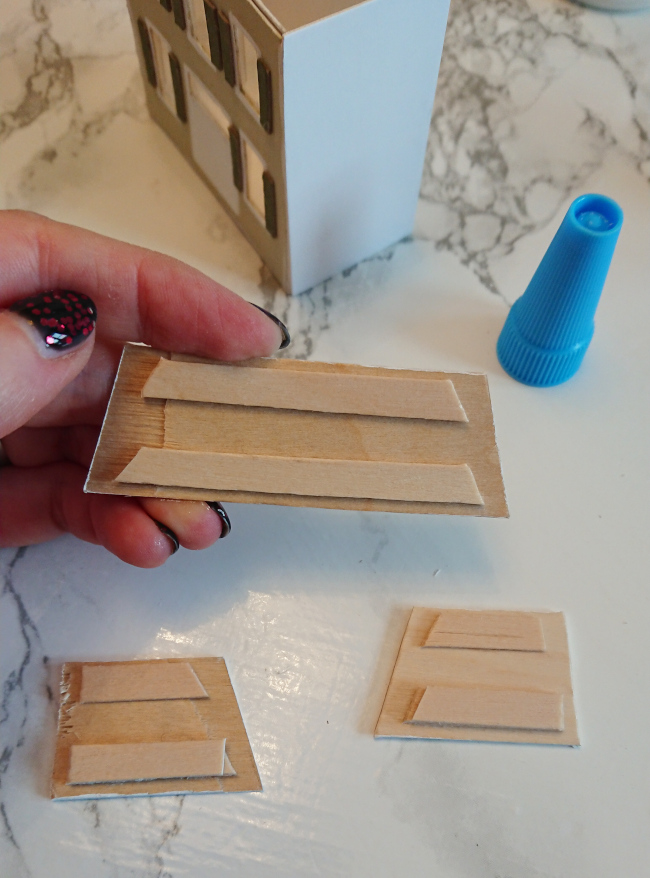
Then I tackled the tiny angled roof. I used wooden tongue depressors [you could easily just use cardboard] that I cut at an angle to mimic the angle of the larger dollhouse’s roof [below]. My next worry was how I was going to securely attach the roof to the dollhouse. It needed to be toddler-proof. So I Super-Glued what I’m going to call ‘brackets’ [I don’t know if that’s the right term?] using wooden coffee stirrers to the inside of the roof pieces [as seen above]. This way the roof ‘brackets’ would be able to rest on the top of the body of the miniature dollhouse. And by ‘rest’ I mean be glued to using vast amounts of Super Glue.

The above picture might help to make a bit more sense of my description. I added more brackets to the top of the inside of the roof to once again give the flat part of the roof something to sit on and adhere to. I painted the outside in a few coats of paint and even cut out tiny cardboard shutters which I Super-Glued into place.

“This seems like a lot of detail for something so small and unimportant and is in no way contributing to current day society“, I hear you say. Yes, you could very well be right, but there really isn’t anything better than seeing Cora’s little face light up the moment she realized I was making a tiny version of her dollhouse. “OHHHHHHH! BABY DOLLHOUSE!”, she squealed. I could have better spent my time doing literally anything else all weekend, but that would have been far too productive.
Amazing! This is a true stroke of genius! And who wants to be doing boring productive chores when you could be creating a baby dollhouse?! When the inspiration strikes, you have to go with it….
Hahahaha! Oh that is so meta!
Totally brilliant.