A decorative plate display for our dining room

A few weeks ago I added a plate display to our dining room and I’m so pleased with how it turned out. I added some of my favourite thrifted plates along side some very fancy one-of-a-kind plates I’ve collected over the years.

A lot of the steps I took to hang the plates are pretty obvious, but since I encountered some trial and error [i.e. I dropped a plate], I thought I’d share my whole hanging process as this was the first time I’ve ever hung up decorative plates.

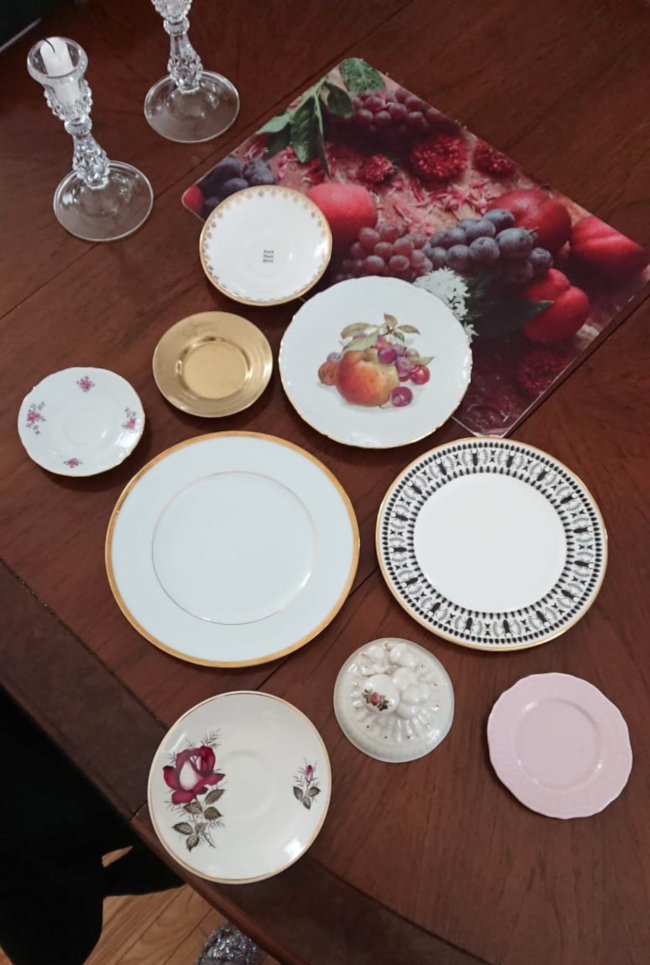
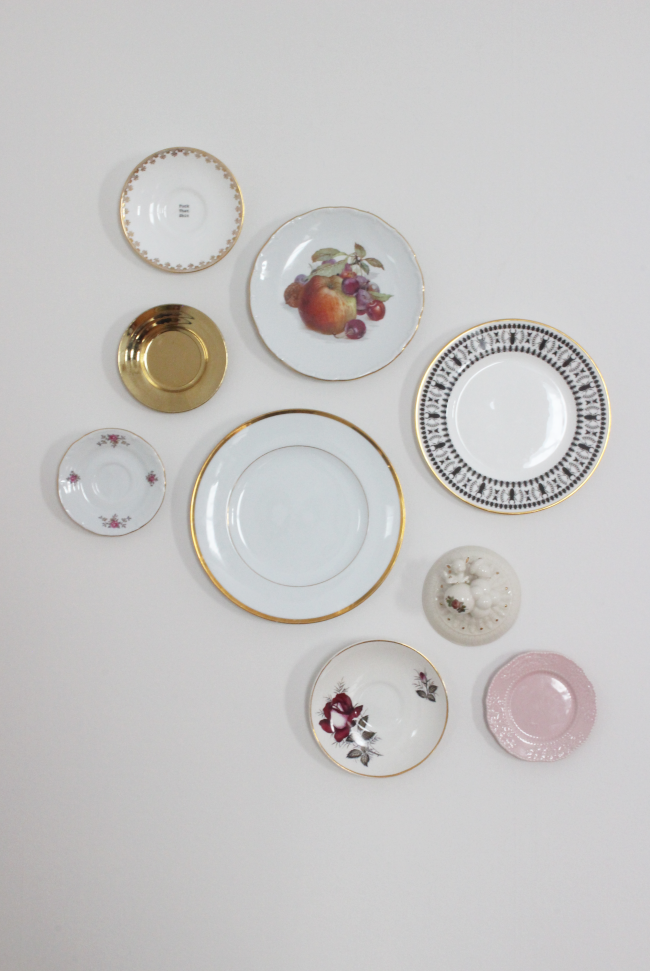
I started by making an arrangement with our plates [above] and swapped them around until I was happy with how they looked. I next left them on our dining room table for 5 days and awkwardly ate each meal around them. This step is optional.

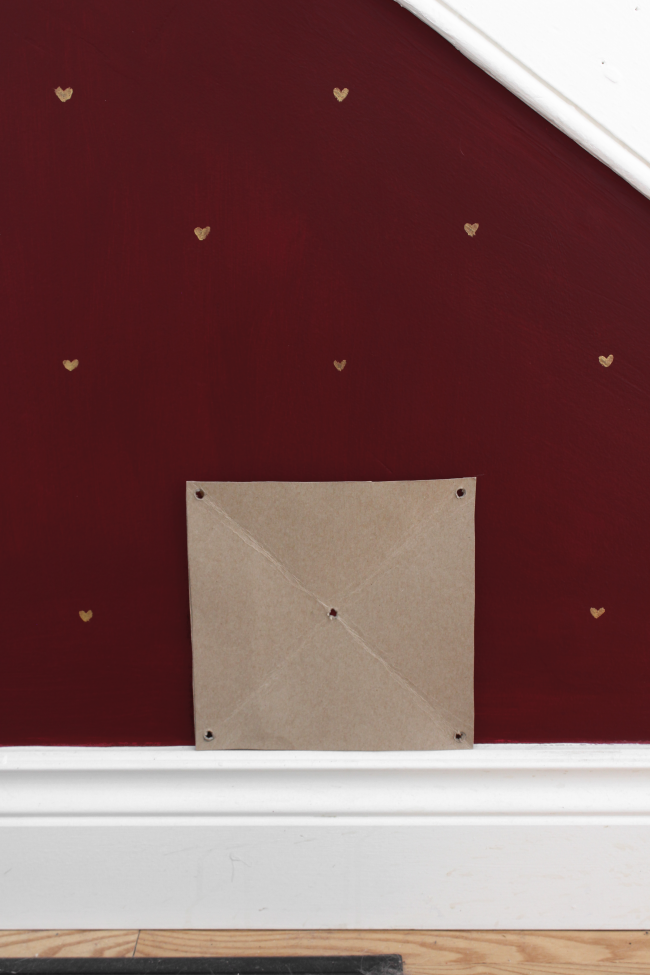
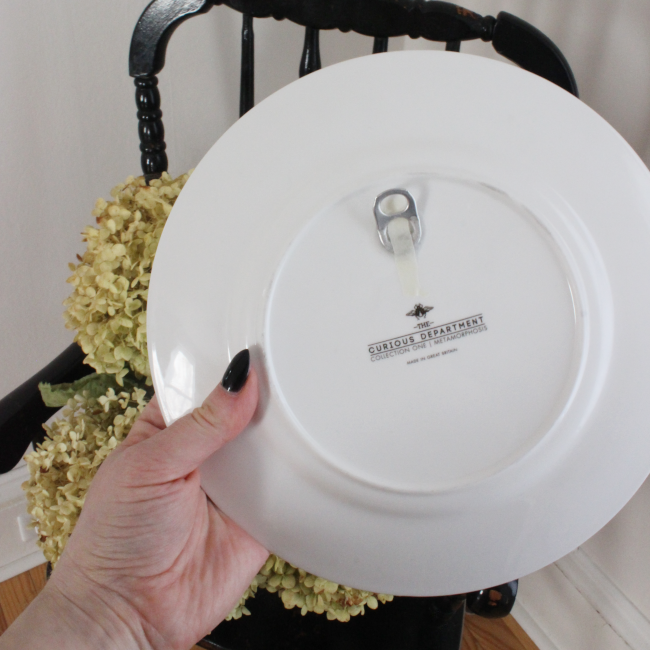
I next worked on how to hang up the plates. Two of the plates came with hooks already fixed to the back, and I think we were in a state of lockdown when I was working on this [I’m loosing track of lockdowns at this point], so it wasn’t an option for me to walk into our local hardware store to pick up some sort of plate hooks, so I DIYed my own. I took some pull tabs, bent them slightly with plyers, and super-glued the bottom to the back of the remaining plates [seem below]. As an added strengthener, I super-glued a long piece of masking tape through each the pull tab. This looks 9,000% flimsy, but the masking tape sealed rock-hard to the back, adding extra “just in case Cora goes on a stomping rampage” insurance to each plate. Trust me, this is incredibly secure.

I then began adding the plates to the wall by starting with placing the two largest plates as a starting point, then adding one plate at a time. TOP TIP: it’s a total pain in the ass, but take every plate down before you hammer in a new nail [so your pattern will be: hang up a plate, hold up another plate, mark the next nail, and take down all previous plates before nailing in the next nail]. I didn’t do this in the beginning and my hammering caused the large plain plate to jiggle off the nail and fall. Luckily, it didn’t break. Taking all the plates off before nailing in the next nail is a total time-suck, but worth it in the end.
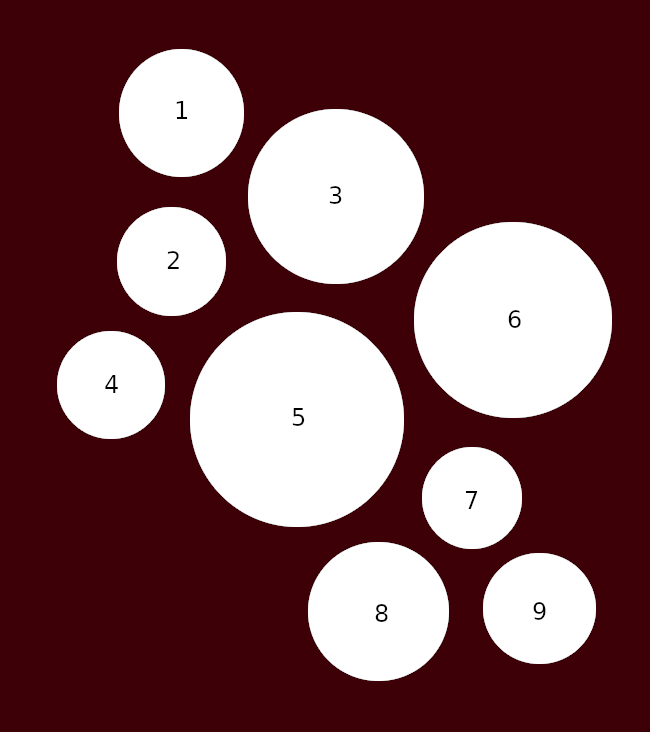
SOURCE LIST:
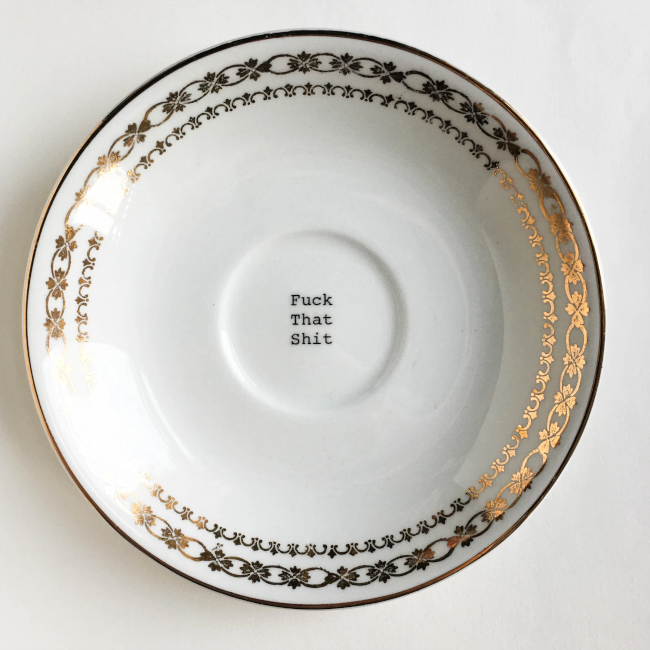
1. Fuck That Shit decorative plate by Lou Brown Vintage
2. Thrifted gold plate
3. Thrifted side plate from Value Village
4. Plate left in our Lower Town apartment by previous tenants
5. Thrifted side plate from a charity shop in Dublin
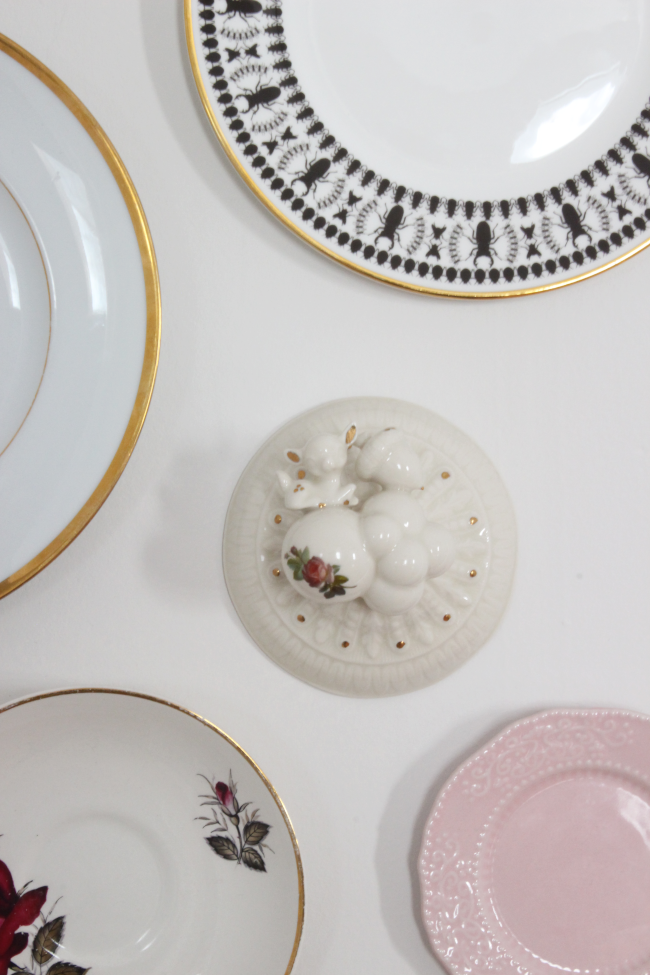
6. Insect Mandala side plate by The Curious Department
7. Bubble wall sculpture by Lana Filippone
8. Thrifted tea set from a charity shop in Dublin for our wedding
9. Plate left in our Lower Town apartment by previous tenants

Special mention for one of my favourite plates which was a recent pregnancy insomnia purchase, Fuck That Shit plate from Lou Brown Vintage [pictured below is a similar plate since they’re all one-of-a-kind]:

I have many more plates I’d like to add to this corner in our dining room. A good few of which will be from Canadian artists I’ve found through Instagram over the past while, and there will be more thrifted plates as well. I’d love to have so many plates that they overflow onto the next wall.

In short: this plate display virgin is a solid convert.

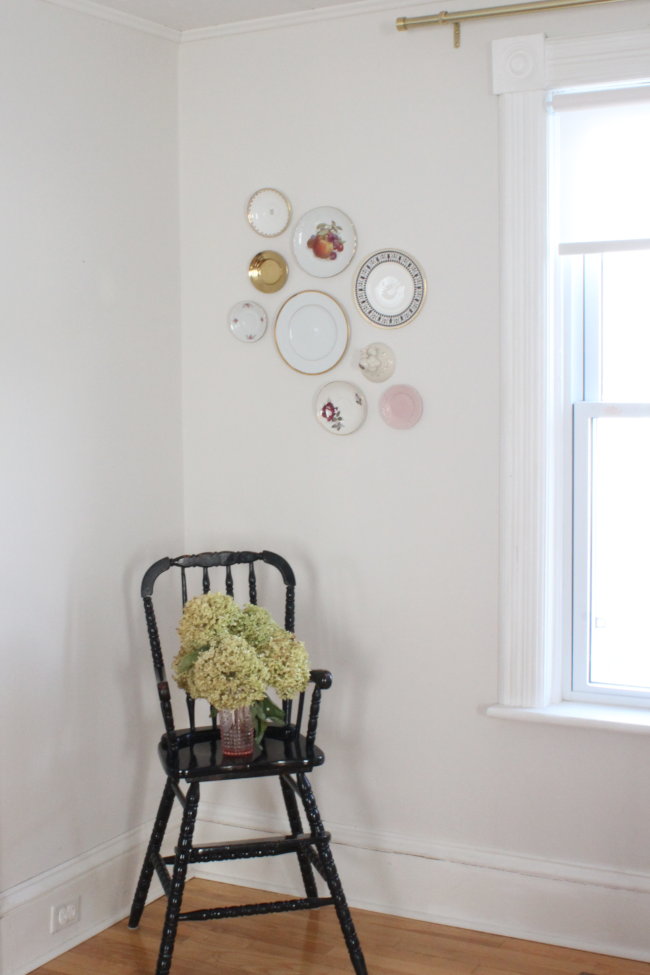
Also featured: secondhand painted black highchair, pretty gold curtain rods

One Room Challenge Spring 2020 – Week Eight!

It’s here! I’m finished! Holy shit. On one hand I don’t think I’ve fully realized I’m finished my One Room Challenge, but on the other hand, I’m looking forward to being horizontal on a couch / lawnchair / bed / under the dining room table / random sidewalk / literally anywhere and not working on any projects in my spare time … for at least a week.

I really am almost overwhelmed at trying to put into words how much this project has meant. At the end of March I miscarried at 12 weeks pregnant. I took 4.5 days off work and then threw myself back into things and wanted to work on something big. Maybe to prove to myself I can finish something and that I’m not entirely useless. For anyone who has been following along with my project will know, I really tore up from the floor up this room as I demolished four layers of ceiling, almost three layers of wall [in places], ripped everything back to the beams, built two stud walls, drywalled, painted, crafted cabinets and finished it off with a thin layer of tears. By myself. No trades people were hired and Robert only helped me drywall the ceiling.

I have really enjoyed sourcing about 90% of this room secondhand. It’s much more of a challenge to find exactly what you have in mind secondhand online, in the colour you want, within a sane budget, during a pandemic, but I tend to like making things exponentially more difficult for myself so why not?

I cannot believe this is what this room looked like just 4 weeks ago:

I’m going to skip immediately back to sharing the now photos as that picture above is giving my anxiety as it reminds me of how much work it took to get to now.

I would strongly encourage you to check all the final Guest Participant reveals here as it is a page exploding with amazing makeovers. We’ve all done incredible work over the past 8[+] weeks from all around the world.

I also want to sneak in one more huge thank you to Bin There Dump That and for their dumpster for my ORC. I 100% would not have taken on such a project if it wasn’t for being able to throw all the demolition drama into a dumpster and completely forget about it.

I ended up going much darker than I had originally planned for my ORC [seen below in my Week One mock-up], but I knew I wanted to have a dark room so I think it’s more of a case that I wasn’t as bold as I’d like to have been in my mock-up vs. the room not turning out how I had planned.

The couch / rug combination very much fed off of each other so depending on the colour of couch I chose, I would either get a pink rug [above] or a gray one [as seen in the final room]. How can you not know what couch you were going to get? That is one of the many joys of sourcing things secondhand! It is unpredictable and you never know what you’re going to get. You plan for things to look a certain way and then the Thrifting Gods laugh in the face of your plans.

My final thoughts on this project; yes, it will be a while before I take on another project of this caliber but I’ve enjoyed pushing myself and proving to myself that I can do it. I also enjoy that this project is now behind me and I don’t have to work on it tonight after dinner until I collapse from exhaustion.

Until the next One Room Challenge.

S O U R C E L I S T :
Wall paint – Onyx, Benjamin Moore
Fireplace – secondhand via Kijiji
Fireplace paint – Coal Black, Fusion Mineral Paint
Gold candle sconces – thrifted by a friend 🖤
Cat portraits – DIY by me, blog post coming soon
Pink Victorian-style couch – secondhand via Kijiji
Gray velvet pillowHay Design
Rug – Dark gray Graham rug, Rugs.ca
Large built-in cabinets – DIYed, blog post coming soon
Pink globeChapters Indigo
Burgundy curtain – discontinued IKEA
Literally everything else – thrifted, secondhand, found etc.

Week One â€“ Week Two â€“ Week Three â€“ Week Four â€“ Week Five â€“ Week Six
Week Seven â€“ Week Eight

DIY wallpaper template

I’m taking my time with deciding how to decorate each area of our home. I’m still up in the air about a lot, but one thing I sporadically did on the weekend when Cora was having lunch was make a wallpaper template and quickly paint a small wallpaper-style pattern on the peek of wall under our stairs.

I painted this section burgundy during my lunch break a few weeks ago. I think I did it to make myself feel like I was making an update to our home [I currently have hundreds of ideas, but there are so many moving pieces and things have to be done in a certain order, therefore I’m getting nothing done].

I then had the idea to paint a faux wallpaper effect*, just to see if it’s something I’d like to do. Using an empty cereal box, I cut out a square template. I folded it in half each way to find the center of the square. I marked the center and four corners with a pencil and then I laid the cardboard template on a folded up kitchen cloth and used my drill to carefully drill 5 holes. Yes, I could have used something else to make the holes, but it was literally within reach and there’s nothing I love more than being lazy.

Then I simply used my template to mark lightly with a pencil the pattern on the wall. Once you do one row, simply line up the template with existing pencil marks to make sure your lines are consistent. That’s it! It was so easy and fast to make. I painted little gold hearts as my pattern. They’re super imperfect, but I like that.

And yes, I’m hoping to paint our entire hallway like this. Because I’m a glutton for punishment.

*I’ve been seriously thinking about wallpapering our hallway for some time, but I cannot decide on a wallpaper. I’m way too indecisive. Plus, wallpaper is expensive and we’d need a fair amount to go up the stairway. So I’m going to try my hand at painting some.