A trip to Rideau Antiques in Lombardy, Ontario

During the Christmas holidays Robert and I had one day where Cora was in playschool and we both had the day off. This may not seem like a big deal to most people, but since moving to Canada two and a half years ago, Robert and I have had maybe three or four dates. That’s just what happens when you move to a different continent from everyone you know and you know zero people therefore you know zero babysitters. This is just our life now.

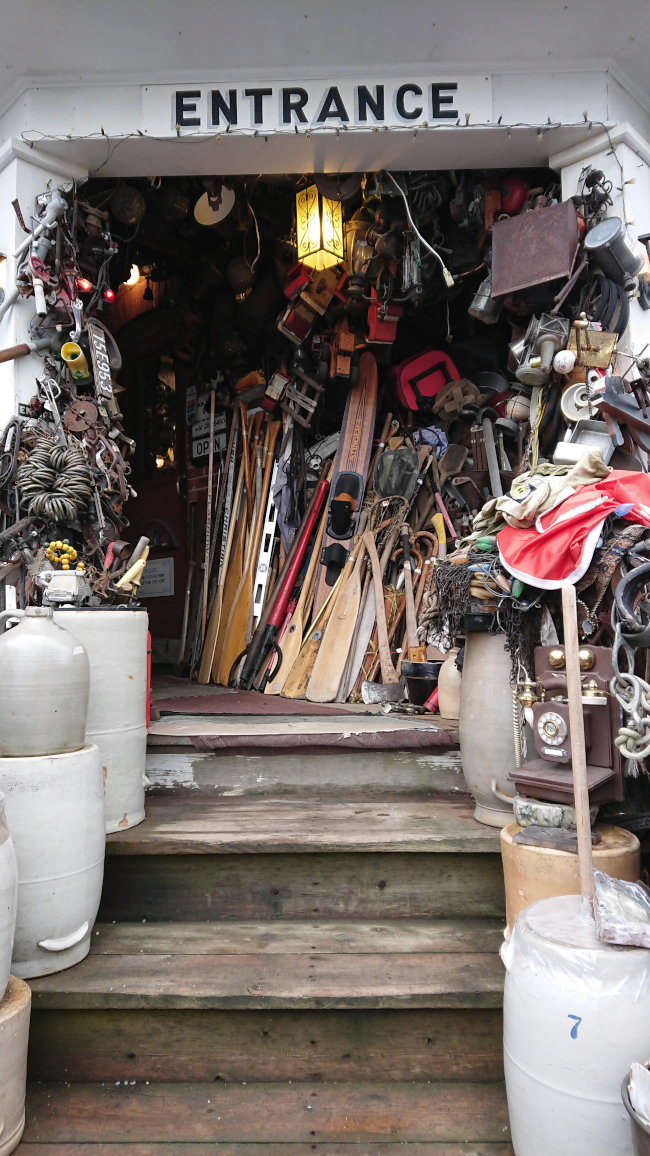
Moving on, because I don’t want this to sound like some sort of absurd misery-brag, but Robert and I had this one unicorn day and wanted to make the most of it. We started our day by going to the most adorable afternoon tea followed by going to Rideau Antiques in Lombardy, Ontario.

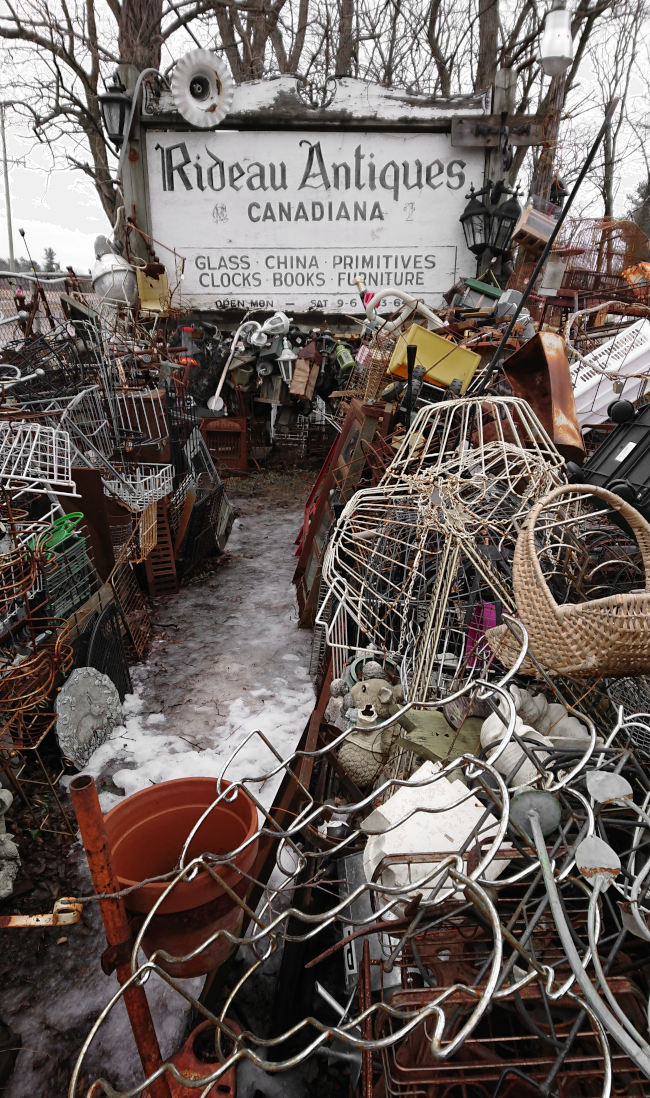
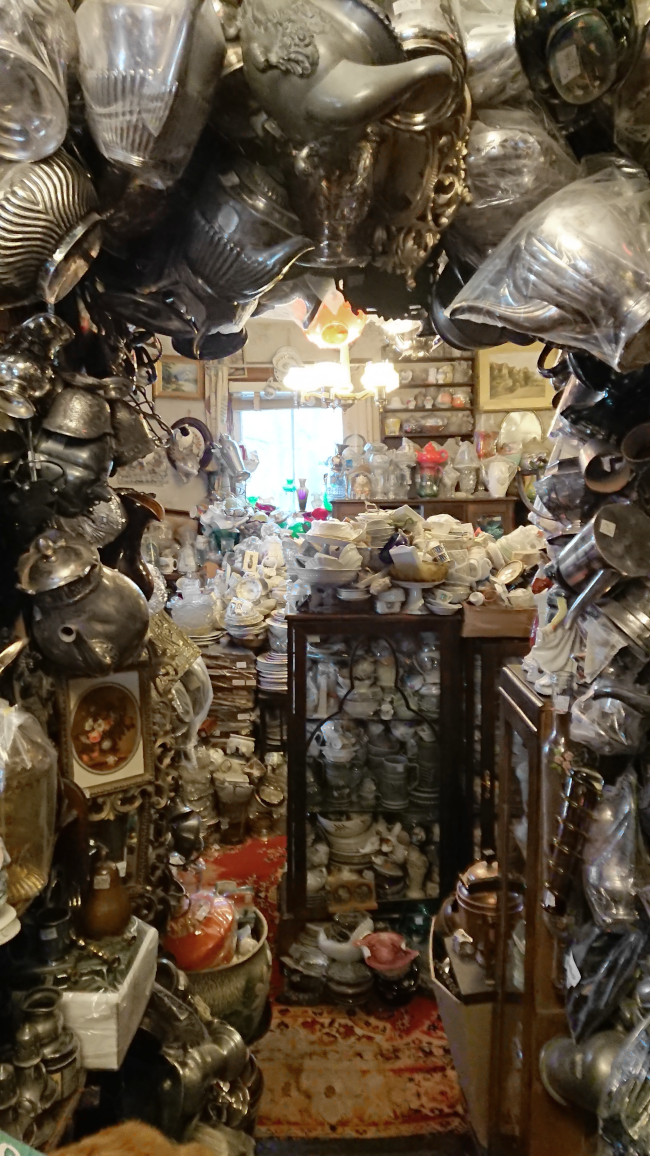
To say Rideau Antiques is intense and amazing is an understatement. It reminded me of some sort of abandoned Harry Potter set where all kinds of objects and treasures are piled up to uncomfortable heights and held together by magic and / or positive thinking.

When my parents visited us in October they took a trip to Rideau Antiques ahead of us and strongly advised that if we visit to not bring Cora, and they were right. It’s not the type of place you’d want curious little hands pulling at something from the bottom of a teetering pile.

It’s such a very difficult place to describe outside of the medium of gifs.

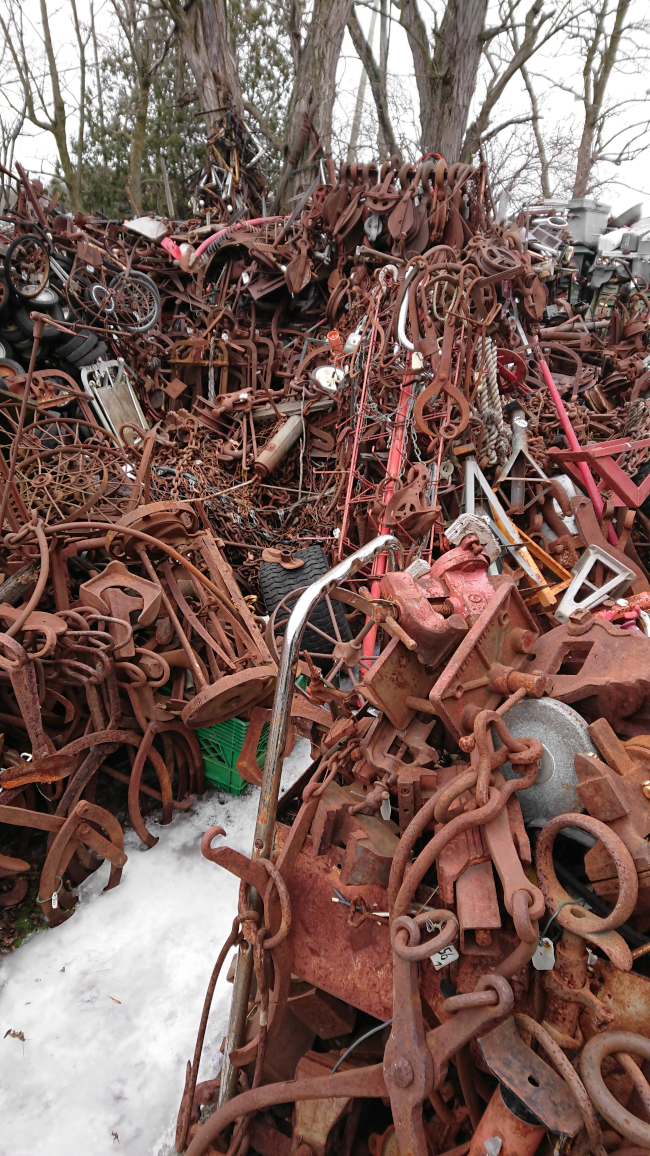
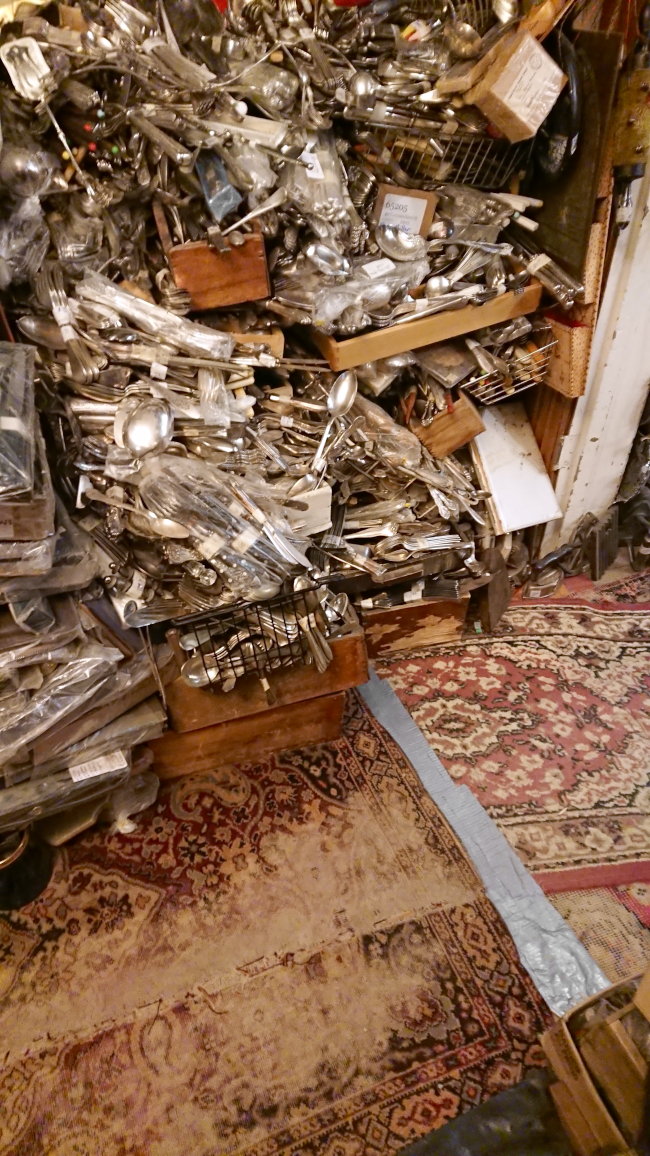
That sums up our entire visit. It was amazing and surreal and if I’m honest, overwhelming. Once you head inside the main building it’s stuff and things everywhere. EVERYWHERE. Neither of us could figure out how big the rooms were because it was impossible to gauge where the walls and ceilings were.

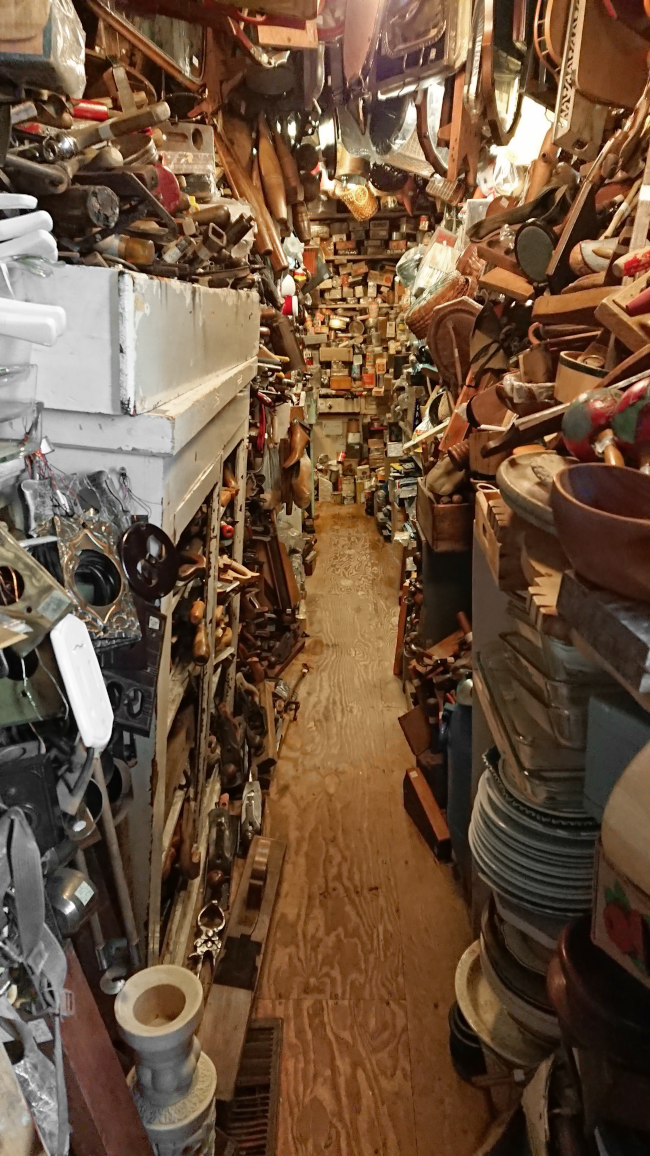
I will admit that at this point in our visit, I had a minor panic attack as I quietly questioned the structural integrity of the building. Look at how much stuff there is … Can the house actually support this much? I’m in the middle of the house RN and I have no idea where the closest exit is.

SPOILER ALERT: I survived completely unscathed and in perfect working order, so this may be a cautionary warning to people who may be sensitive to their surroundings or claustrophobic. And if I’m being honest, if you are a person that commands a lot of space or you are currently heavily pregnant, I would not suggest you go very far into the house. There were places where we didn’t go because the aisles were too tight or we felt that if we tried to turn around, we would knock into a lot.

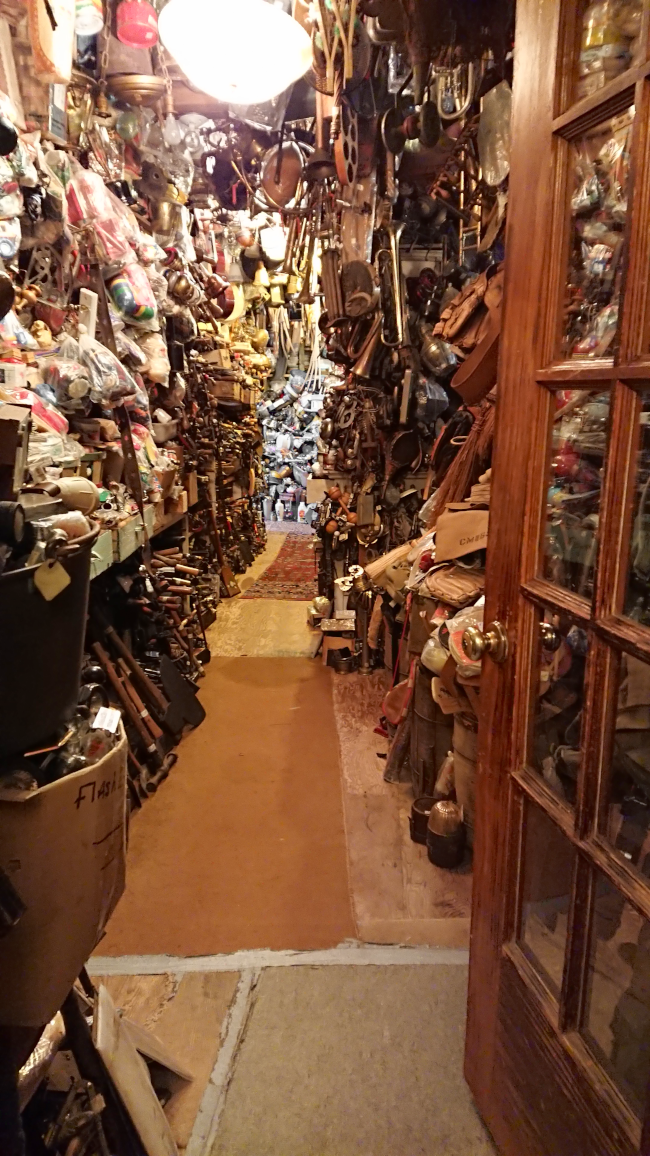
If you stick with it you can find amazing things. If you go with a specific item in mind, I would urge you to ask the owner Clifford where to find a certain item and he can point you in the right direction. His knowledge of where everything is in that store is one of the lesser-known wonders of the world.

I’ll be heading back soon in search for the perfect door knob for our pantry door.

Lower Town Dollhouse – tiny artwork

Pretty much the moment I shared the stairs I made for our Lower Town Dollhouse last week, I received 20 messages in shrill voices wanting to know M O A R about the tiny little cat portrait seen at the bottom of the stairs.

I took a few photos while I was making it, so I figured it might be something 4 people might be interested in seeing so here it is!

It was really straight forward; I painted a tiny kitty portrait on some thin, white cardboard, then painted around the portrait using gold paint and cut out the tiny oval. I had some tiny random coloured jewels [that I bought from Dollarama to use on my nails sometimes] that I painted in the same gold and glued them into place.

Then I over-thought how I’d mount the tiny portrait to the wall; do I use a tiny nail? Do I braid some string and secure it to the back of the portrait? Or do I create a tiny picture rail to hang it from? But then I committed to the idea of gluing it in place. If Cora grows out tiny kitty portraits then I’ll just shiv it off the wall. One less thing to over-think!

Lower Town Dollhouse – stairs

When I found our Lower Town Dollhouse online secondhand, it was a great price for a reason – because it had no front door and no staircases. This didn’t deter me at all so I bought it knowing I’d one day be able to make some proper little dollhouse stairs for it.

I started by measuring the ceiling height and dividing it by however many steps I wanted [20.3cm ÷ 15 steps = 1.35cm high per riser], and then I measured the depth of the space for the stairs [ie – the hole in the floor] to find the depth of each tread [14cm ÷ 14steps = 1cm deep per step]. I ended up with 1.35cm high steps that were 1cm deep and after a few sketches it looked just right. I tested the measurements using a cardboard template before committing to the real thing, and luckily my second template worked out perfect.

Having to assemble the stairs was one of those things that got more difficult in my head the longer I left it when in reality, as soon as I started, it didn’t take long to make. I used the template to cut 4 copies of the stair silhouette on corrugated cardboard; gluing two sets together to form sturdy supports for each side of the stairs. I wish I took a photo of the assembly stage, but I either forgot or was distracted by a something small yelling at me.

I first glued the risers in place with superglue, followed by gluing each step on top with two layers of cardboard sandwiched with superglue to really toughen them [see: to withstand a sweet and thoughtful yet unrelenting toddler]. I also used masking tape on the back side of the steps to further secure them in place and reinforce the sturdiness.

Again, I didn’t take a photo, but I next used filler to fill in the gaps and toughen the edges. Once that was dry I painted the stairs white and using superglue along the entire right side, along the top step and under the bottom step, I glued the entire staircase in place and I have to say, it is so sturdy that I think Cora could actually stand on it with her real feet and the stairs would survive.

Using wooden coffee stirrers and an existing tiny chair rail, I created [or, attempted to create] a bead board look. I carried the bead board look around the rest of the hallway. It at first looked awful as I was adding it but as soon as I painted it, it looked like a real little room.

Above; the hallway as a work in progress. When I first bought the dollhouse, there wasn’t even a window here. It was just a giant hole. It really was tore up from the floor up [you can get an idea from these photos]. I know it doesn’t look perfect as it is now, but I think it’s an improvement and TBH, because the stairs are glued in place, you can’t get a proper look down the hallway.

It’s quite difficult to see from the only ‘before’ type photo I have below, but you’ll see that the stairs that once were here used to face the other way. For Cora’s sake, I thought it made the most sense for the stairs to be facing toward the back of the dollhouse so Cora could actually use them. Yes, they break several health and safety standards this way, but I don’t think any of the little creatures are part of a union, so I think we’re safe. And let’s not mention the lack of a banister either [purposefully left out until toddler is a bit less smashy].

I have to do an entire second set of stairs for the next floor, so I’ll be following my own set of instructions again soon. But this time around it won’t take nearly as long now that I know what to expect. It’s tiny work but I really do love it so much. To the point where if dollhousing was a career, I’d be trying my best to get into doing that.

Click here to see the rest of my Lower Town Dollhouse updates!