Structurally sweet treats

Oh how I adore Christmas baking. More so when it’s things you can customize and make your own, which immediately means to me – gingerbread houses. Mid summer I always get extravagant gingerbread house designs creeping into my brain and by the time it’s Christmas, out come the basic shapes. But there’s nothing wrong with that.

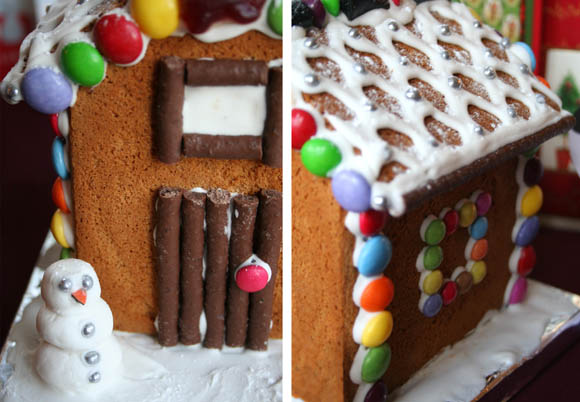
This year I made three mini gingerbread houses – one each for two of my friends, and one for a couple fiance and I go on dates with regularly. It was my alternative idea for a present. I’ll be making two more bigger gingerbread houses this week for family. I’ll make sure to post pictures once they’re done!

I made my gingerbread houses over a number of days. I would strongly suggest this. The first step alone is like running a marathon; I don’t mean to put you off, but you won’t harbor an unholy amount of hatred towards your gingerbread house if you do it over three stages.

Festive note: a point I’d like to make is that this is something that can be made {dare I say} after Christmas. I hate hate hate how the moment Christmas is over, all the Christmas cheer is dead. It’s called the Christmas SEASON for a reason. I like to plan things after Christmas, and especially in January after New Years since there isn’t much to look forward to after all the hype of Christmas. So maybe arrange to make and decorate a gingerbread house on the 27th of December. Live a little. Colour outside the lines. 

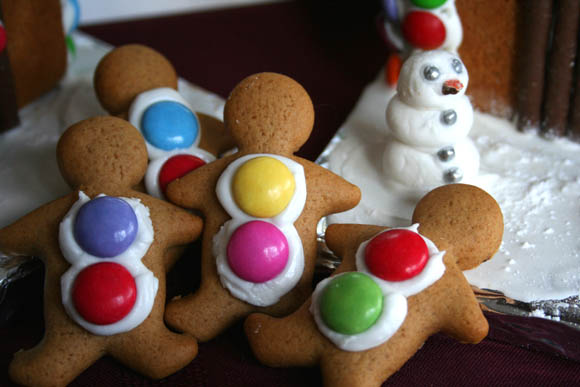
With the extra dough I was left with, I made two-bite gingerbread men. The Smarties look like they’re devouring them. All the excruciating details on how to make your own sweet structures can be found after the jump. Happy holidays! 🙂
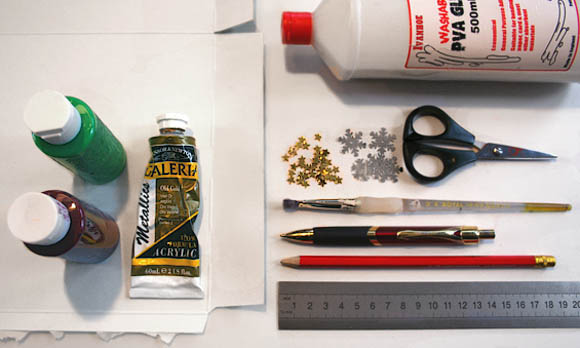
Ingredients

6 cups all purpose flour
4 teaspoons ground ginger 
4 teaspoons ground cinnamon
1/2 teaspoon of all spice or ground cloves
1/2 teaspoon salt
12 tablespoons of butter, softened
1 1/2 cups of light brown sugar
2 eggs
1 cup molasses*
1 tablespoon water

*I haven’t been able to find molasses here in Ireland. I’m sure it exists, but if you can’t find molasses where you are, here is an easy substitute – use 1 tablespoon black treacle and up to 1 cup of golden syrup {I used Lyle’s for both treacle and syrup}. For all that is holy, DO NOT USE one full cup of BLACK MOLASSES / BLACK TREACLE. I did this the first time I made a gingerbread house, and it tasted like an old pretzel found in the boot of someone’s car. It was horrible. Please learn from my mistake. 

Step one: making the dough 
In one bowl, mix all the dry ingredients. In a separate bowl, whip the butter and brown sugar until fluffy. Beat in the eggs and treacle/golden syrup mixture until all is smooth and well blended. A cup at a time, add your dry ingredients and stir thoroughly before adding more flour. Keep going until all the flour is added. You will now have arms like this. You will also hate your dough at this point, and your kitchen will look like a dump {see image below}. Wrap the dough in cling-film and leave it in the fridge – overnight is the best. I broke mine into three sections as I was making three tiny gingerbread houses.

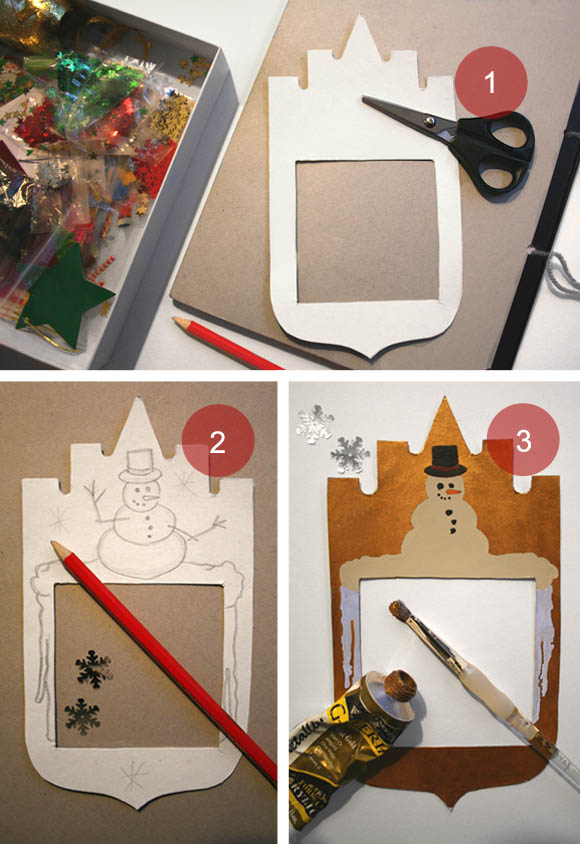
Step two: structural engineering
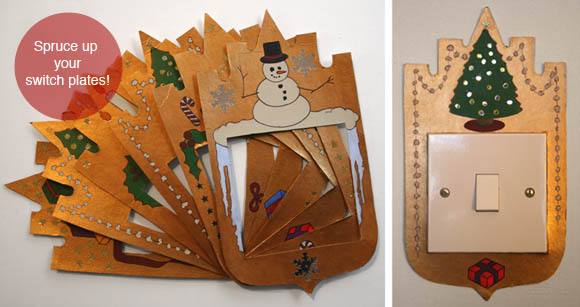
The next step is to cut out a template for your gingerbread house. I drew mine out on paper, cut it out, then placed it on my rolled out gingerbread. You can make yours as simple as you like. It’s really not as intimidating as you’d think. Here are some templates to give you an idea of how easy it is.


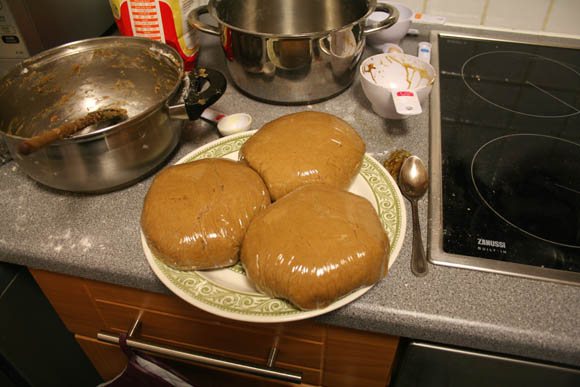
First roll out your gingerbread on parchment paper. What I did was dust the rolling pin with icing sugar regularly to stop the dough from getting out of control. This is where the parchment is very helpful. Cut your templates in the dough, and then roughly cut the parchment it’s on, keeping it on the paper, and place on your baking tray. This will help your blood pressure. Bake for roughly 10 minutes at 180C {350F} while keeping an eye on the dough as all ovens vary. When the dough is cooked, take out of the oven and leave to cool. Roughly an hour.


Ingredients
2 egg whites
2 1/ cups icing sugar


In a bowl whisk your egg whites while slowly adding the icing sugar. Once roughly half the icing sugar has been added, you can choose to heat your mixture, for anyone out there hesitant about using raw eggs in your icing. Since I mixed mine in pots {boo, no mixing bowls in this house} I placed mine over a low heat for 2 minutes, whisking furiously so not to cook the egg whites. Alternatively, you can place your mixture in the microwave for 40 seconds.


Step three: assembly and decorating
Using your icing, begin to assemble the gingerbread house. Once they are structurally sound and standing on their own, use more icing to fix them to your base. For the base of my houses, I wrapped a DVD case in tin foil so we could easily hand over the mini houses to our friends. Now the fun part begins – use your favorite sweets and treats of your choice to decorate your house in whatever way you’d like. I always have such high hopes for how mine will look, but they usually turn out looking like poop. The plus side – they’re edible, so they won’t be hanging around for long.


Many thanks to Simply Recipes who supplied the best gingerbread house recipe I could find, and gave some really good tips to save some holiday angst. Happy holidays, and happy baking!

DIY – Seasonal switch plates

This little project has stood the test of time.  So far. Knock on wood. I originally made my seasonal switch plates {or ‘festive flickers’ as fiance calls them – although, I think that sounds dirty} over seven years ago, and year after year, we put them up. It only took me seven years to sit down and photograph them … 
They’re one of the first things I like to put up at Christmas, and we always get compliments on them. So below I’ve written a tutorial on how to make them, so that you too can revel in the glory of everyone saying how much a Suzie Homemaker you are. 

What you’ll need: a cereal box or supermarket pizza box {thin cardboard works best}, paint in a range of festive colors, PVA glue {to glue on glittery things. It also dries clear}, glittery things of your choice like snowflakes or stars, scissors, paint brush, a black pen, pencil, and a ruler.

Step 1: decide on a template for your seasonal switch plates. I  designed a silhouette inspired a little by Russian architecture. I have a secret fascination with Russia. Anyways, I drew my template on a folded piece of paper – when I cut out the design and opened it, it was a perfectly symmetrical template. I also cut out a square the size of my light switches. To make sure the templates fit each switch snugly, I fitted and trimmed the inside square with a pair of scissors {scalpel or exacto knife} where necessary. Step 2: with your pencil, draw a Christmassy scene. I went with a different design for each switch plate, but there’s no harm in doing the same pattern en masse. Step 3: once you’re happy with your design, paint it in. I began with the gold background, which I needed to build up with two layers of paint. Once the gold was dry, I went ahead and painted the remainder of the scene.

Step 4: When your paint has dried, use a  black pen {or fine marker} and draw an outline around your design to really make it popStep 5: attack every boring light switch in your home. 

Tip: use a small amount of blue-tack on the back of each to ensure they don’t fall off the wall, if they’re not super snug.

I’ve also done monogrammed seasonal switch plates for our bedrooms. They’re a lot less fussy/time consuming to make, and make a classier more sophisticated impact.

Happy craft hagging 🙂

Got ‘nog?

This recipe brings me some serious redolent memories – pyjamas, decorating the Christmas tree with my family, and opening the fridge and helping myself to full-to-the-brim glasses of eggnog from the carton.
Eggnog is a North American phenomenon, and hasn’t reached our shores in Europe – that I know of. Not here in Ireland at least. Three years ago I gave this eggnog recipe a spin with my family, and it went down a treat. I made it again this past weekend, and with the help of some old school Christmas music, fiance and I were well on our way to decorating our apartment. 

This recipe however, has a rather hearty kick of rum in the mix, but it can be made without rum in order to appeal to a wider audience. Full eggnog recipe is stored away neatly below. It seriously is Christmas in a glass. Srsly.

Note: I halved this recipe for fiance and I. Half the recipe still gave us 3+ glasses each. We were well on our merry way!

Ingredients
12 egg yolks*
5 cloves {I ground them up. You can leave them whole if you like}
4 cups of milk
3 1/2 cups of cream {substitute with soya cream for less inches on your waist}
3 cups of light rum
2 cups of sugar
2 teaspoons of vanilla essence
1 teaspoon cinnamon, ground
3/4 teaspoon of nutmeg, ground


Method


In a saucepan over low heat, blend the milk, cinnamon, cloves and half
a teaspoon of the vanilla essence. Keep stirring while mixture heats,
and remove from heat just before boiling point.

In a bowl, mix together the sugar with all those egg yolks. Whisk them well so that they’re light and fluffy. Gently and a little at a time, pour in the milk mixture while continuing to whisk.
Transfer mixture back into your saucepan over a medium heat while
continuing to stir. Keep stirring until your eggnog mixture gets closer to
resembling custard. Never let it reach boiling point!

Pour the mixture into a jug, making sure to remove the cloves. Stand
jug in the fridge or leave on the stove top for an hour or two to allow it to cool. Stir in the
cream, light rum, remaining vanilla and ground nutmeg. Serve in glasses all pretty with a little extra ground cinnamon sprinkled on top.


*I put the egg whites into a container and freeze them. Then there’s a
load of whites ready to be defrosted should you make meringue or
anything needing that much egg whites. Waste not, want not!