Anchors aweigh – Part 1

I am particularly nervous this morning. I suppose it began in July of this year. I was in a tattoo parlor getting my final micro-dermal implant removed, when I asked the gentleman if he knew of any tattoo artists in Ireland who dealt with chameleon black light tattoos. He told me that only one guy in all of Ireland did, and to my luck, his studio was a 10 minute walk away. I nervously made my way over, and to my surprise, it was pretty nice. Not your typical tattoo parlor. I had a chat with Remis {the owner} and since they had opened within the week, the closest date he could book me in for a black light tattoo was in four months time.
That day is tomorrow at 15:00.
This event goes back much farther. I’ve always wanted a tattoo. I really adore them, but in the same breath, at times they look tacky. Like when you’re at a formal event and that Tweety Bird tattoo you got on your 21st birthday is creeping up out of the top of your dress. Or lower back tattoos – sorry to those of you who may have one – but I think they’re tacky as hell. Coupled with muffin tops. Worst look ever.
Back to my story – I had been researching for months, until I came across this particular style of tattoo – chameleon black light tattoo. It can only be seen under ultra violet {UV} light. It was my loophole. I was really pumped when I found this style of ink, and researched the availability in Ireland with no luck. Until that day in July. I am now roughly 24 hours away from getting it.
What I had pondered over the four months was what I was going to get tattooed. My choice had been always one of three: old school skull and cross bones, an anchor {I really like old fashioned tattoos}, or a pair of scissors. To be placed on my left forearm. I hummed and hawed over the past months, and in true form, I only drew up my tattoo this morning. And I am mildly infatuated.

You spin me right round, baby

In 2005 Dutch designers Viktor & Rolf opened their upside-down shop in Milan. Famous for their unconventional fashion sense, it comes as no surprise that their store is a focal point, in and of itself.

For my Studio V in college I used this shop as well as a number of Escher’s pieces as inspiration for an alternative bar which I called ‘Bottoms Up’. 

Amazing design, but I don’t know if I could spend more than 10 minutes in the shop. I find my brain working overtime just looking at the pictures. The pillowed archways set off a couple of H&S alarms, but aside from that, the detail is astounding. From the parquet flooring on the ceiling, to the upside-down vases and chandeliers. Even the door on the shop front is upside-down {see second last image}.
Thanks to coolboom for the photos.

Oh my, pumpkin pie

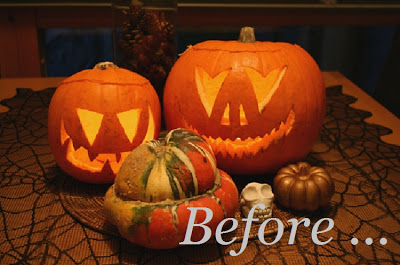
Before you dump or compost your pumpkin, don’t let it go to waste. You know – the one you savagely hacked into over the weekend? It can be made into a plethora of yummy, healthy and unusual dishes for you and your family. Variety is the spice of life.

This is the perfect time to puree your pumpkin that you have carved into – any later and the inside of your pumpkin will start to get moldy. For pumpkins you have not carved, they can last for a number of months, depending on where you have them placed in your home {sunny or warm area = less time}.

The most basic way to store your pumpkin is to cook and puree it. So many pumpkin recipes call for pureed pumpkin – pumpkin pie, soup, sauce, cookies, bread, cheese, chili, fudge, mashed with potato, etc.

To puree your pumpkin: cut a lid in the top and scoop out the seeds and stringy membranes. Cut the pumpkin in half  and place cut side down on tin foil. Cook for 40 minutes at 350F/180C. To check if your pumpkin is ready, pierce it with a knife: knowing if it’s cooked will be the same as checking a potato. Don’t be surprised if your pumpkin needs more time, since the size and density of all pumpkins vary.

When your pumpkin has cooked and is cool enough to handle, peel off the skin and place the pumpkin flesh into a bowl. My weapon of choice is a hand blender. Blend that baby into a smooth puree. From here, you can use the puree immediately in a recipe, or you can freeze it for future recipes. I’m all about freezing. Freeze in small batches in stead of one big bowl. You’ll only ever need two cups of puree at a time in one recipe.

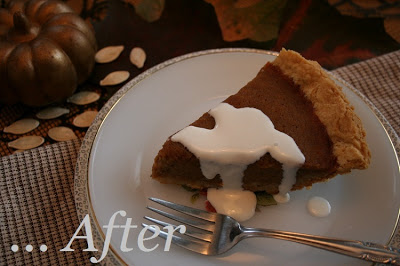
We had two pumpkins this year, so I’m hoping to try as many recipes as possible. Last night I made a scrumptious and simple pumpkin pie. A perfect and hearty accompaniment  for cold autumn nights. To check out the delicious recipe I used and tweaked where I found necessary click below to see more …

Additional note: a point my dad has made in the past – for when pumpkins are not in season and you have a hankering for pumpkin pie, make a substitute using butternut squash. Your taste buds will be none the wiser.

Ingredients
1 1/4 cups of pumpkin puree
1/2 cup of sugar {the original recipe called for 3/4 cups, which would be over bearingly sweet}
1/2 teaspoon of salt
1/4 teaspoon of ground/dried ginger
1 teaspoon of ground cinnamon 
1 teaspoon of all-purpose flour
2 eggs, lightly beaten
1 cup evaporated milk {I used soya cream as an alternative}
1/2 teaspoon of vanilla extract
1 blind baked pastry shell {basic pastry recipe is perfect, or if you’re lazy, store bought pastry pack will do plenty}

Method
Pumpkin pie is really straight forward. Add all ingredients in a bowl and mix well. Pour into pastry lined pan and carefully place into the oven. Bake at 400F/200C for 15 minutes, then lower to 350F/180C for 45 minutes or until center is set. To check this, take a clean knife and insert into the center of the pie. If the knife is clean when you remove it, then the pie is perfect. If not, cook further in 10 minute shifts until set.

For a real treat, enjoy pumpkin pie with whipped cream tainted with either maple syrup or Baileys. YUM.
Click here for a handy cooking calculator, should you prefer to measure in cups, mls, oz etc.