DIY Friday – paper storage bag for toys

Since immigrating to Canada, as you’d expect, we’re starting from the beginning with everything. Furniture, accessories and food [like, spices. You don’t realise how long it takes to build up your cupboard until you have absolutely nothing]. We’ve been here 2 months and while it’s going to take a lot longer to get everything we need, I am able to start thinking about small projects to work on. One of them was some kind of storage for Cora’s toys. 
I looked online for secondhand trunks and storage boxes but I didn’t fall in love with anything so I continued tossing Cora’s toys into the corner of her room. Then through an ad on Instagram, I was suggested a paper storage bag for toys. I thought it was cute, light and soft but at $30 [plus tax and shipping], I was unfortunately put off a bit [see first paragraph about how expensive the past few weeks have been].
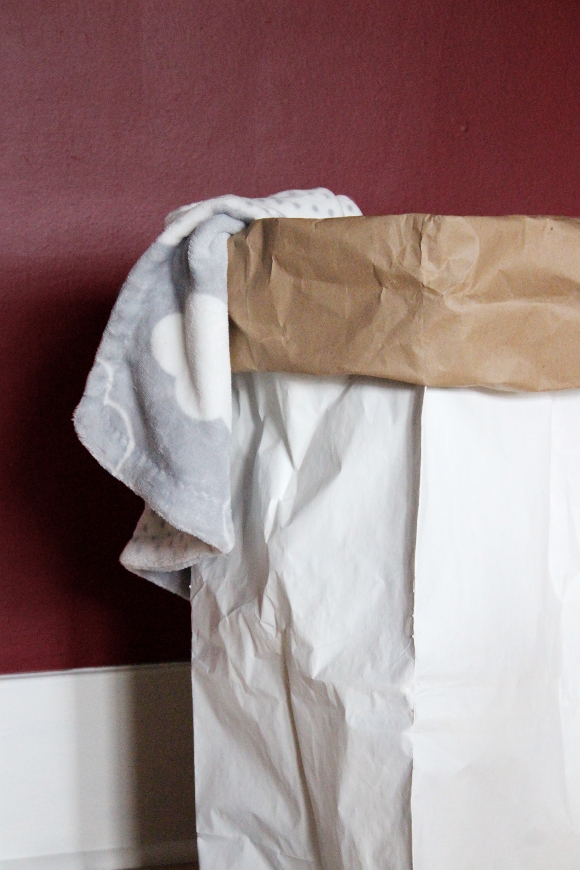
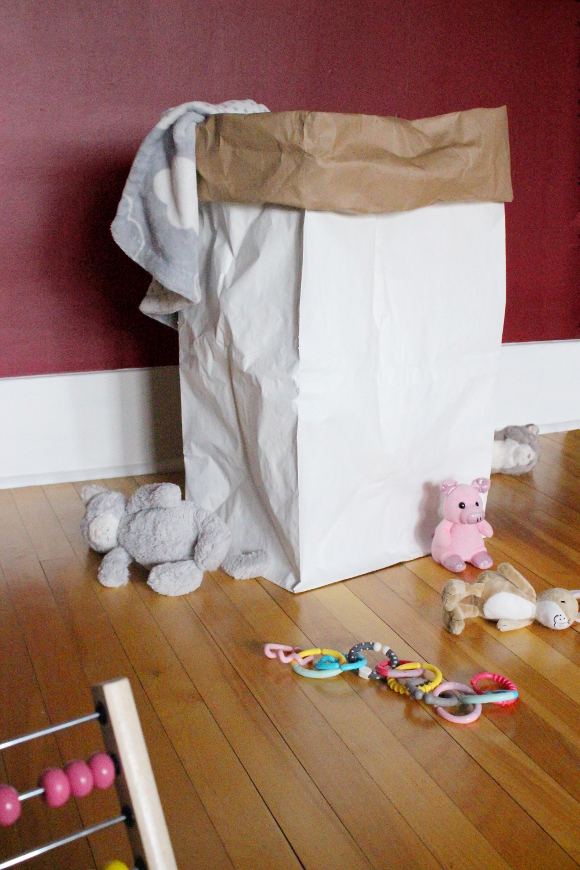
A few weeks passed and on our way home one day we passed a driveway with paper yard waste bags from Canadian Tire waiting to be collected. I saw them and immediately thought, “How perfect would they be for storing Cora’s toys! If I painted one white, it could sit unassumingly in our living room and chaos would be restored to every aspect of our lives.” Perfect.

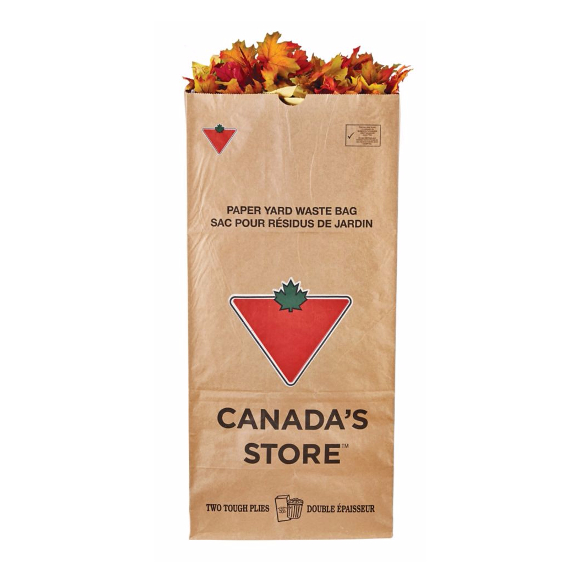
The next time I visited our local Canadian Tire I bought a pack of 5 bags for $2.69, headed home and began painting one white [which, by the way, was A LOT harder than I thought it would be]. That’s when I realised I was basically just making one of those paper storage bags I saw online a few weeks earlier. I was hesitant about sharing my project because it looks so simiar to the branded versions and I didn’t want it to seem like I’m copying them, but at the same time, I did think of the idea by myself too. After an overwhelming response to my Instagram stories poll and 100% of the vote going to “YES! BLOG IT!” [vs. “NO, YOU’RE A BAD PERSON”], I decided to blog it!
I’ll be honest in that it was pretty tricky at times trying to paint the bag [it continually collapsed while I was trying to paint the sides and I had the added bonus of teething toddler hanging out of me], so I wouldn’t blame you for wanting to buy one online and save yourself some hassle. BUT, if you’re like me, and like doing stuff yourself, my version cost me $0.53 for one bag [I used white paint I already had]. Not bad for something that Cora might literally tear through one day. 

Repainting a high chair black

One of the first things we bought when we moved to Ottawa at the end of September was a high chair for Cora. We bought it secondhand on Kijiji [the equivalent to Adverts in Ireland] for $40. I really liked the old-school shape and style of it and the table flipped the table to the back so when Cora is a little older it would allow her to eat at the table with us. It had so much charm that I couldn’t resist it. And yeah, one of the back spindles broke and had been replaced some years ago, but I didn’t mind at all. It was in good shape and was clean and safe [I wouldn’t have put Cora in it otherwise], but I had every intention of updating it. 

For a long time I wanted to restain it. It had a dark wood stain but 16 years of use had worn through it so there would be a lot of sanding ahead of me. Sure! I’m up for it! But then I actually thought about the work involved. All those spindly bits. Such spindles. So many damn beautiful, intricate spindles. I’d have to sand the entire thing back to the original wood to get an even coat of stain across the whole piece. So much spindly sanding. And to be honest, I didn’t have enough mental energy to do it. 

I thought about painting the entire thing a solid colour. I thought for a few weeks before deciding on anything [if I’m ever indecisive, that usually means I need more time to think]. In the mean time we bought a dining room set secondhand [also through Kijiji], and its black dining chairs were the reason I went for the set so I figured, why not paint Cora’s high chair black to match?

I headed to our local Canadian Tire and spoke to their paint experts about what I was looking to do. They suggested Rust-Oleum‘s line of Tremclad paint for the likes of outdoor furniture and toys. We decided on their Rust Paint in black as it was high gloss and I’d need something easy to clean for Cora’s high chair. 

Before I got to work, I disassembled the entire top half of the high chair as the black frame wobbled from side to side – not to the point that is was dangerous, just loose from years of use. I wanted to do a proper job of fixing it and I couldn’t tighten the spindles without taking it apart. 

I painted each piece in a light coat of paint and waited around 6 hours before applying the second coat [I waited so long because it was drying on our cold porch. If it had dried at room temperature, it would have taken less time]. I waited a further 12+ hours before reassembling it. I glued all the loose spindles back in place with Gorilla Glue and let it dry another half of a day before letting Cora use it. 

It looks SO MUCH BETTER as one uniform colour and it’s so easy to wipe smeared avocado or peanut butter off of it [it was tough to clean it properly before if any food got into a part of wood that was untreated]. I think it looks quite posh actually! Yes, I totally spent $250 on our child’s high chair …

I doubt black would be a colour many people would think to paint a high chair, but it looks really smart alongside our new dining set; all of which are black [sans the table]. The woman I bought the set from had ‘upcycled’ [her words, not mine] the set by spray painting the chairs black and painted the seats with grey chalk paint [which makes zero sense], so I’ll be repainting each of our chairs in the same [more suitable] paint as Cora’s high chair so they’ll all match. They already look really well together now that they’re the same colour and I can’t wait to share more of our dining set soon. SOON!