Bespoke eternity ring by Da Capo Goldsmiths

When I was pregnant with Cora, Robert asked if an eternity ring was something I’d like. To be honest I didn’t know what an eternity ring was before then, but I liked the idea of one [sans diamonds. My engagement ring has more than enough diamonds for me]. 

Five years ago when Robert and I were organising our wedding, I had the idea of having a flat-top ring as my wedding band. I really like strong contrasts and I liked the idea of having a flat-top ring next to the engagement ring that Robert chose for me*. At the time we were on a tight budget, so it was an easy decision to go with a traditional wedding band. But I still thought about that ring. And in the five years since we got married, I thought about it often.

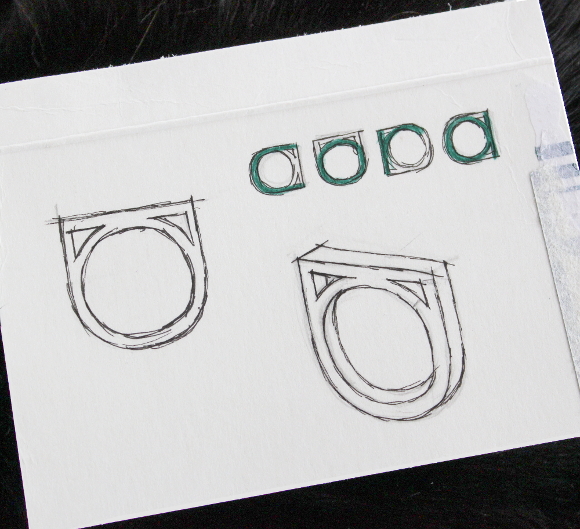
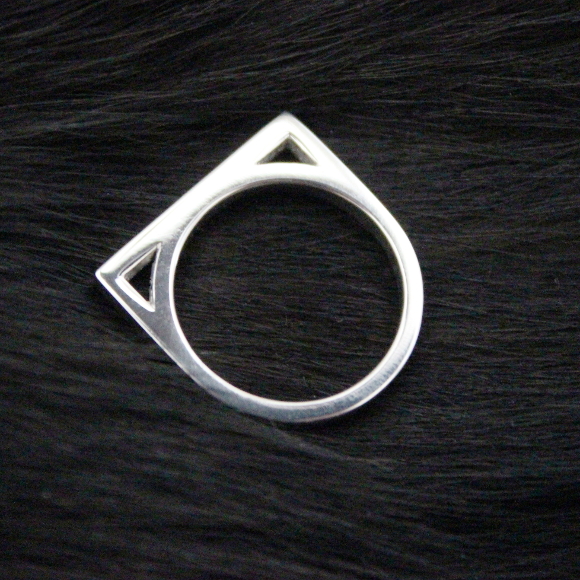
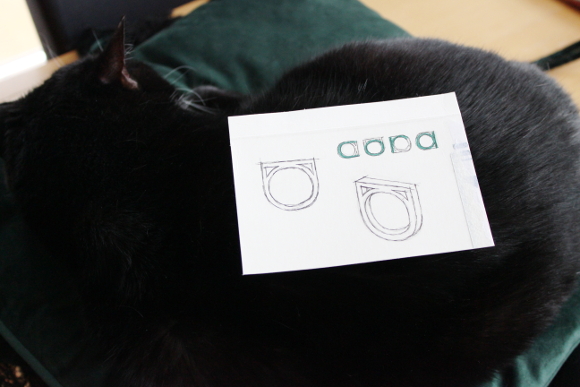
Once Cora was a few months old, I started thinking about an eternity ring and my flat-top wedding band came to mind. As I was sketching its general shape, I noticed that if I turned the drawing one direction, it looked like the letter ‘C’. I turned it again, and it looked like an ‘R’. Then depending on which way you turned the ring, it would spell out Cora’s name. I had the perfect shape in mind, but I knew it wasn’t finished. In April I had a stronger idea and began sketching a new design [I remember it being April because I drew on the back of an After Eight easter egg box]. To loosely mirror the gallery look of my engagement ring, I thought about removing the inside corners of the eternity ring [I don’t know if that makes sense. My sketches below will help]. When I did this, the ‘Cora’ aspect of my design was so ridiculously strong that my heart jumped and I knew this was the design I wanted. 
I drew the ring in four different directions for each letter in Cora’s name, marked each letter in green pen and showed Robert – “Cora“.  

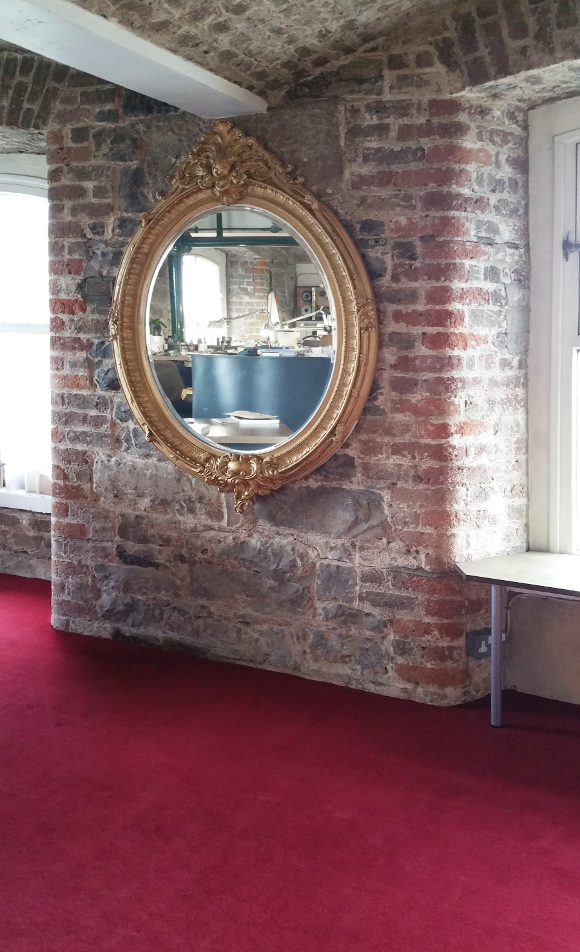
I went to a jeweler in town and asked about getting a bespoke ring made. They didn’t have such a service, but they pointed me in the direction of Da Capo Goldsmiths. I emailed Sé and a few days later I had an appointment in their studio. 
Sé [pronounced ‘Shay‘] and I talked for over an hour about the design. He showed me countless pieces he made that were full of secret messages and perfect details that only the wearer knows. Sé immediately understood what I was looking for and I knew my idea was in more than capable hands. A few weeks later Sé sent some 3D designs including 2 alternative designs. I ended up deciding on my original design and of course felt so guilty because Sé’s designs were really beautiful. As Sé explained, by having a choice between designs I can me more sure about what I want. 


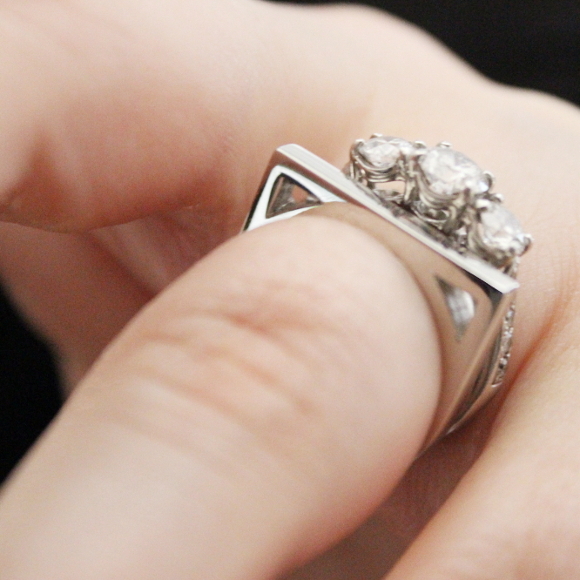
Do you know how difficult it is to photograph your own hand?
It’s about as elegant as trying to photograph a string of burst sausages.

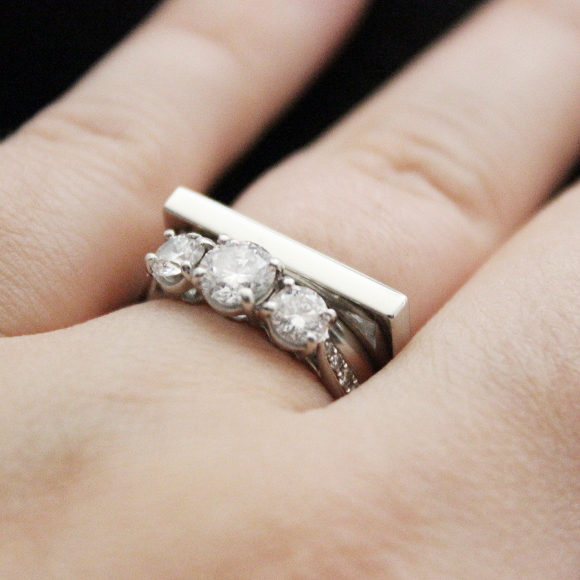
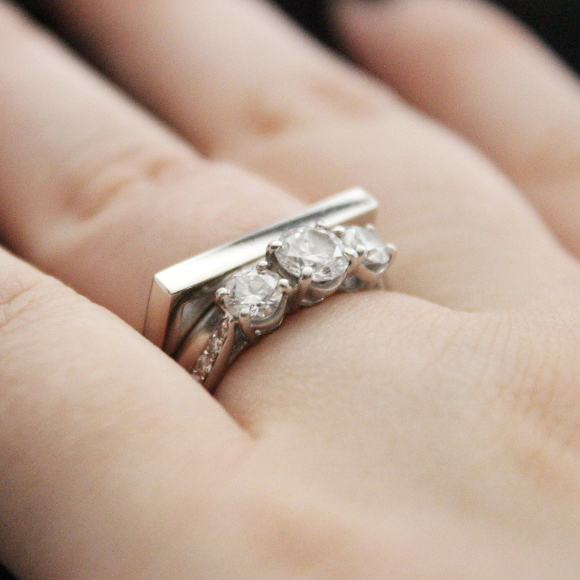
A few weeks later my eternity ring was ready and I haven’t stopped looking at it since. I love the juxtaposition between my engagement ring, my wedding band and my eternity ring. They’re a collection of different styles from different parts of my life and I love how they all make the other stand out. Thank you again, Sé for your talent, creativity and for making the ring I’ve been dreaming about for 5 years into a real thing. If you’re thinking of having anything bespoke made, I would strongly suggest you contact Sé and Lee. They are jewelry wizards.  

p.s. I should also thank sleepy Toshi for being my perfect backdrop model. Also, my new ring looks a little like it has cat ears and I am 9,000% okay with that.

*Robert spent 2 weeks worth of lunch breaks going from one jewelry store to another comparing engagemetn rings and looking for the ‘perfect one’. He’d often spend his entire lunch hour looking and not have time to eat a lunch. He’d then come home starving, I’d be in the middle of making dinner and he would want a sandwich. “I’m making dinner, can you just wait 20 minutes?” I’d say, and he never told me why he was hungry. Don’t worry, the guilt still haunts me. 

Nursery dresser makeover!

It  really feels like things are moving at a snails pace these days [myself included], but things are finally getting ticked off my to-do list. One of them being the nursery. Between appointments and classes and endless lists of what to do and get, there’s so much involved in getting ready for a baby. And once you get everything struck off your list, you start thinking of more things you should do. My lists are reproducing. Or sometimes you just want to lay the hell down and nothing gets done for a day or two. Do I sound complainy? I really don’t mean to, I’m just glad things are finally starting to fall in place!

Back when I first put some ideas together for transforming our spare bedroom into a nursery, I wanted to source as many secondhand items as possible. So when we were looking for a dresser / changing table, I took to Adverts.ie and found a perfect sized one for €45 …

It  was a standard dresser in relatively okay condition. I knew I’d be painting it as there were already a lot of different wood finishes in the room – walnut crib, faux pine floor, some other faux wood on the built-in wardrobes and then the chicken-fat orange wood around the windows, the combination of them all together just wasn’t working.  

Since our spare bedroom / nursery is a fairly dark room and the dresser would be going under the window [potentially blocking more light from the room], I didn’t want to go with anything too wild or dark on the dresser. When it came down to it, I wanted to keep it light and bright. I still had some leftover white Rustoleum paint from updating our bedside tables this time last year, so on went 5 even coats of plain white paint all over. I thought of doing a faux marble effect again, but quickly changed my mind as I didn’t want to overdo it.

As for the details on the dresser, I kept it relatively simple. I spent about 2 weeks looking for the perfect hardware for the drawers. I found these black rose knobs and backplates on Etsy [which I don’t think is a genuine Etsy seller and is probably a warehouse of sorts, but welp. I couldn’t find them elsewhere and I really wanted them so I got them]. I thought they were a perfect mix of whimsical, dainty and a little bit gothic. I decided to order just two knobs for the top drawers and went with very simple knobs for the rest of the dresser  as I didn’t want to overkill it [I found perfect budget-friendly untreated pine knobs in Woodie’s that I painted matt black]. 

Since getting my hands on Emma’s Tangled Hawkmoth wallpaper, I immediately knew I’d be lining the drawers of any future nursery dresser with it. Unfortunately we can’t hang wallpaper in our apartment [boo, renting], so into the drawers it went. It works so perfectly and I love seeing peeks of it underneath all the tiny baby clothes. I want to line ALL OF THE THINGS WITH IT NOW.

As for the feet of the dresser, I’ve not done anything just yet with them. I’ve left them unpainted as they were, which in a way kind of makes it look like the dresser is floating [I know, a stretch] but I’m hoping to either swap them for different feet or just take them off entirely. 

I should also say sorry for all the tightly cropped nursery pictures – it’s really to spare your eyeballs from seeing the madness that lurks to either side of the nursery. Soon, though. Soon it should be finished! Considering baby is now finished cooking and I’m 40 weeks [and 4 days], but I think [see: hope] later this week baby will make her debut. Fingers crossed – but not legs. Legs are anything but crossed 😉

Little living room updates – cast your vote

Back in November while I was editing the photos I took of our new rug, the first picture I included in that post kind of made me uneasy. It was all the colours. And that end of the living room. It didn’t really work anymore. There was too much burgundy, there was too much wood that didn’t match and the rug made it more obvious. It all looked too thrown together and nothing worked. 

Since we’re renting our apartment and are stuck with our landlords furniture [I wish I could burn it to the ground and start over trade it in for more comfortable and practical pieces], I’m forever hitting road blocks in our own home. Of the many pieces of furniture, our landlord’s coffee table has been driving me up the wall. It’s not the same colour as the ‘wood’ floors and it’s quite distressed thanks to previous tenants. And I don’t mean the good kind of distressed that’s trendy. The bad kind. 

When Kimberly updated her vanity and then Linda updated her kitchen counters, both ingeniously using faux marble contact paper to do so, I filed that nicely in my brain [even check out my comment on Kimberly’s post. Ha!]. Contact paper is beyond perfect because when we move out, I’ll simply peel it off and it’ll be immediately reversible. As with most things I’m a bit unsure of, I did a mock up to help me make up my mind. I edited the cat basket to black, slapped some faux marble on the coffee table, and as anyone who has updated their home will know, the design domino effect came into play so the tray on our coffee table got edited too. Many times. 

Here’s what the above GIF is showing, frame by frame …
1. Original living room as it is now
2. Cat basket edited black 
3. Coffee table marble-ised
4. Tray edited black 
5. Tray edited burgundy
6. Tray edited viridian
7. Tray edited pink [for the hell of it]
And to think, this was all done without disturbing Juniper in the slightest.

Here’s where I need your help. Genuinely. Tell me what you think. Marble? Yes or no? A solid colour coffee table instead? And what colour tray should I go with? Or just leave it all alone? Srsly. I’ll be thinking about this one for a while, but a change is defo going to happen. At the moment I’m going for the black basket + marbled table + black tray. But nothing’s set in stone. Or faux marble.