Lower Town Dollhouse – stairs

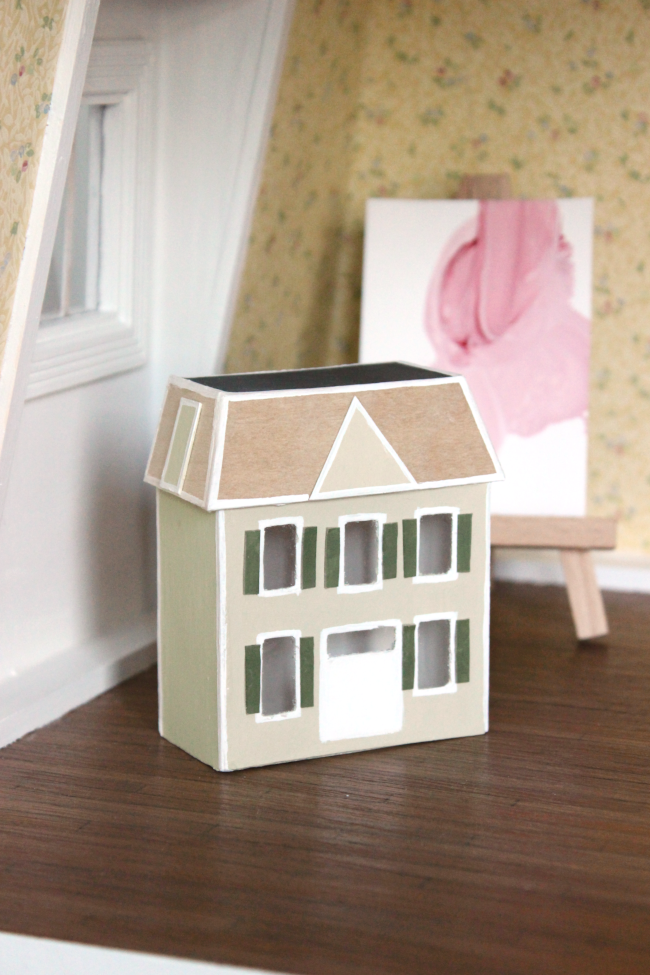
When I found our Lower Town Dollhouse online secondhand, it was a great price for a reason – because it had no front door and no staircases. This didn’t deter me at all so I bought it knowing I’d one day be able to make some proper little dollhouse stairs for it.

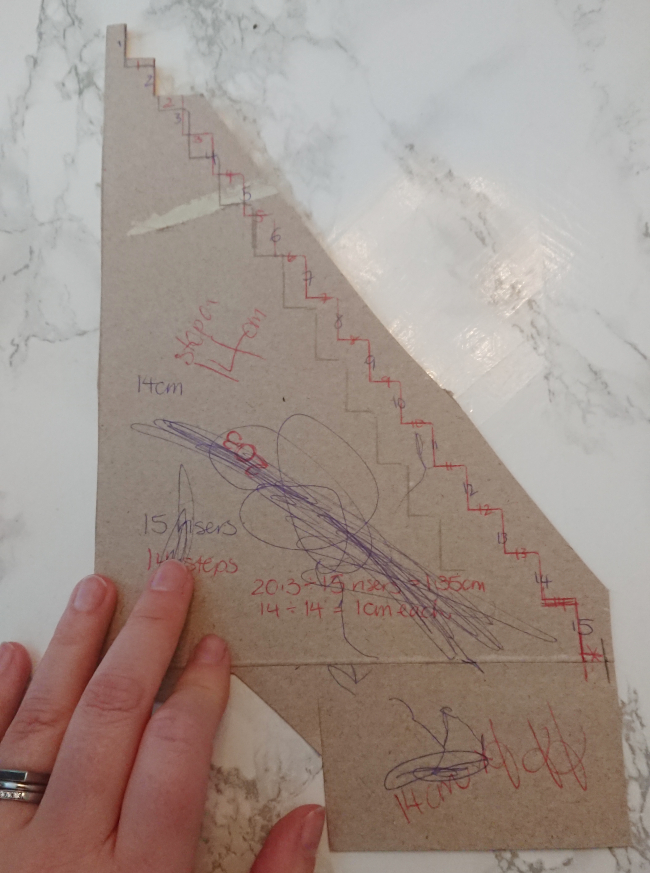
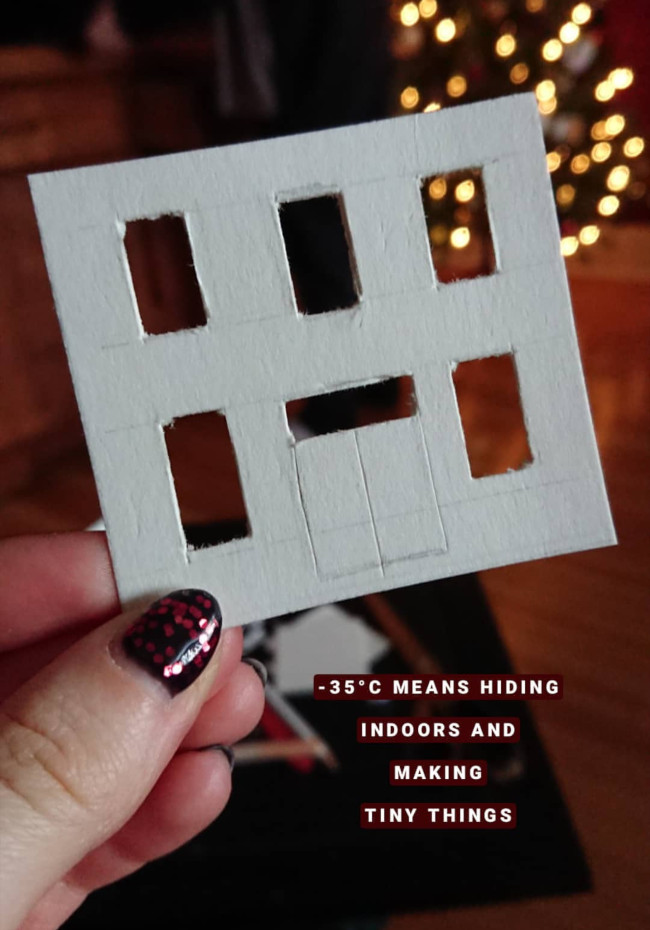
I started by measuring the ceiling height and dividing it by however many steps I wanted [20.3cm ÷ 15 steps = 1.35cm high per riser], and then I measured the depth of the space for the stairs [ie – the hole in the floor] to find the depth of each tread [14cm ÷ 14steps = 1cm deep per step]. I ended up with 1.35cm high steps that were 1cm deep and after a few sketches it looked just right. I tested the measurements using a cardboard template before committing to the real thing, and luckily my second template worked out perfect.

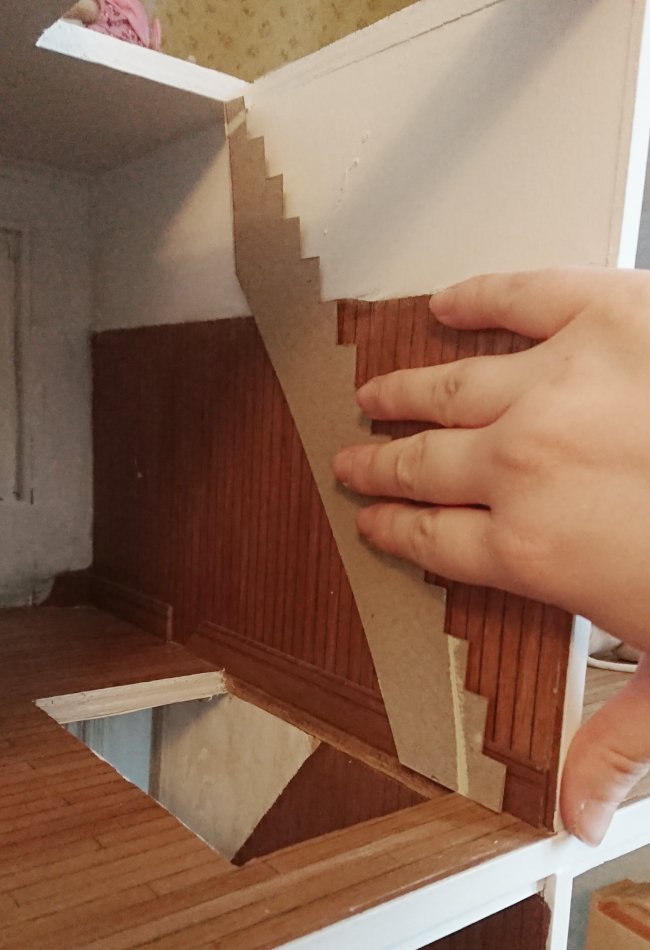
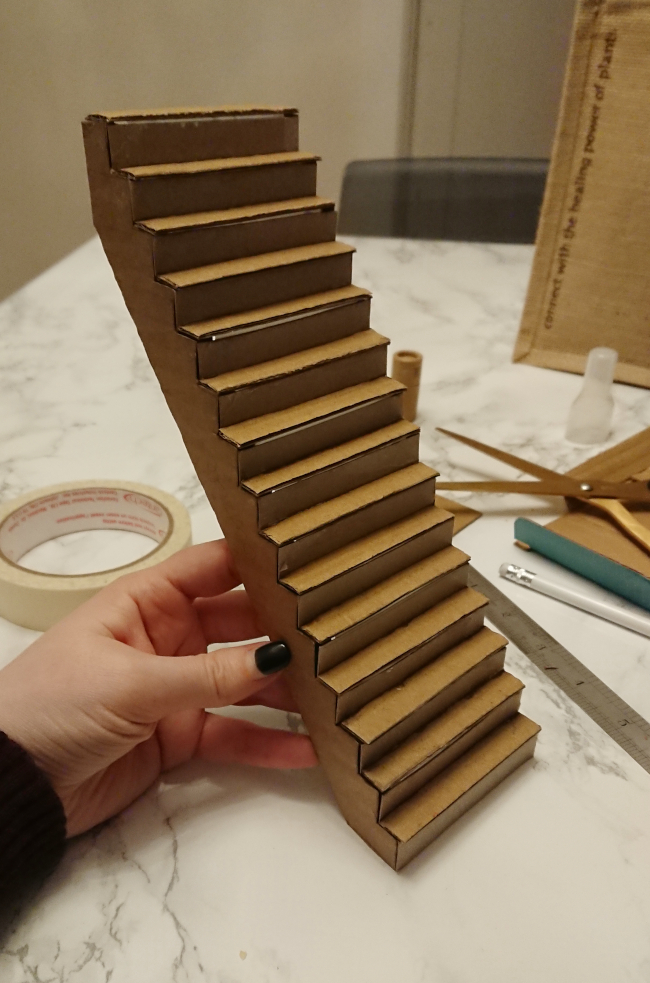
Having to assemble the stairs was one of those things that got more difficult in my head the longer I left it when in reality, as soon as I started, it didn’t take long to make. I used the template to cut 4 copies of the stair silhouette on corrugated cardboard; gluing two sets together to form sturdy supports for each side of the stairs. I wish I took a photo of the assembly stage, but I either forgot or was distracted by a something small yelling at me.

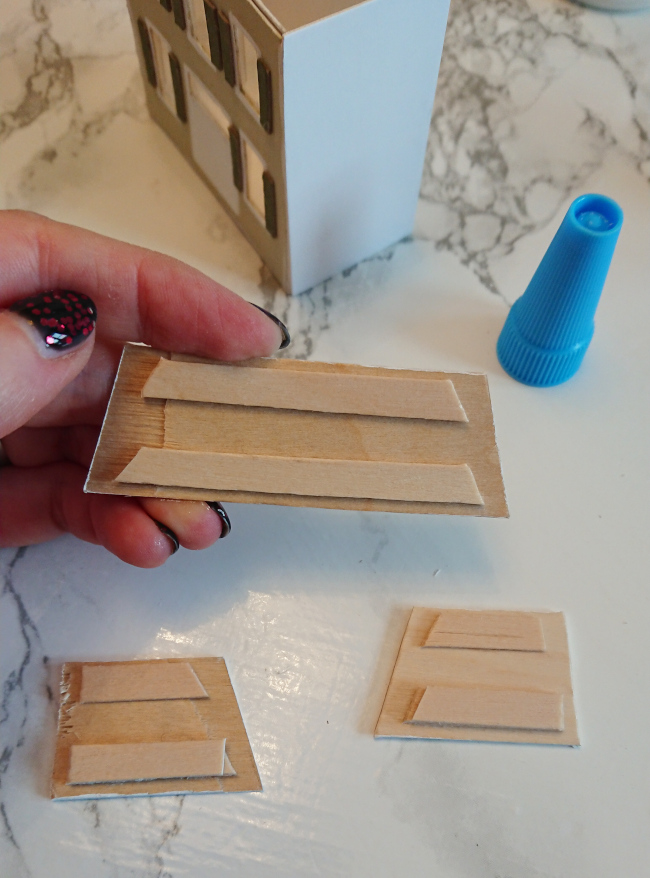
I first glued the risers in place with superglue, followed by gluing each step on top with two layers of cardboard sandwiched with superglue to really toughen them [see: to withstand a sweet and thoughtful yet unrelenting toddler]. I also used masking tape on the back side of the steps to further secure them in place and reinforce the sturdiness.

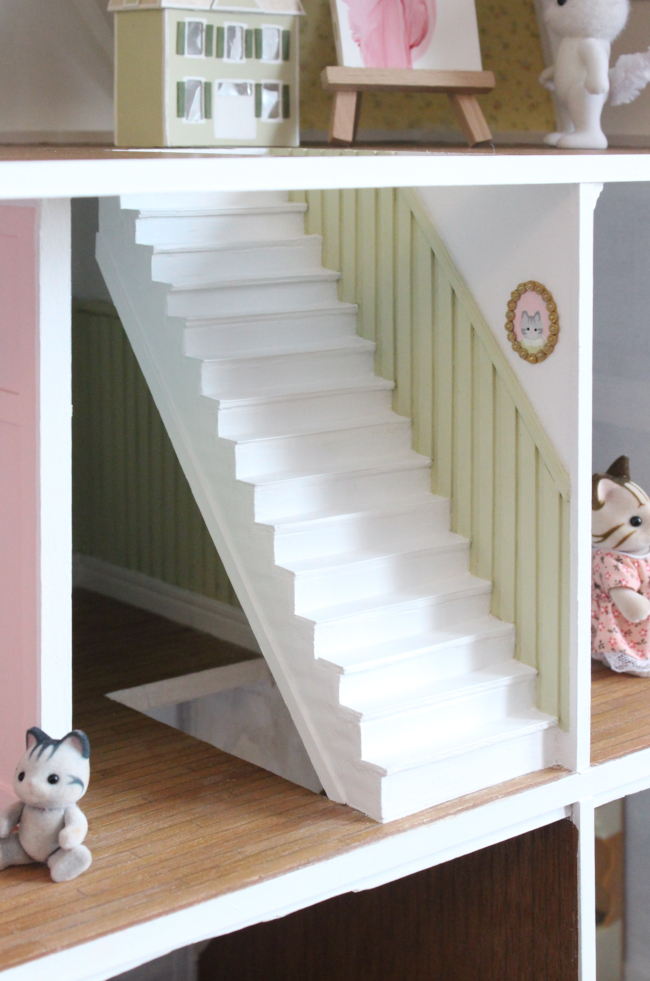
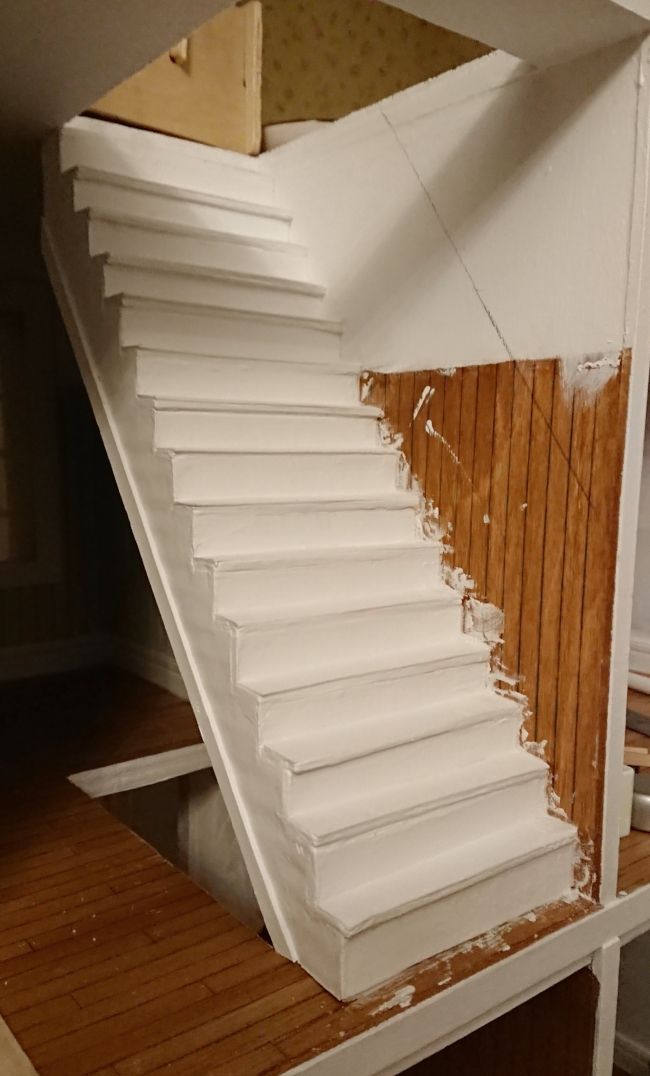
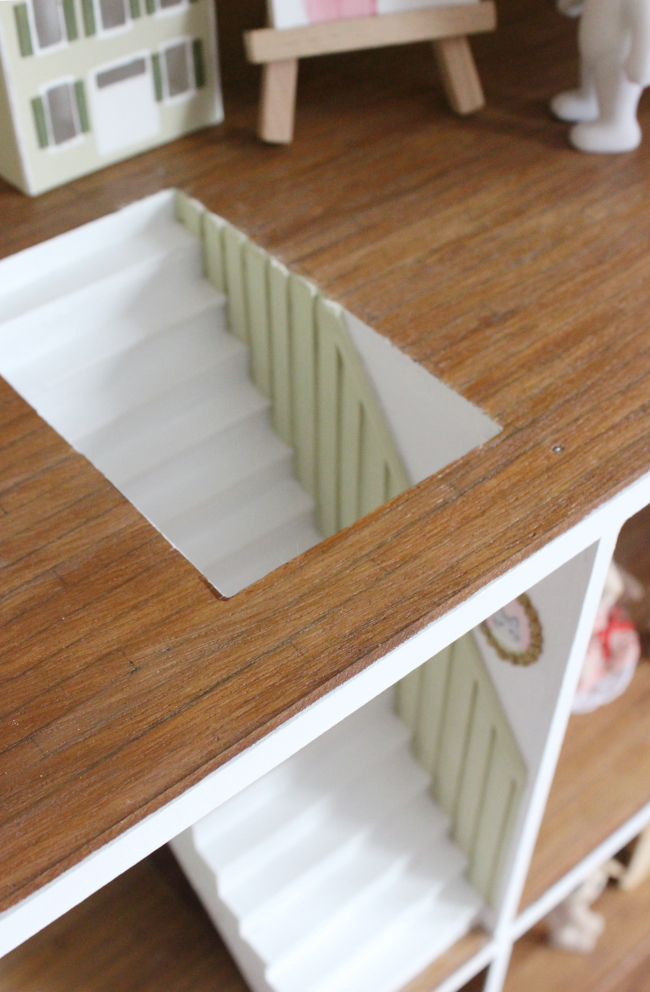
Again, I didn’t take a photo, but I next used filler to fill in the gaps and toughen the edges. Once that was dry I painted the stairs white and using superglue along the entire right side, along the top step and under the bottom step, I glued the entire staircase in place and I have to say, it is so sturdy that I think Cora could actually stand on it with her real feet and the stairs would survive.

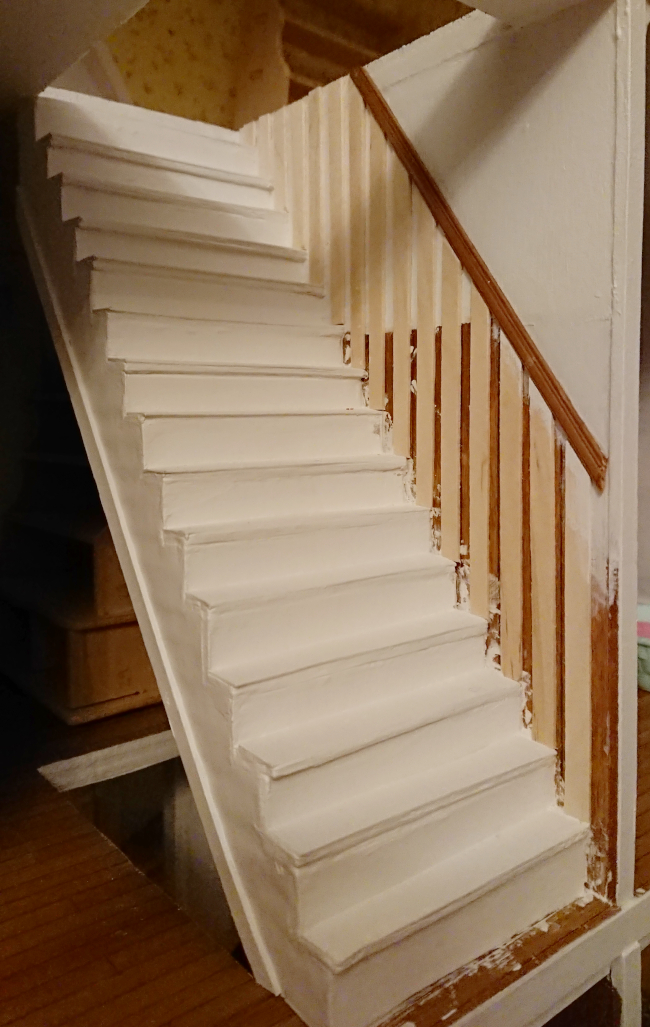
Using wooden coffee stirrers and an existing tiny chair rail, I created [or, attempted to create] a bead board look. I carried the bead board look around the rest of the hallway. It at first looked awful as I was adding it but as soon as I painted it, it looked like a real little room.

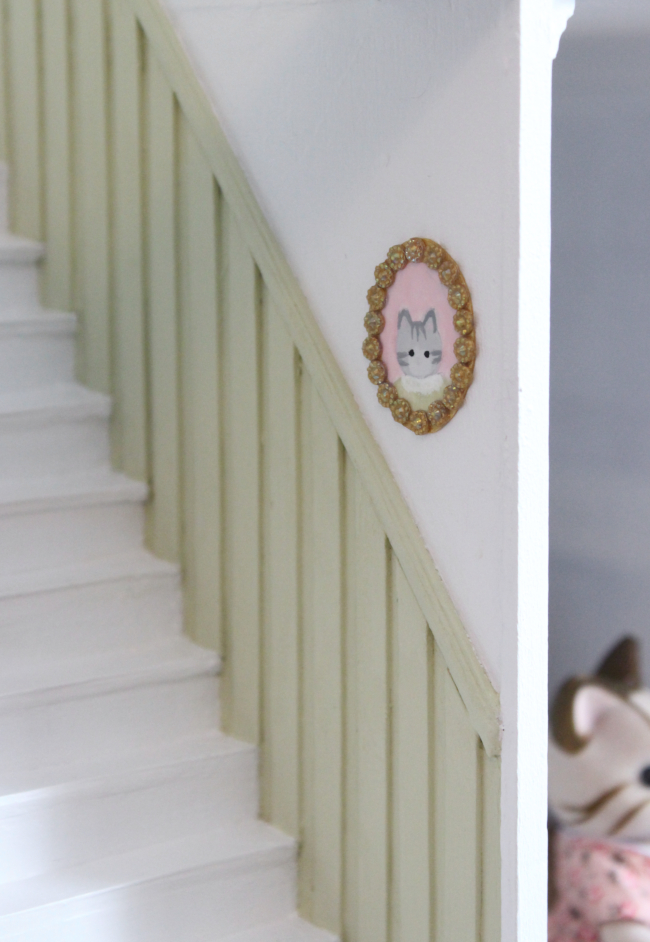
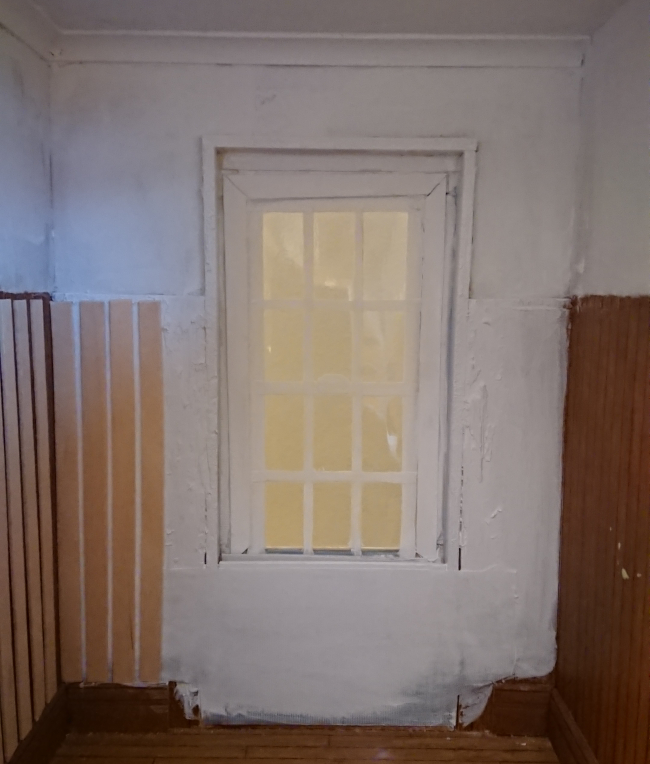
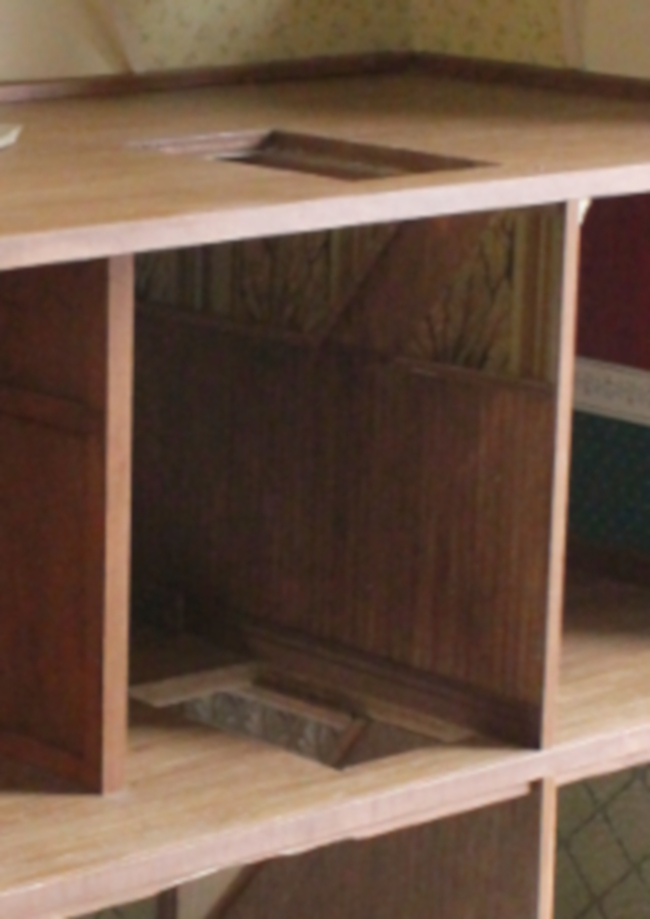
Above; the hallway as a work in progress. When I first bought the dollhouse, there wasn’t even a window here. It was just a giant hole. It really was tore up from the floor up [you can get an idea from these photos]. I know it doesn’t look perfect as it is now, but I think it’s an improvement and TBH, because the stairs are glued in place, you can’t get a proper look down the hallway.

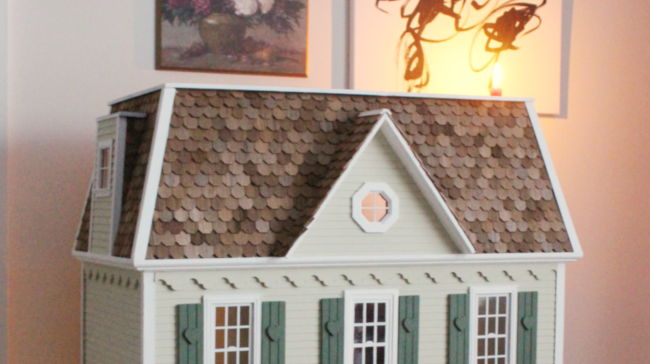
It’s quite difficult to see from the only ‘before’ type photo I have below, but you’ll see that the stairs that once were here used to face the other way. For Cora’s sake, I thought it made the most sense for the stairs to be facing toward the back of the dollhouse so Cora could actually use them. Yes, they break several health and safety standards this way, but I don’t think any of the little creatures are part of a union, so I think we’re safe. And let’s not mention the lack of a banister either [purposefully left out until toddler is a bit less smashy].

I have to do an entire second set of stairs for the next floor, so I’ll be following my own set of instructions again soon. But this time around it won’t take nearly as long now that I know what to expect. It’s tiny work but I really do love it so much. To the point where if dollhousing was a career, I’d be trying my best to get into doing that.

Click here to see the rest of my Lower Town Dollhouse updates!

House creeping in Ottawa

One of my favourite things to do, to the quiet yet unmistakably simmering frustration of Robert, is to stop every 20 meters and carefully look at a house or building on our route somewhere. I don’t always take photos, but I love looking at houses. Especially houses with a lot of detail or can’t be figured out right away. The more gingerbread, the higher pitch my squeal …

What about you? Are you a fellow house-creeper? Or do you know someone who’s an adamant house-creeper and it bothers you? Speaking as one, I do apologize. But also know that it’s not going to stop us.

Lower Town Dollhouse’s … Dollhouse

The niche-ness of this blog post is almost too much. Also, I will shortly be changing the name of my blog to The Interior Dollhouse-er because I have a newfound tiny obsession that you may or may not have noticed.

Last weekend there were two special weather advisory’s here in Ottawa; one was for frigid temperatures [-35°C and below] and the other was a snow storm warning so we spent the entire weekend indoors. Did I do anything productive? No. Did I Marie-Kondo our kitchen? Or paint the hallway? Or make batches of dinners for the week ahead? No. I made a miniature dollhouse for Cora’s Lower Town Dollhouse.

So this week I thought I’d share how to make a miniature dollhouse, or, a dollhouse’s dollhouse. Because I just know there are thousands of people out there feverishly Googling this very niche subject right now and I must ensure I reach them through most excellent Search Engine Optimization.

It was actually fairly straight forward making the body of the miniature dollhouse. For the facade, [try to keep a straight face while I use the term ‘facade’ to describe something 8cm tall], I sketched a rough outline of the windows and cut them with an exacto knife [as seen above]. I did the same with a second piece of cardboard [but a lot less accurately] as I was going to sandwich a piece of plastic between the two to securely create plastic windows that wouldn’t budge thanks to tiny toddler hands [you can see the roughly cut inner piece three photos down in the interior of the dollhouse].

For the rest of the body of the dollhouse, I used cardboard, masking tape and Gorilla Super Glue to create the other three sides [Super Glue because toddler].

Then I tackled the tiny angled roof. I used wooden tongue depressors [you could easily just use cardboard] that I cut at an angle to mimic the angle of the larger dollhouse’s roof [below]. My next worry was how I was going to securely attach the roof to the dollhouse. It needed to be toddler-proof. So I Super-Glued what I’m going to call ‘brackets’ [I don’t know if that’s the right term?] using wooden coffee stirrers to the inside of the roof pieces [as seen above]. This way the roof ‘brackets’ would be able to rest on the top of the body of the miniature dollhouse. And by ‘rest’ I mean be glued to using vast amounts of Super Glue.

The above picture might help to make a bit more sense of my description. I added more brackets to the top of the inside of the roof to once again give the flat part of the roof something to sit on and adhere to. I painted the outside in a few coats of paint and even cut out tiny cardboard shutters which I Super-Glued into place.

This seems like a lot of detail for something so small and unimportant and is in no way contributing to current day society“, I hear you say. Yes, you could very well be right, but there really isn’t anything better than seeing Cora’s little face light up the moment she realized I was making a tiny version of her dollhouse. “OHHHHHHH! BABY DOLLHOUSE!”, she squealed. I could have better spent my time doing literally anything else all weekend, but that would have been far too productive.