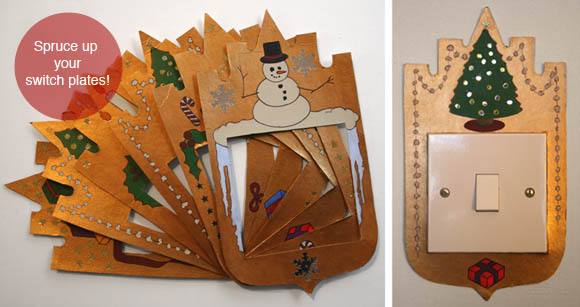
This little project has stood the test of time. So far. Knock on wood. I originally made my seasonal switch plates {or ‘festive flickers’ as fiance calls them – although, I think that sounds dirty} over seven years ago, and year after year, we put them up. It only took me seven years to sit down and photograph them …
They’re one of the first things I like to put up at Christmas, and we always get compliments on them. So below I’ve written a tutorial on how to make them, so that you too can revel in the glory of everyone saying how much a Suzie Homemaker you are.
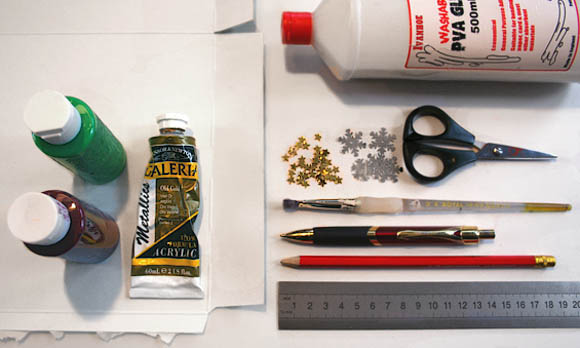
What you’ll need: a cereal box or supermarket pizza box {thin cardboard works best}, paint in a range of festive colors, PVA glue {to glue on glittery things. It also dries clear}, glittery things of your choice like snowflakes or stars, scissors, paint brush, a black pen, pencil, and a ruler.
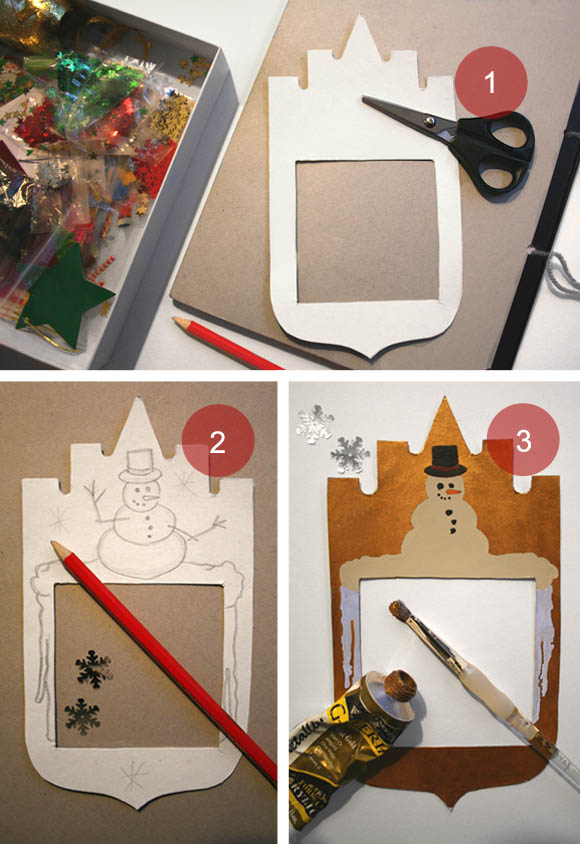
Step 1: decide on a template for your seasonal switch plates. I designed a silhouette inspired a little by Russian architecture. I have a secret fascination with Russia. Anyways, I drew my template on a folded piece of paper – when I cut out the design and opened it, it was a perfectly symmetrical template. I also cut out a square the size of my light switches. To make sure the templates fit each switch snugly, I fitted and trimmed the inside square with a pair of scissors {scalpel or exacto knife} where necessary. Step 2: with your pencil, draw a Christmassy scene. I went with a different design for each switch plate, but there’s no harm in doing the same pattern en masse. Step 3: once you’re happy with your design, paint it in. I began with the gold background, which I needed to build up with two layers of paint. Once the gold was dry, I went ahead and painted the remainder of the scene.
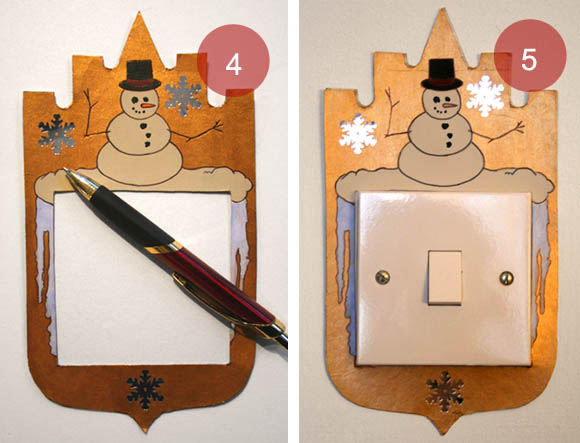
Step 4: When your paint has dried, use a black pen {or fine marker} and draw an outline around your design to really make it pop. Step 5: attack every boring light switch in your home.
Tip: use a small amount of blue-tack on the back of each to ensure they don’t fall off the wall, if they’re not super snug.
I’ve also done monogrammed seasonal switch plates for our bedrooms. They’re a lot less fussy/time consuming to make, and make a classier more sophisticated impact.
Happy craft hagging 🙂

