Last week I traveled to our closest
Home Depot to decide on a paint for our living room. It had a huge selection of interior paint so as you can imagine, I was excited to pick a colour. I did the thing you’re not really supposed to do though and I chose a colour without trying a few tester pots first. It took me nearly an hour to get there by bus and it was -17C that night, so forgive me as I had survival instinct priorities at the time so I committed to 3.5L of BEHR’s Classic Burgundy [09YR 05/305] and headed home.
After first
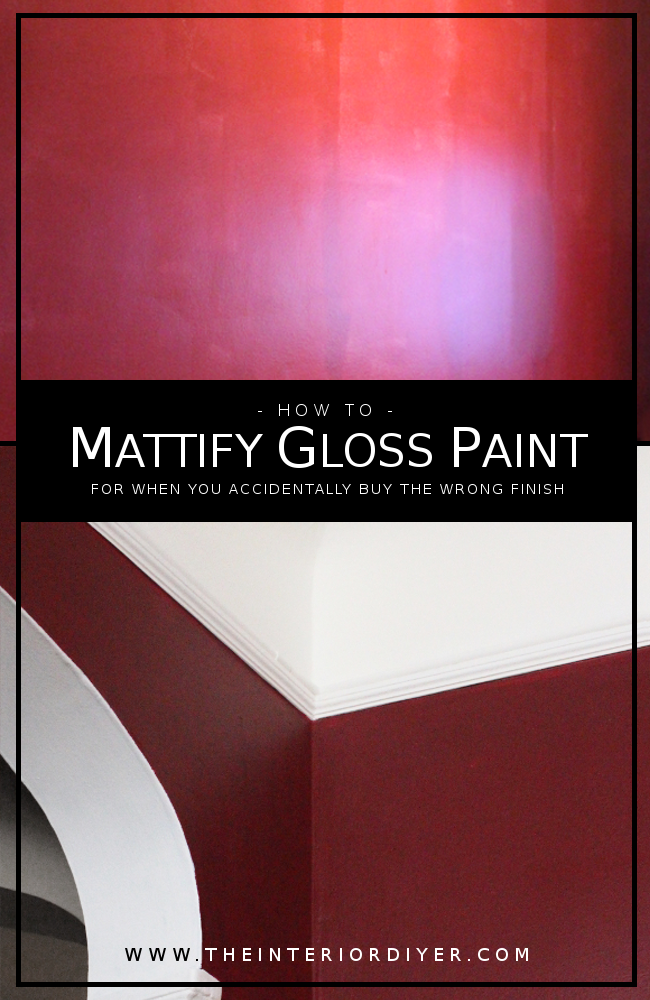
painting the ceiling white that weekend, I got to work and started painting the walls burgundy. I got very lucky as BEHR’s burgundy was EXACTLY the colour I was looking for. Except for one thing; it was in an eggshell finish. Big time not something I wanted.
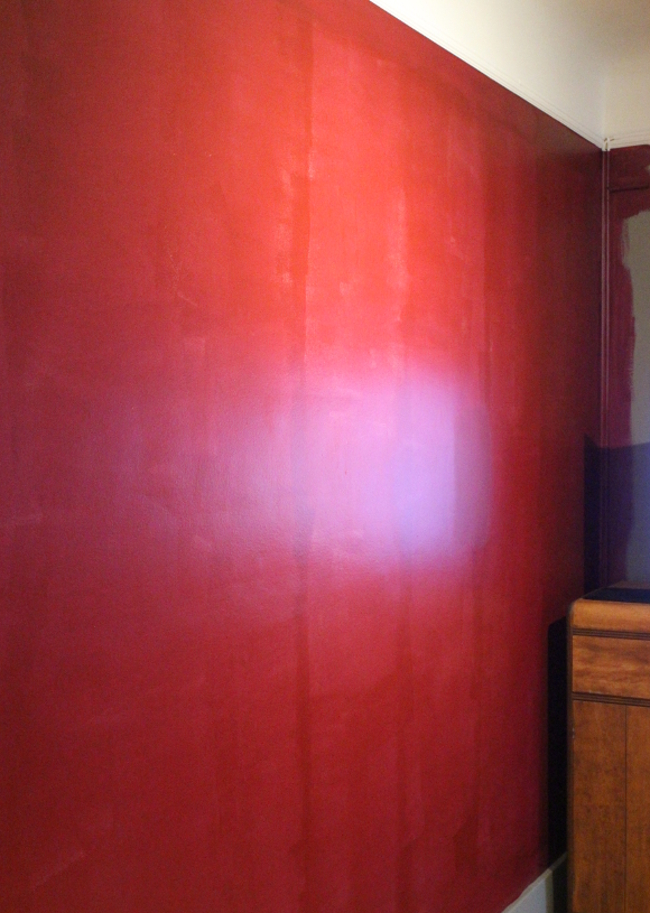
I don’t like eggshell finishes in such a dark colour as it makes it too glossy. I’m not pointing fingers but I am used to being asked what type of finish I’d like my paint to have and as I wasn’t asked, I completely forgot to mention it to the paint technician so I didn’t realise it had an eggshell finish until the first coat dried. It wasn’t cheap paint and I bought enough to paint our entire living room, so the thoughts of having to buy more paint was exhausting [it ended up taking me close to two and a half hours to get home by bus that night as the bus I was on got cancelled mid-journey. I wasn’t looking forward to a potential repeat]. I figured I’d take advantage of the opportunity to make lemonade and help out anyone else who might be in the same situation.
It wasn’t long though before I remembered a hack my dad told me about a few years ago that I used on the
walls in our living room in our Dublin apartment to dull the shine on our even then glossier walls.
WHAT YOU’LL NEED
– plaster of Paris
– water
– tablespoon and cup measures
– a tub to mix the plaster of Paris
– paint brush, roller etc. and whatever else is needed to paint a room
– patience
RECIPE / PAINT HACK
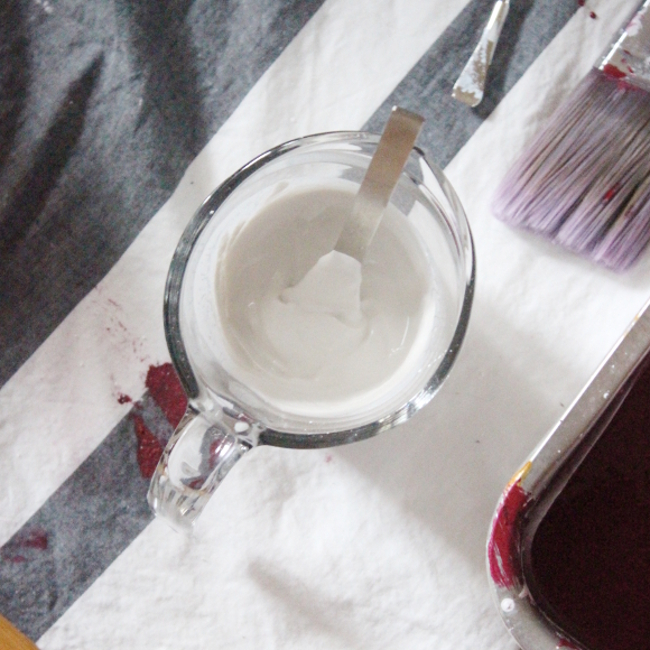
I mixed 3 tablespoons of plaster of Paris with 1 tablespoon of water in a jar. I mixed it thoroughly to make sure the plaster of Paris was completely dissolved and there were no lumps. It’s pretty VITAL [enough to warrant the use of capitol letters] that you mix the paste like this first and not under any circumstances do you just add the powder directly to the paint. PLEASE FOR THE LOVE OF DIY, DON’T DO THAT.
I used this amount of plaster of Paris mix for every 1 cup of paint I used. For the eggshell finish I had, I found this ratio worked out perfectly to give a matt finish. Try messing around with the proportions yourself if you’d like in small batches before committing to repainting an entire room and finding it’s still too shiny for your liking. I definitely found I needed about 10L of patience while I was testing out the ratios. There was a lot of waiting for things to dry before finding out if my ratio was right, but it totally paid off.
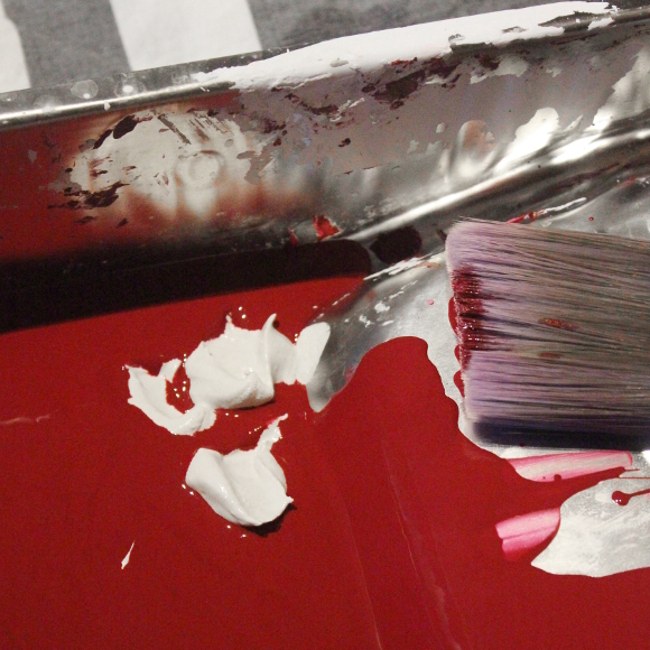
At the most I mixed up enough for 2 cups of paint as that’s how much my paint tray would take. To add the paste, place a few dollops of the paste in the corner of your paint tray. Using your brush, smooth the paste into the paint in a small corner of your tray and ensure it’s completely mixed and lump-free before stirring it in with the rest of your paint. Once all the paste is added, thoroughly mix your paint so the paste is evenly distributed. Thoroughly. If you think it’s all mixed, mix it for another minute to be sure.
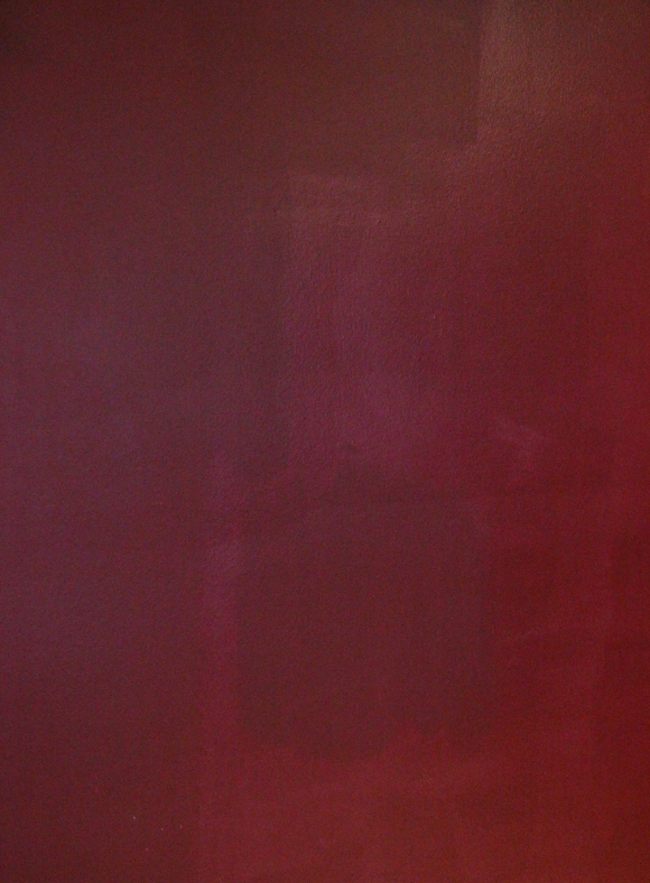
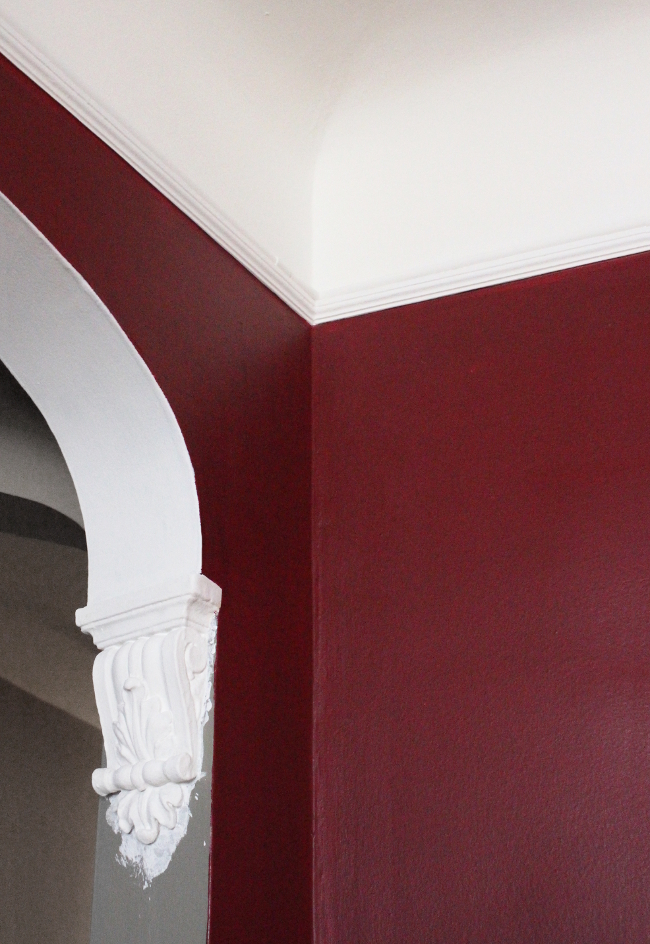
It was actually quite difficult to try and photograph, but you can just about see where I used the plaster of Paris paint vs. the eggshell paint above. To me, it made a huge difference and I was able to actually use the paint in our living room without it driving me up the walls.
I then used the paint mix as I normally would; I painted on the edging and rolled on the rest. I will say because of the plaster of Paris, don’t go for a lunch break mid painting. The paint in your tray will dry faster than it normally would and especially the paint on your brush and roller thanks to the plaster of Paris. If you do go for a break or want to finish on another day, use some cling film on your roller and brush to keep them airtight and that will stop the paint from drying. Once you’re finished, be sure to clean your roller and brush thoroughly as you don’t want any paint or plaster of Paris left in the bristles.
I am so SO SO happy with how it turned out. BEHR’S Classic Burgundy is my dream colour and I’m able to appreciate it so much more now thanks to having a more calming finish. I’m now almost finished painting the living room [I’m taking it one wall at a time – about as much as you can get done with a toddler] and I cannot wait to share what it looks like now. It’s so excellent.
PLEASE NOTE – I have not tried storing paint after adding plaster of Paris to it so I do not know what would happen to it. I don’t know if it would completely solidify or if it would be fine. It could make like Han Solo at the end of The Empire Strikes Back, or not. I really don’t know. But I am going to make up a small amount to store and I will report back as to the Han factor in a few weeks / months.