
I’m not sure if you could call this week’s DIY Friday technically a DIY, but it’s a revamp no less to a piece of furniture I bought 4 years ago. Our apartment didn’t come with storage for one’s small items in our bedroom, so I went online and bought this old wooden dresser. It was cheap as chips and did the trick. It held my garments, husbands manly stuff, and a drawer dedicated to pyjamas. Perfect.
In the early years of my apartment designing, I painted the top of the dresser with leftover paint; it was a weird greeny-grey paint, and I don’t know what the hell I was thinking to be honest. I quickly gave up on doing anything with our dresser and then 4 years happened. Yeah. For 4 years it sat like this in our room …
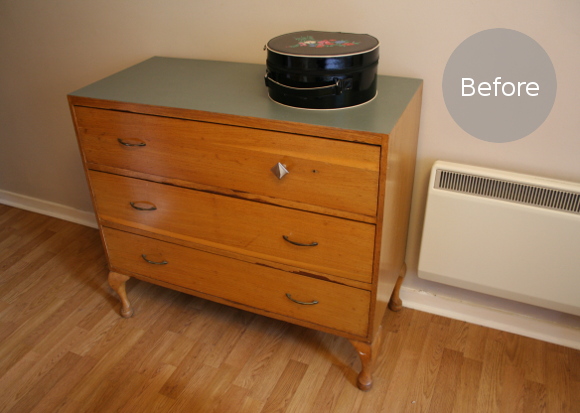
I think the word you’re looking for is ‘fugly’. I hated it and it was such an eyesore in our bedroom. Last month I finally had enough, so I got on my bicyclette, cycled to Rua on Capel Street and picked up a tin of Annie Sloan Chalk Paint.
Back in the day I had a major crush on the EDLAND line of furniture from IKEA. I daydreamed of having a house and filling it to the rafters with beautiful EDLAND armoires and dressers. Sadly, that line became extinct, but I was lucky enough to swipe a little EDLAND bedside table in their final sale {sadly, it was the only piece we had room for}. To date, it’s still one of my favourite IKEA pieces. I adore the dark grey, and it inspired me to pick Annie Sloan’s moody warm ‘Graphite’ grey.

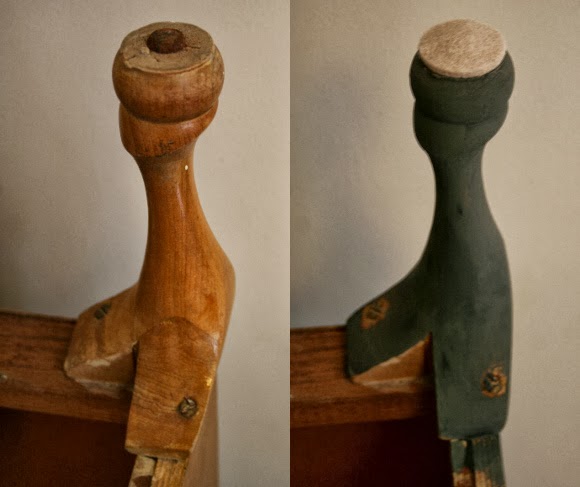
Enough of that. Onto the makeover! I cleaned the dresser of any dust and whatnot, took out all the drawers and flipped it over to start. He was in bad need of a pedicure, so I sorted that out while I was down there. Yes, I’m claiming this dresser to be man as no woman would let her feet look like that.
After two coats of paint on the feet I turned it right-side-up and gave the body two coats. Pretty straight forward.
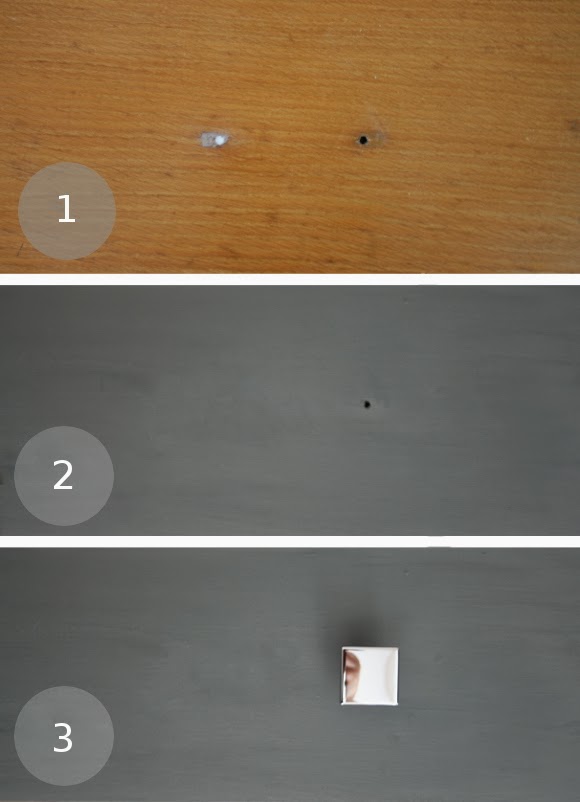
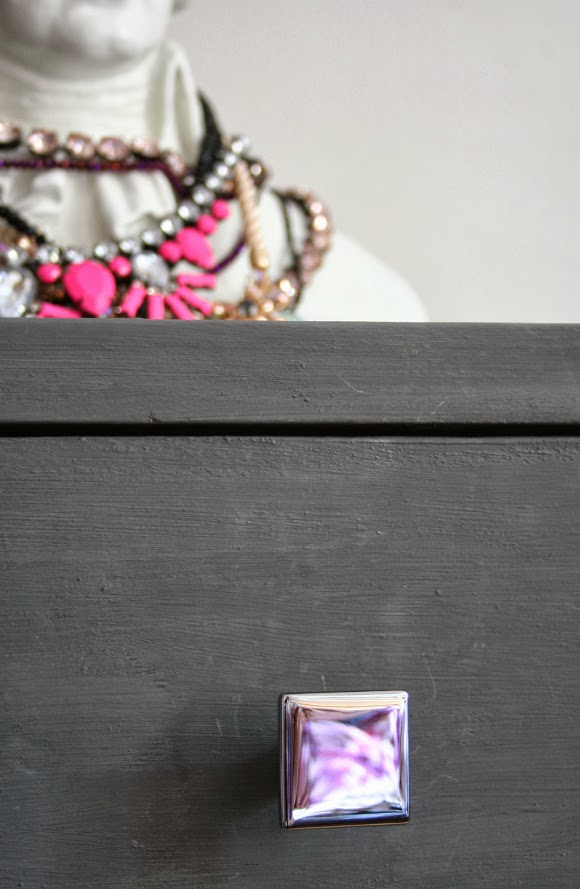
While I was at it, I updated the drawer pulls as well. I’m afraid I picked these up years ago in IKEA – they’re from the GLIRA range which is also now extinct. You can actually see one of these drawer pulls in the ‘before’ photo that I replaced years ago in premature revamp excitement. Our dresser kind of looked like it was winking for a very long time …
I took the old rusty drawer pulls off, filled the holes with decorators calk, let it dry, painted the drawers with two coats of paint and finally added my ‘new’ GLIRA pulls. And ta dah! It was much easier project then I thought it would be.
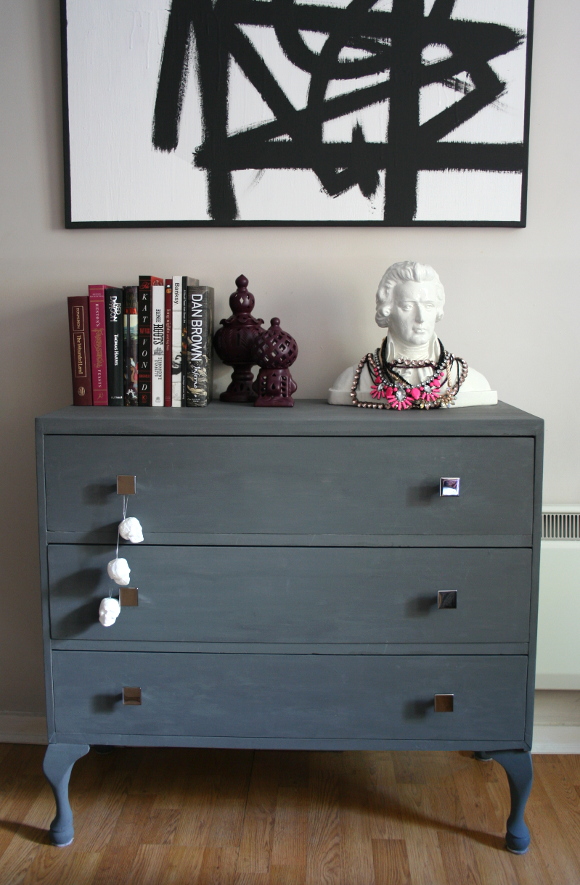
I’m so happy with the result and I really don’t know why I didn’t tackle this project sooner. I guess it was just one of those things you keep reminding yourself to do, and after years of mental torment, you break down and do it eventually. Please tell me I’m not the only one with ‘guilt projects’ that eat your brain like a zombie?
Anyways homies, it’s Friday and I cannot wait for the weekend to hurry up and get here. Happy Friday! xx A
Also featured – my Mozart jewelry bust and our living room painting.
This is fab! A simple yet dramatic transformation, and one that sounds like it was seriously satisfying to complete – the best kind! It looks wonderful, very glamorous now and well worthy of a central location in your place.
Lovely remake! Huge improvement. I was an Edland fan too, but never could find a place in my home for any of the pieces. My home is one big guilt project, sadly. Have a great weekend!
Lovely bit of DIY! The grey is so warm and modern. Yes, I have one of those projects that has been so long on the long finger (about 4 years) It's a Victorian vanity table that got one base coat, was left to dry and is now under a ton of craft projects (that are also on the long finger!)
wow you worked some magic on those toes. You my friend can give me a pedicure anytime lol. Gorgeous job all round on transforming that dresser. Must be satisfying knowing that you gotten rid of they odd looking grey/green left over paint and made the dresser into a gorgeous new piece. Love the nobs too.
Yep, looks amazingly better than before.
I wish I could find the time to get on some of my half finished projects. This is getting ridiculous. You are super inspiring, my friend.
That looks amazing Alex – what a transformation, you must be so chuffed! Beautiful styling too, as always. (And… does your black and white painting move around your home for styling purposes?! I love that picture, it's so striking!) How do you make everything look so cool?!
Maria xx
Ahhh! You caught me Maria. Yes, that's our living room painting. I haven't gotten around to painting another piece for our bedroom {just yet}, so for the sake of this post, l snatched it from the living room and temporarily added it for 'styling' purposes.
Well spotted 😉 There's no fooling you.
xx A
Haha – well why not, when it works so well in the photo! These are the tricks I need to take on board to improve my photos.. xx
Great blog! I will definitely visit it again!
looks great 🙂 I am a fan of chalk paint too! My local crafty shop stocks Authentico chalk paint – and I get on great with it. Only problem is I want all the colours lol
I know exactly what you mean Laura – I want ALL OF THE COLOURS. Especially baby pink these days. xx A