I am very excited and a bit nervous today to share that I’ll be participating in the Spring 2018 One Room Challenge as a guest participant! It’s something I’ve followed year after year and I’m excited to finally be participating this year. For anyone who found me here thanks to the ORC, hello! I’m Alex and I’ll be redesigning the dining room in our rented apartment here in Ottawa over the next six weeks as part of the Spring 2018 ORC.

We’ve been living in our Lower Town apartment in Ottawa for six months which has given me plenty of time to think of design ideas and decide on what I’d really like to do with our dining room. To give you an idea of what I’ll be working with, here is our dining room as it is right now …
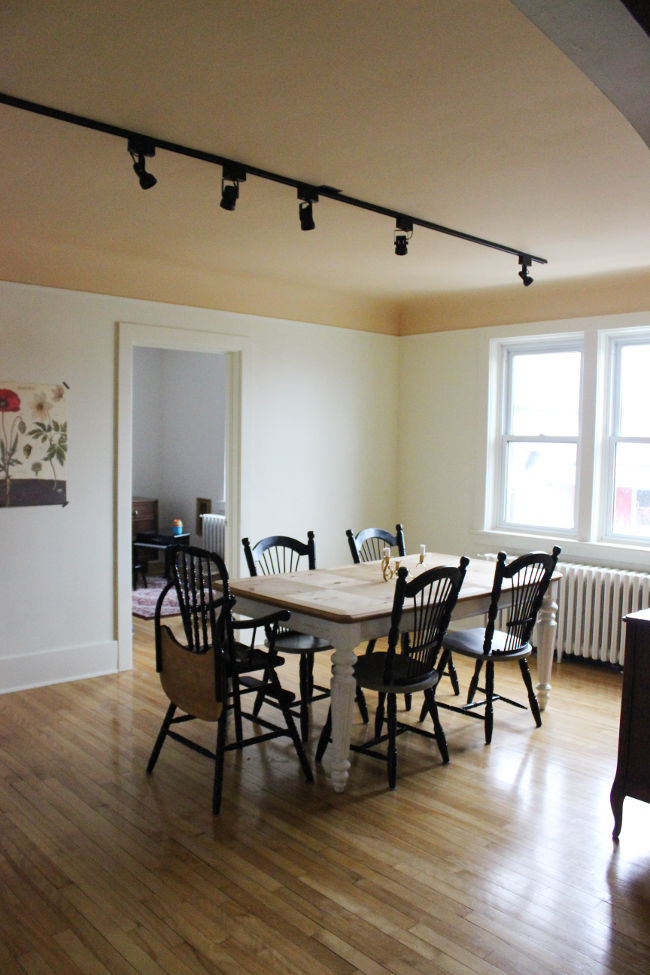
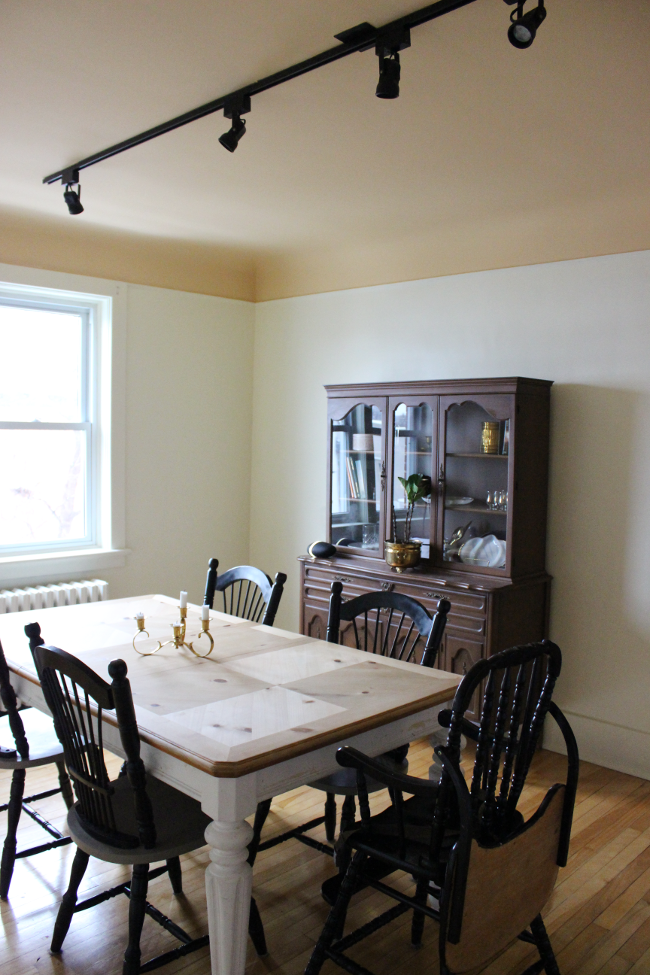
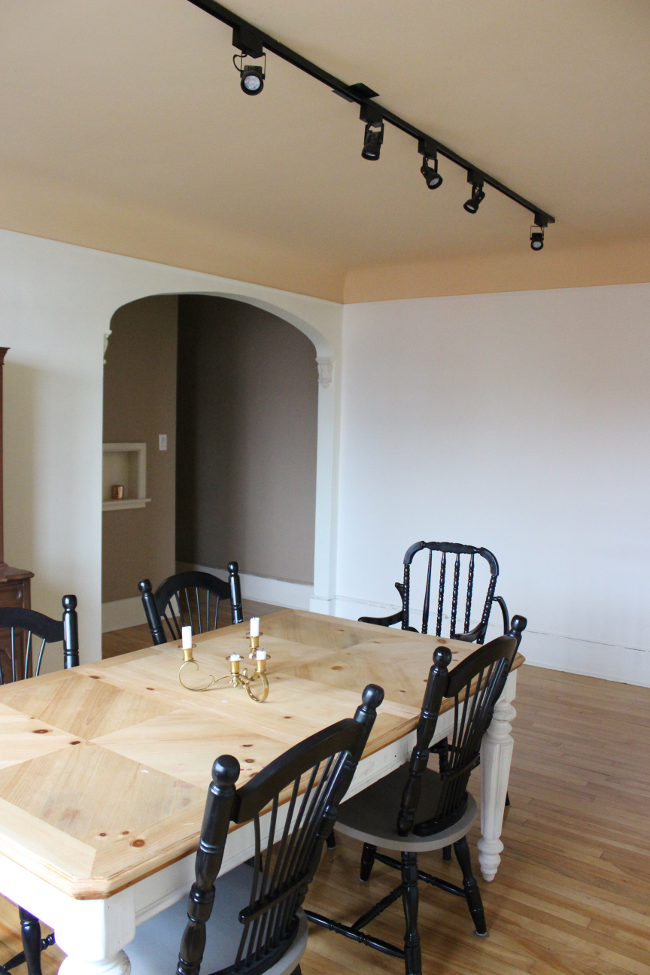
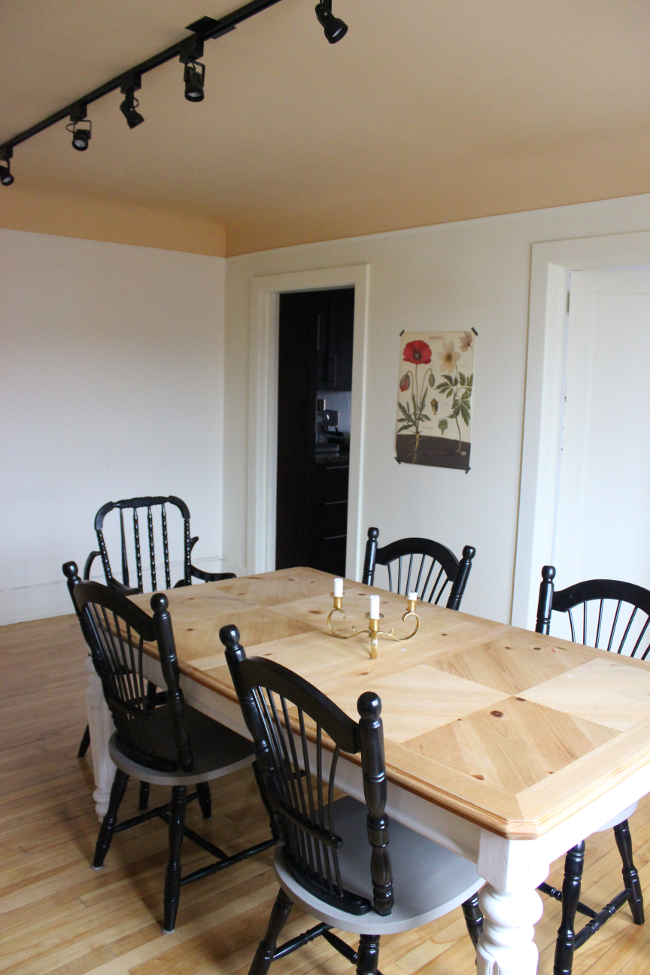
It’s the brightest room in our apartment and also where Cora and I spend most of our day. It’s the biggest room and I did think about maybe tackling a smaller room for my first ORC, but we spend so much time here as a family that it made the most sense to update it first. We’ll also have guests staying with us over the next few months so it’ll be a [more] welcoming space for them.
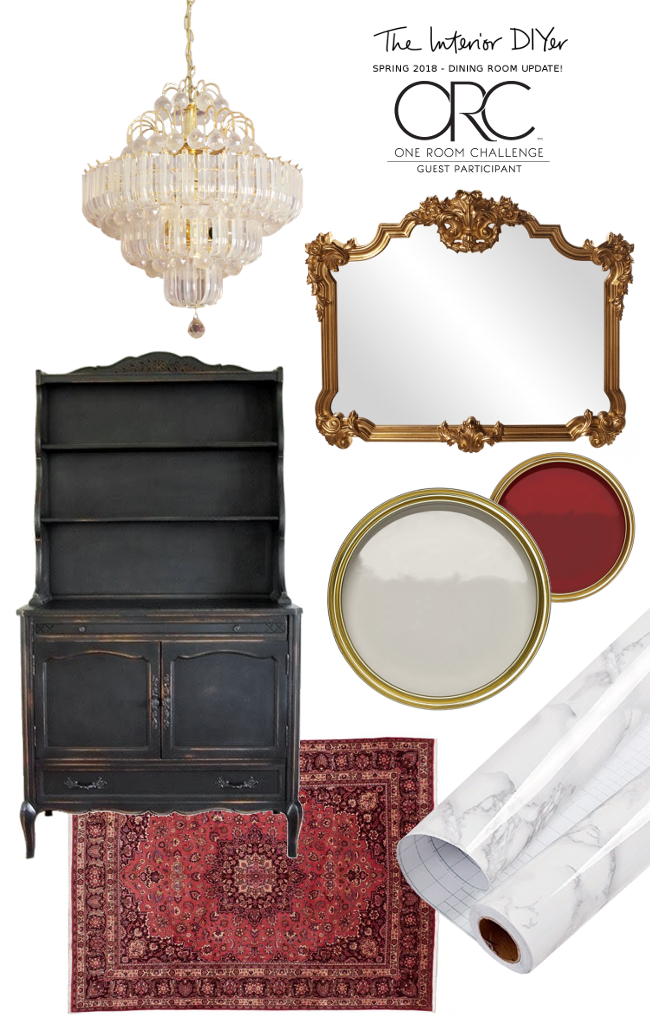
I’m hoping to source as many secondhand pieces as I can for this challenge. I will be getting some brand new pieces, but I’ll be putting a lot of thought into each piece before buying it. So starting from the top down, here’s an outline of what I’m planning on doing to our dining room! …
Change the lighting
I luckily already have a secondhand chandelier ready for our dining room. It’s very similar to our living room chandelier but bigger. I’ve been patiently waiting for the day when we can take down the track lighting in here as this cluster does absolutely nothing for this room.
Paint the ceiling
It’s not as intrusive as you might think, but it’s time for peachy ceiling to go. I have leftover ceiling paint from updating our living room so I’ll use up the remainder of that.
Paint the walls greige
It’s taken me a while to come to terms with it, but I’m a big fan of greige [grey + beige]. I like neutral walls but I’m not very comfortable with stark white or cold greys, and greige is just the right mix of neutral and warm I’m looking for this room.
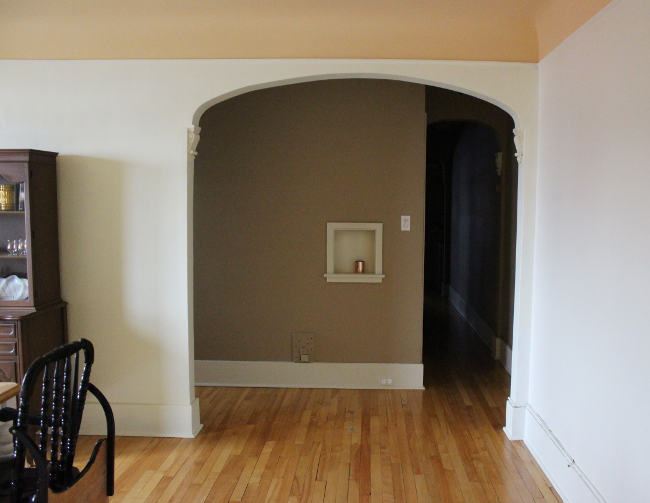
Burgundy focal wall
There’s an opportunity to make one of our hall walls [seen below] a focal wall as part of my dining room update. It’s a dark area so I’ll be embracing it and painting the wall burgundy with the leftover paint from our living room.
Contact paper dining table
We inherited the dining table from the previous tenants in our apartment. It truly is a beautiful table, but it’s seen better days; the legs are scratched and painted different colours and the top is dotted with spilled red nail polish, coffee stains [that I can’t remove] and has a finish I’m not in love with [the knots are too dark for my liking and I’m not keen on the pattern]. So instead of buying a new table, I’ll be painting the legs and covering the top with faux marble contact paper [like what I did with our coffee table].
New seating
We bought our dining chairs secondhand and they have not held up well. Along with my persistent hip problems, I can’t sit in them for very long without immediately regretting it. And they’re falling apart. The chairs, that is. And my hips too I guess. So I’m on the lookout for well made chairs with a bit of a modern design, or possibly two chairs and a bench? I’m still open to options.
Large vintage mirror
Just wait until you see the beauty of a mirror I found on Kijiji. Once the walls are painted I have the tall task of safely securing it to one of the walls without bringing the entire building down.
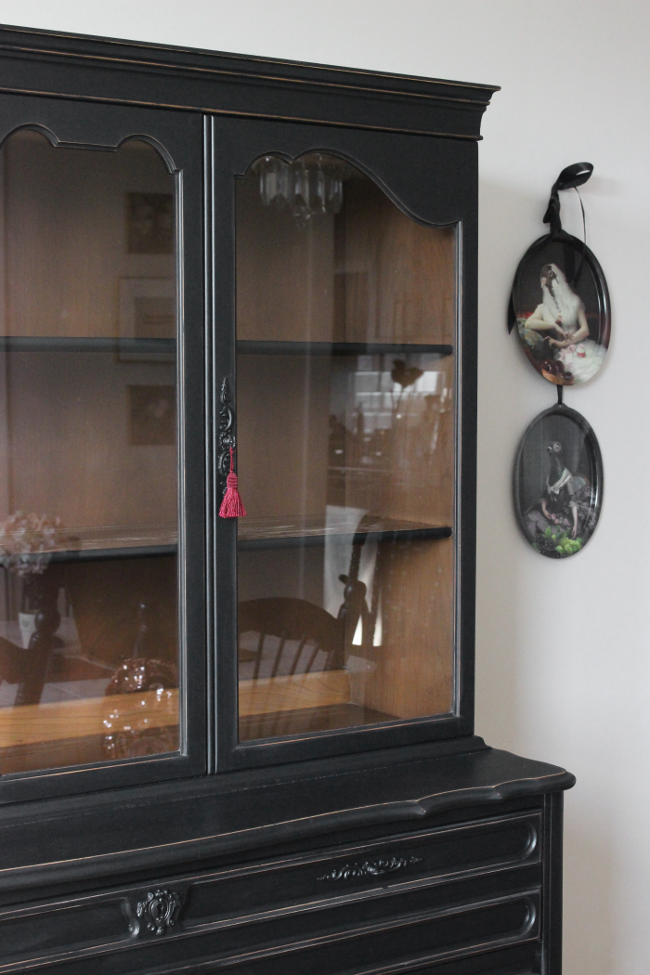
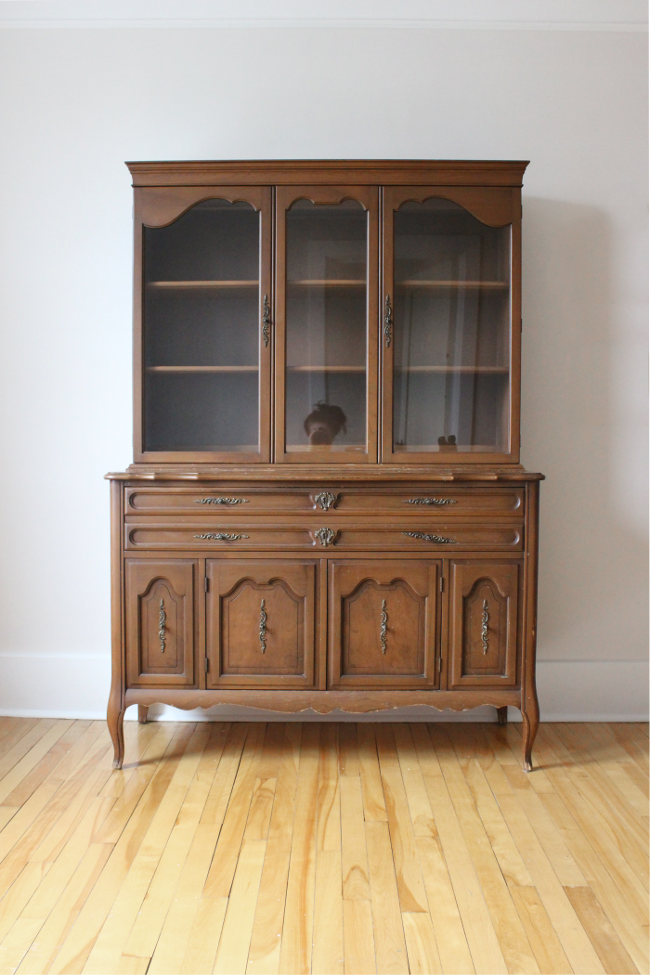
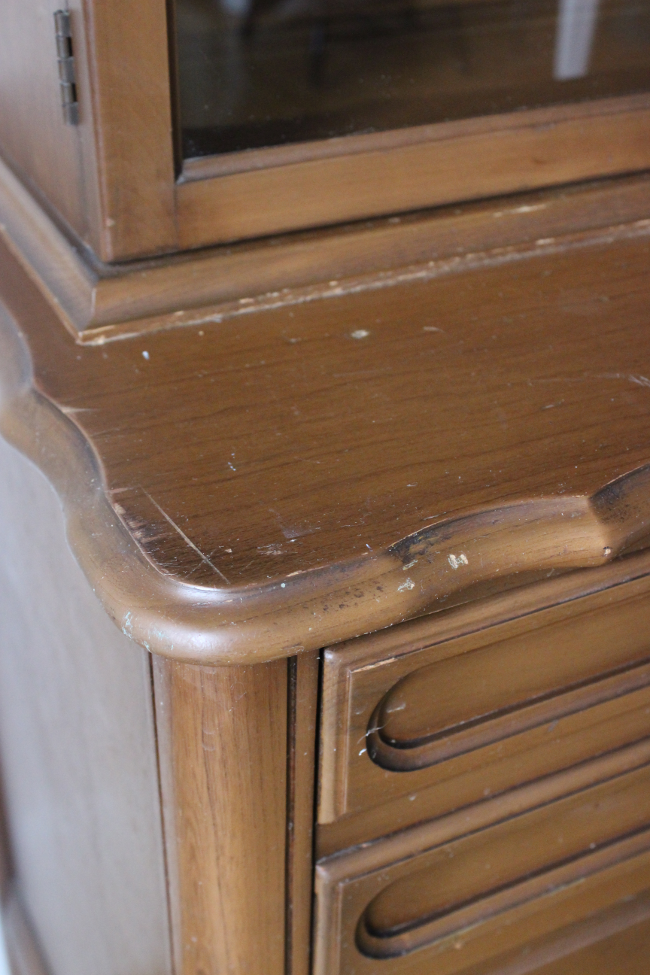
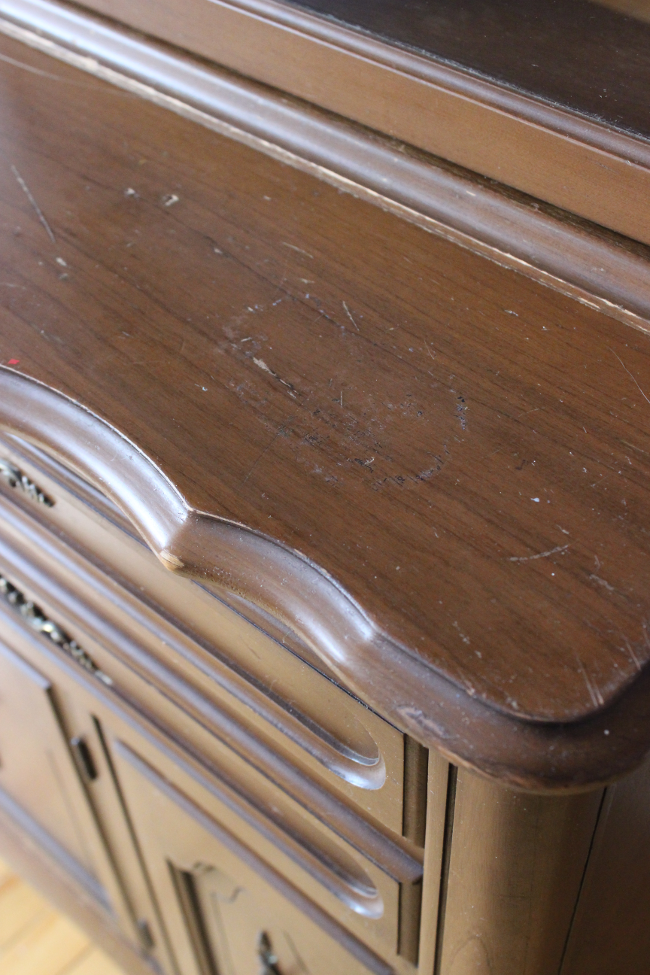
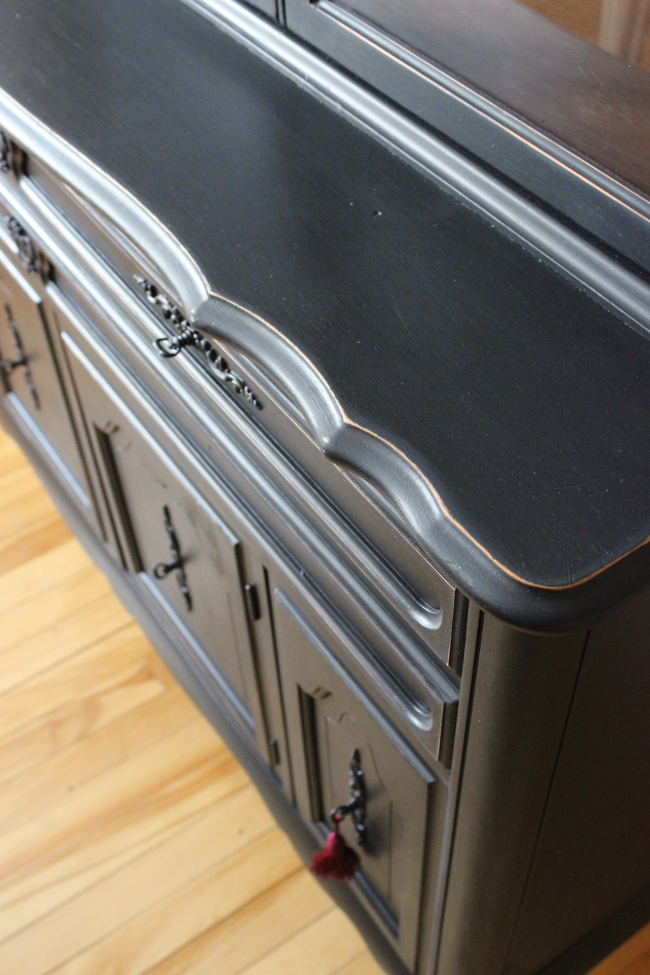
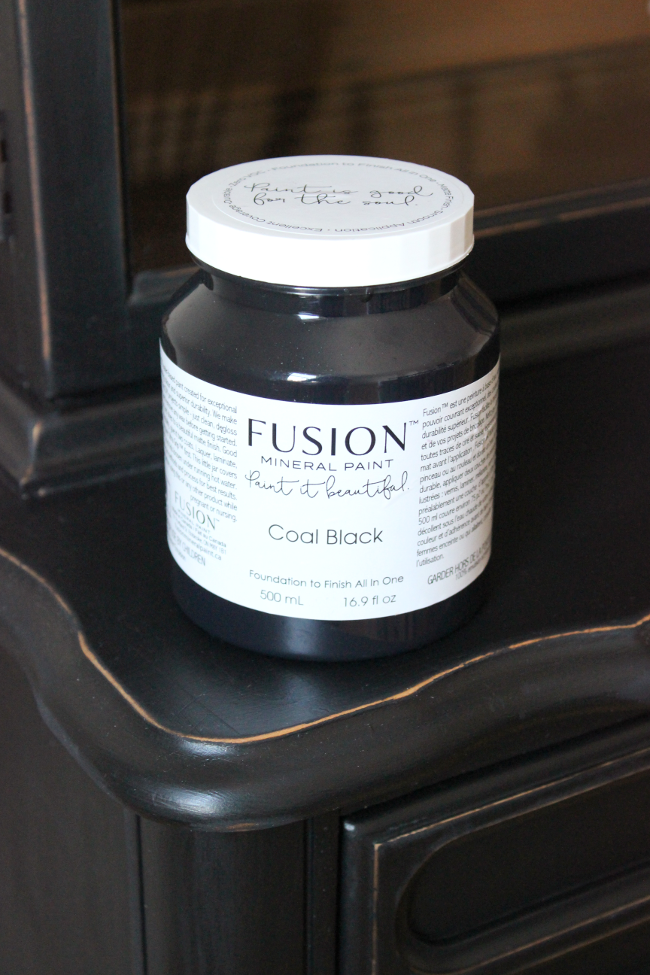
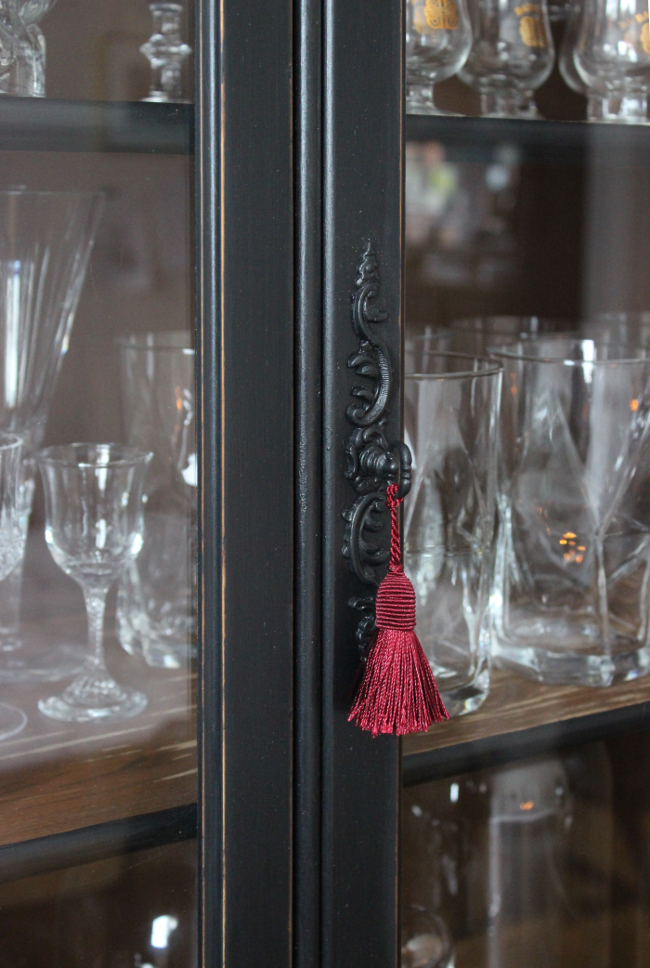
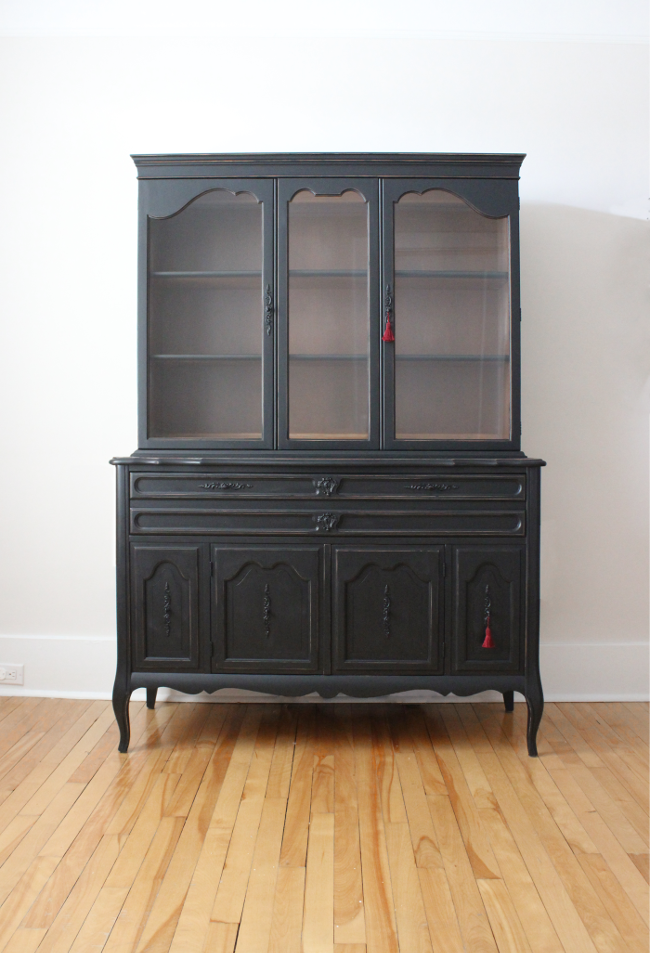
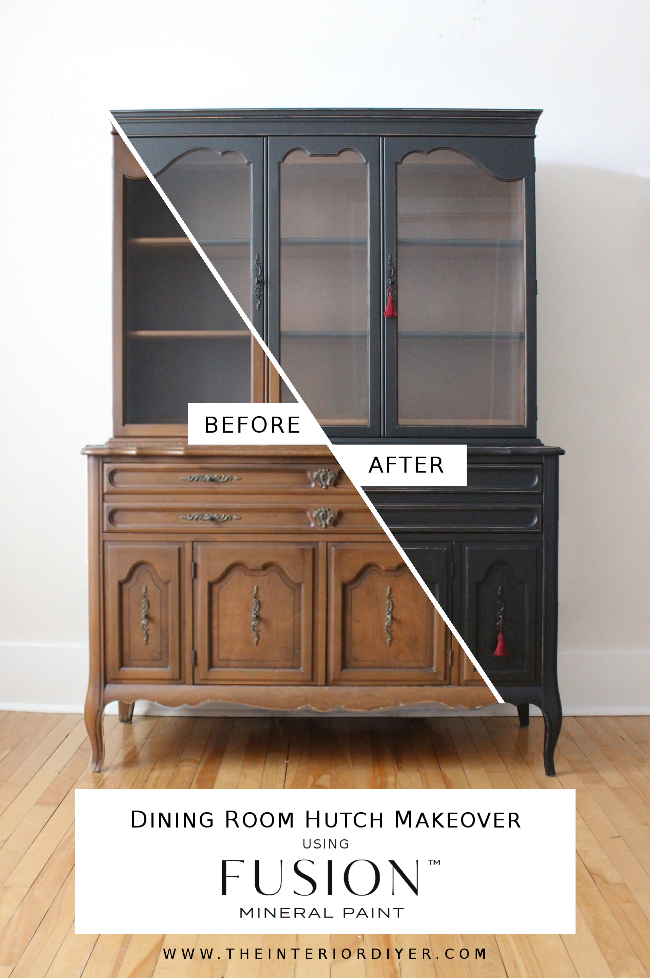
Paint the dining hutch
I found this beautiful hutch on Kijiji for just $30 a few months ago. The wood finish is terrible so I have no hesitation painting it with Fusion Mineral Paint‘s shade of Coal Black and distressing the finish a little to make it a little less perfect.
I have so many more details and ideas to add to the space, but for now I threw together the below to give you an idea of how I’m hoping our dining room to feel. I’ve been hoarding little thrifted treasures for this project for what seems like forever, so I really can’t wait for all my ideas take shape! I’m still in the excited stage and waiting for the WTF were you thinking trying to do this in 6 weeks with a toddler underfoot? stage to set in. Give me a day or two and I’ll be panicking.
Check out the full list of Guest Participants here! I should have stayed up and added my link when the link-up went live, but I slept through my alarm 😅 #MomProblems
Week One – Week Two – Week Three – Week Four – Week Five – Week Six