One Room Challenge Spring 2020 – Week Two!

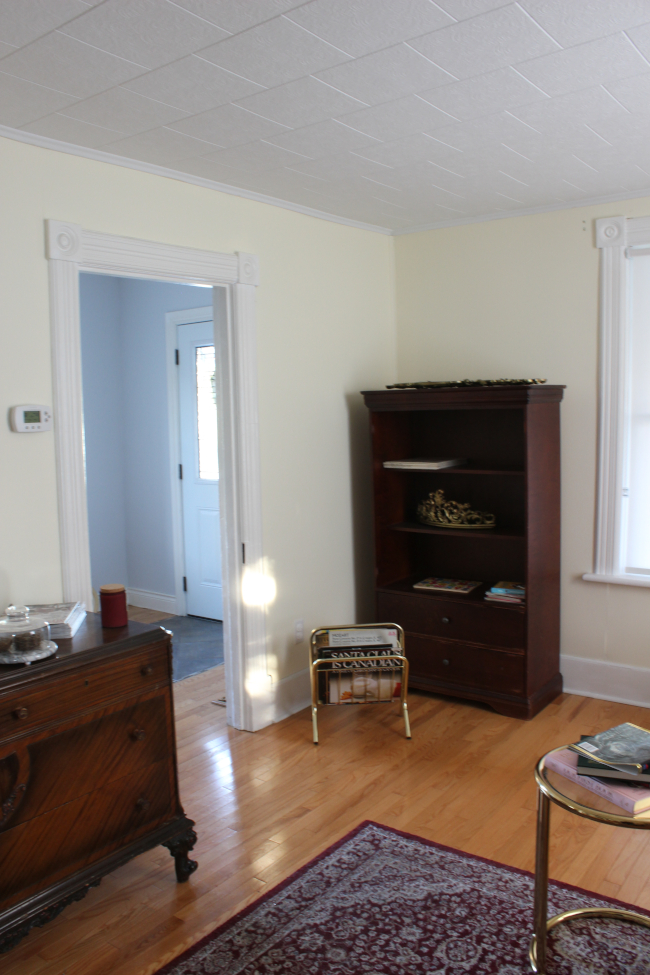
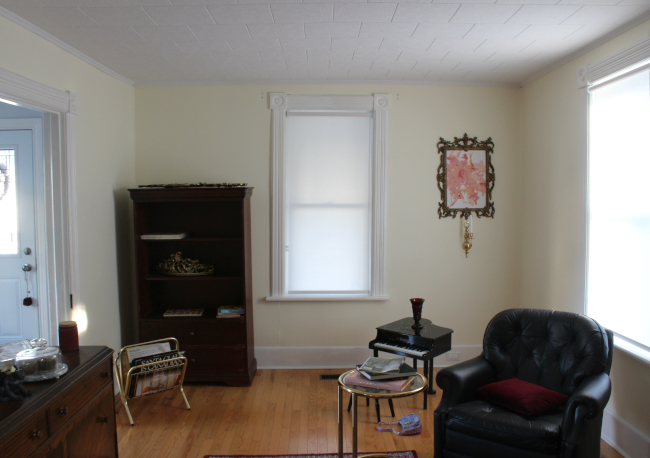
My first week in the One Room Challenge has actually gone really well considering all that I’ve uncovered has pointed out more things that need to be fixed [something I was prepared for], but I am still so excited to transform this space.

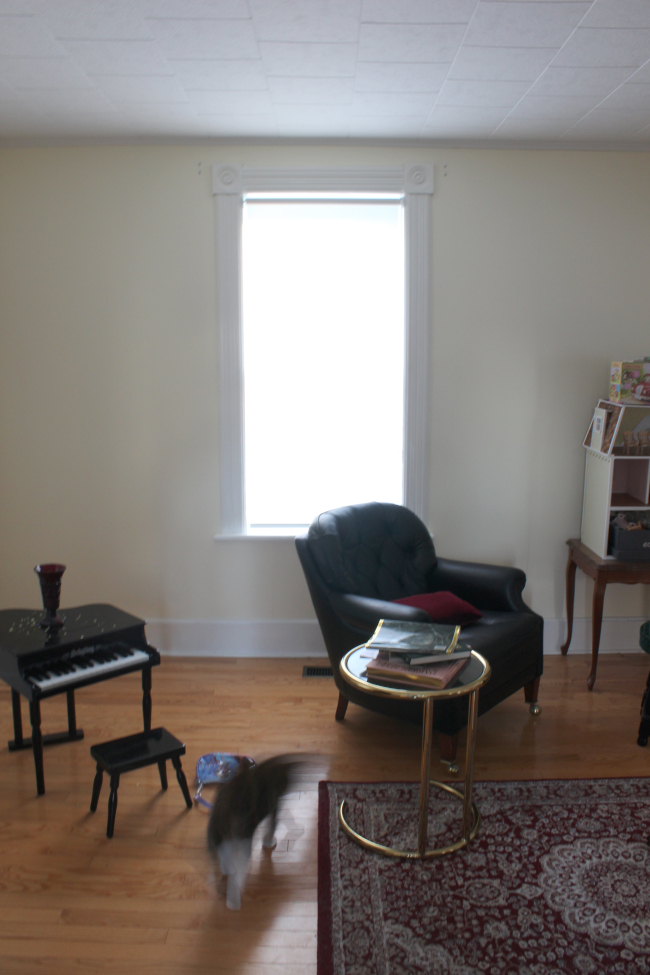
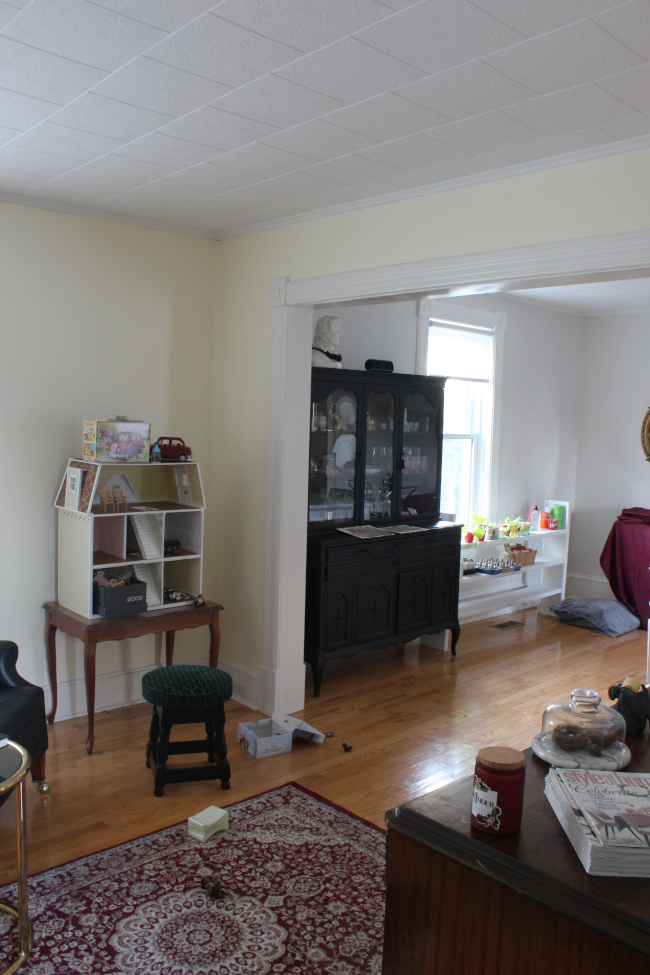
You can blame my lack of experience, but I’m looking forward to correcting the wrongs that were made over the more recent 50 years to this house’s history and making the front room in our house a real part of our home and somewhere to enjoy. Not somewhere where furniture goes to die.

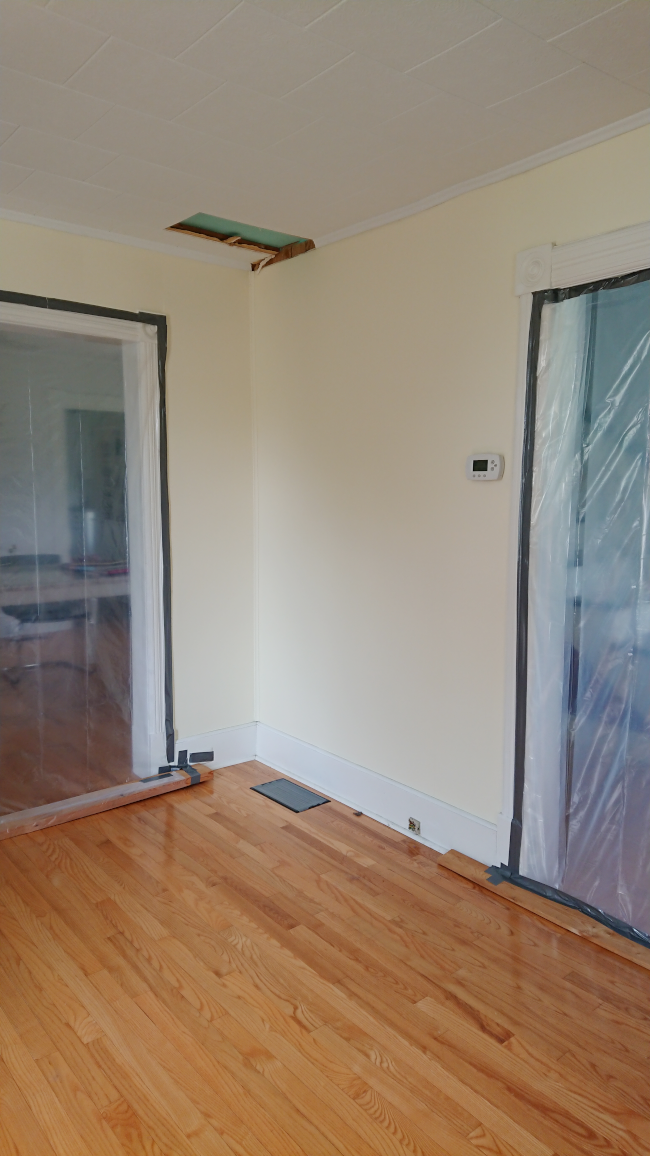
I first wanted to get our ceiling tiles tested for asbestos as I was conscious that some older ceiling tiles can have it. This was the main deciding factor in moving ahead with our ORC; if the test came back positive and we couldn’t rip out the tiles ourselves, then we wouldn’t be tackling this room until a professional could do it. I called a few places and thanks to speaking with a few knowledgeable people, I found out if you bring a tile sample in yourself [$90] vs. getting a professional to call out to your house and take the sample [$650 – no exaggeration], you can save yourself a boat load of money.

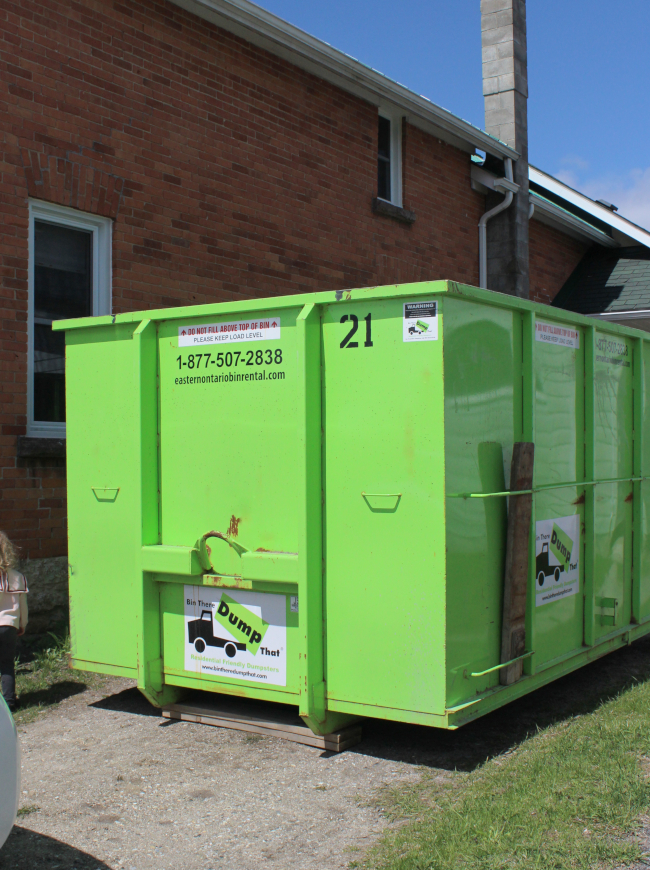
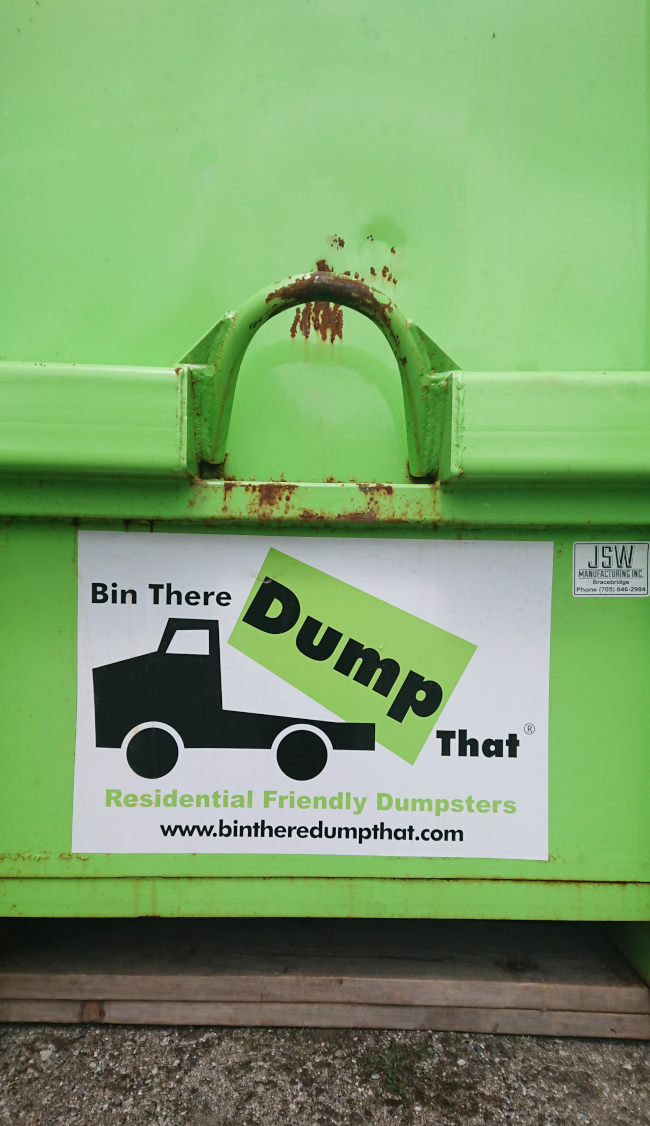
Up the ladder I went, ripped out one tile, delivered it for testing and one week later we go the results we were hoping for! The next day I contacted Bin There Dump That, who so generously offered to partner on our ORC and provided a 20-yard dumpster, I then ordered the dumpster from them and two days later it arrived and I got started on demolishing our front room.

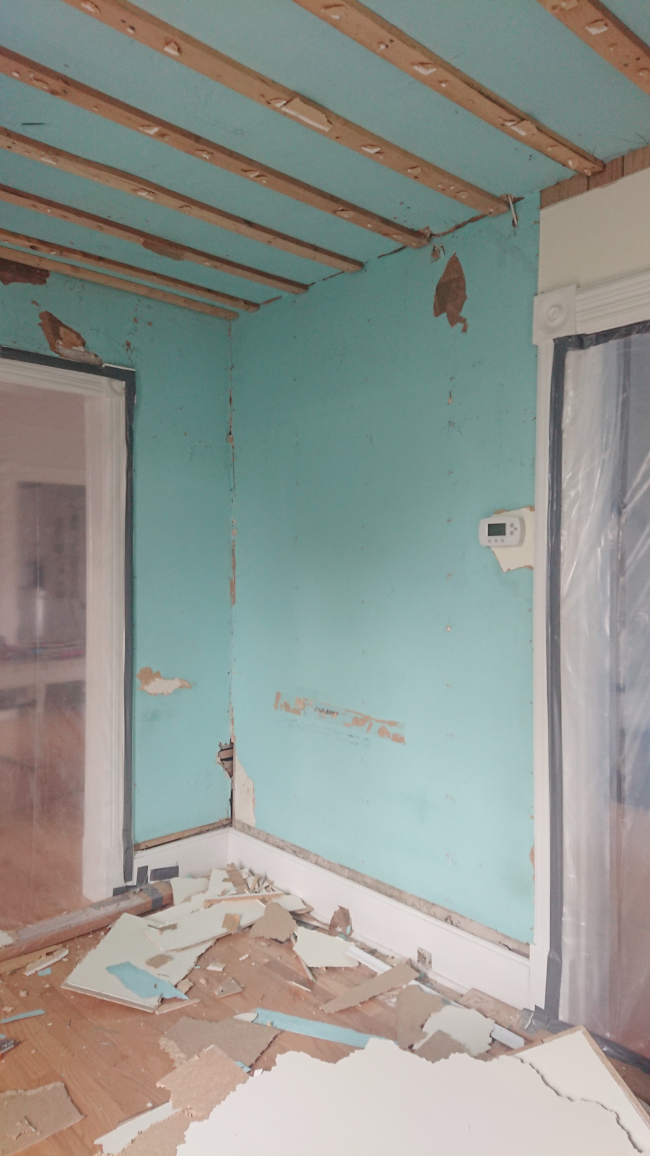
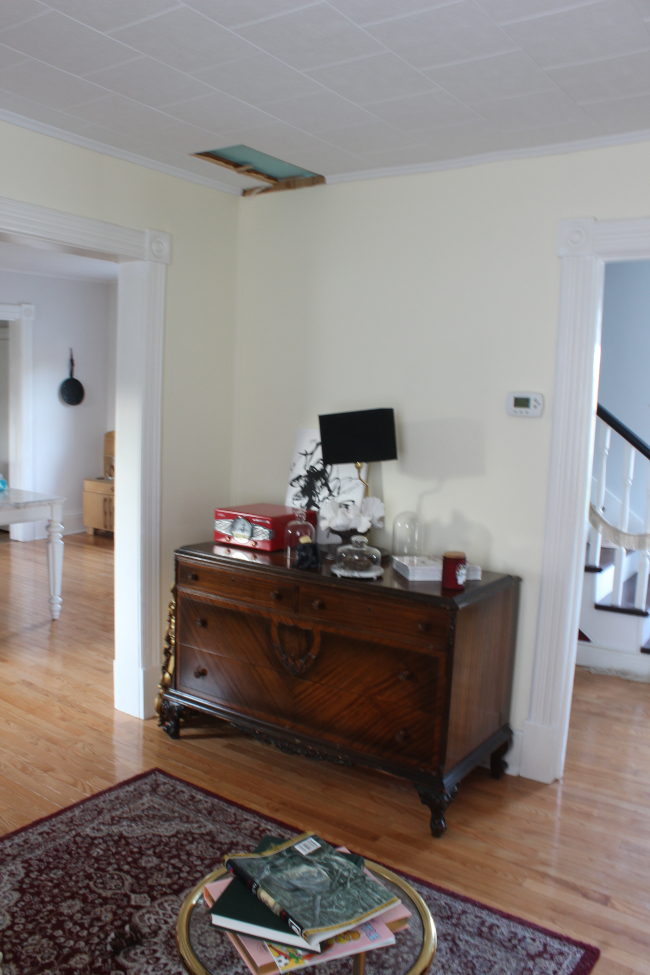
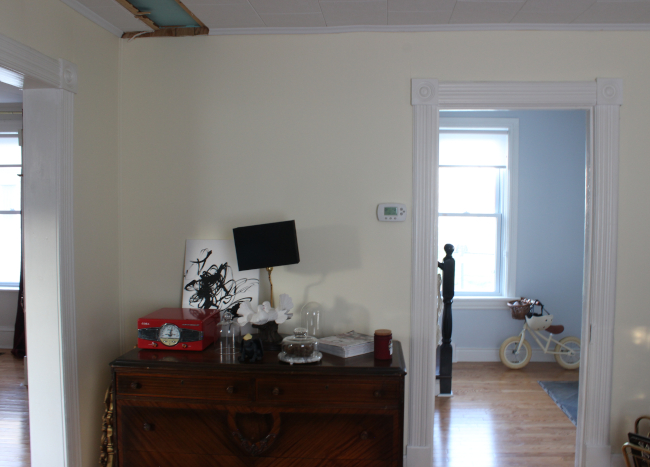
Down came the ceiling tiles followed by the 80’s faux wood paneling [this kind of stuff, not this stuff]. Both were hiding a plethora of sins. The original 100-year-old plaster on the ceiling and the walls were in terrible condition. They may not have been this bad when they were originally covered, but this is the reason they both were both covered. A case of if I can’t see it, it’s not happening series of design choices.

This is where I got nervous. My dilemma was; the original walls and ceilings are in terrible condition. I want to conserve them, but I can’t. Is it okay for me to rip them out, or is that an even bigger crime against historical architecture? I video called Dad DIYer, who confirmed that the best [and really only] way to move forward is to rip everything out. I was prepared for this and wasn’t disheartened by it, I just wanted to make sure I was making the right decision.

As usual, you can see all the Guest Participants progress here! Check back here next week when I introduce our crowbar to our 100-year-old plaster …

Week One – Week TwoWeek ThreeWeek FourWeek Five
Week SixWeek SevenWeek Eight

DISCLOSURE - while this post is not sponsored, I did receive the service of a dumpster rental during my One Room Challenge free of charge from Bin There Dump That in exchange for a blog post. I only work with brands that I like and of course, think you will too. Thank you for supporting the companies that support The Interior DIYer.

Bin There Dump That

When Luke from Bin There Dump That contacted me in early February of this year to see if there was a project we could work on together, it was a pretty serendipitous opportunity. At the time I was considering taking part in the upcoming One Room Challenge for the first time as a homeowner. In my new-home-ownership excitement, I figured if I was going to partake in the ORC I was going to go all out and do a proper renovation. Not just painting a room. Like, divide and conquer that room, then paint it. It was a very stars aligning moment when I heard from Luke and felt it was too perfect an opportunity on our first renovation project.

After a few emails and tests [I first wanted to test our ceiling tiles for asbestos before confirming we could move ahead with doing any renovating (which tested negative, yay!)], last week I called the Bin There Dump That Eastern Ontario branch and spoke with Destiny, who took me through the ordering process. Bin There Dump That is North America’s largest residential-friendly dumpster company, so it took less than 10 minutes for her to locate and coordinate a 20-yard dumpster to be delivered when we needed one in two days’ time.

Threenager for scale.

It was a very straight-forward process. On Friday morning Jess delivered our 20-yard dumpster. Even though our driveway is unfinished and rough, she put down large wooden planks to protect it. The dumpster itself isn’t touching our driveway at all so if you had a beautiful driveway I can easily see how it would be fully protected, regardless of how much chaos is happening mere inches above it.

This was one of those grown-up type tasks I had blown out of proportion in my head, but felt I successfully graduated from once I had done it. Ordering a dumpster. It was so easy to order and I’m very thankful for how helpful everyone at the Bin There Dump That team has bin (#DadJoke).

DISCLOSURE - While this post is not sponsored, I did receive the service of a dumpster rental during my One Room Challenge free of charge from Bin There Dump That in exchange for a blog post. I only work with brands that I like and of course, think you will too. Thank you for supporting the companies that support The Interior DIYer.

One Room Challenge Spring 2020 – Week One!

I am super excited to share that I will be partaking in this spring’s One Room Challenge as a guest participant! Pretty much since buying our first home last autumn I’ve been weighing up which room I would makeover first, and this time as a fully-fledged ORC participant [vs. when I participated in spring 2018 as a renter].

I decided to update the room we’ve called up until now the front room. We call it that because it’s at the front of the house and it’s a room. A room that serves zero purpose other than to be Random Furniture Limbo™ and somewhere to put Cora’s dollhouse. It’s basically is where furniture goes to die, but I want it to be so much more. I want it to be a room we want to spend time in.

Before I detail my plans, I want to acknowledge that I am taking this project very seriously during the current COVID-19 pandemic. I will not be hiring anyone to come into the house to do work. I will be doing all the work [with help from Robert when I need a second pair of hands]. Anything that comes into the house will get the same treatment everything gets these days; it’ll be Lysolled within an inch of its life. Anyone who follows knows I prefer to source items secondhand. I will continue to do so as it’s very budget-friendly and I strongly believe it is more environmentally responsible than ordering brand new everything. Anything secondhand coming into our house will be Lysolled and where needed will sit for 2 – 3 weeks in our shed to be on the safe side and to kill off any unnecessary visitors. Because of the pandemic, we have 8 weeks to complete this ORC project vs. the usual 6. I am not going into this project being flippant. Trust me, I’ve thought of all the scenarios and have the stress-induced acne to prove it.

Now that that’s out of the way, onto my ORC!

Our front room is okay at the moment. I mean, it’s livable. But I have big plans. The main items I want to achieve are: 

CEILING AND WALLS
Both and all will be ripped out. The 50’s / 60’s style ceiling tiles will be removed, the faux wood grain panelling will be ripped out [the entire room has that 80’s wood paneled walls, but it’s been sneakily painted since so you can’t tell it’s there], and then on the exterior walls I will be insulating, drywalling, plastering, then adding the good-kind of wood paneling treatment on the walls and finally painting them all a dark, warm gray. It’s a tall task but it’s also a small room so I’ll take my time. 

I’ll be partnering with the incredible team at Bin There Dump That, who very thoughtful offered to send a 14-yard dumpster to help with our renovation. It will be arriving tomorrow and I cannot wait to throw every single ceiling tile into it with a smile on my face. I’ll detail the whole process next week! 

SHELVING
At the far end of the room [as seen wall above] using secondhand shelving units on either side of the window, I’m hoping to create a built-in-shelf-feel as well as make a window seat under the window. I’m planning on painting the shelves white, but I’ll flexible with maybe painting them the same colour as the walls [but am not sure if that might be overwhelming]. Again, I will be using as much secondhand as I can and using up the plethora of leftover wood scraps we inherited when we bought the house. Waste-not.

FIREPLACE
I so desperately want a fireplace somewhere in the original section of our home, but without having to spend $10,000 to install it. So, I’ve sourced a fireplace mantle secondhand for next to nothing which I’m hoping to place where Cora’s dollhouse currently sits [as seen above]. The fireplace is currently oak and I’m debating whether or not to paint it or leave it as is. I have 8 weeks to decide so I’ll take my time.

There will be some items I want to buy new, one being a focal rug. It’s not something I want to source secondhand right now and I’d prefer to buy a new one. If anyone can suggest a great Canadian company that specializes in over-dyed or faux vintage rugs, please let me know! I have a backup rug but would rather support something more local.

Check out the full list of Guest Participants here! I’ve had a quick look at this year’s projects and they are amazing. I’m equal parts looking forward to starting and also WTF am I about to take on and I don’t even know it yet. I guess time will tell!

Week OneWeek TwoWeek ThreeWeek FourWeek Five
Week SixWeek SevenWeek Eight