Release your inner geek

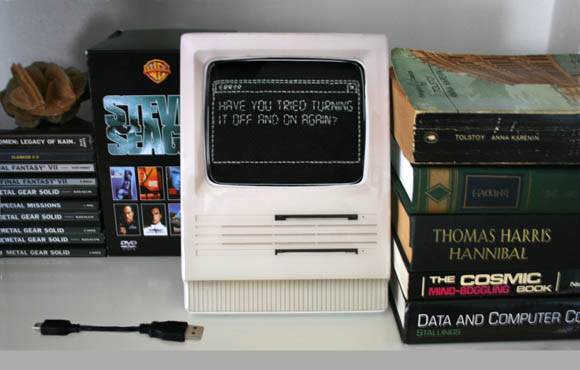
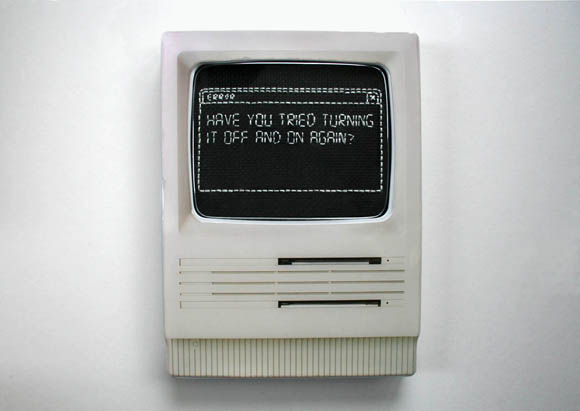
For Christmas I made this old-school IT Crowd inspired cross stitch for fiance. He’s in the middle of his final year studying Computing Science {aka, IT}. He’s one of those guys you can tell is an IT guy – curly hair, cute glasses, pale skin – just how I like them. So in an act of hindsight for his impending career, I created this little cross stitch for him for Christmas. For anyone who may not be familiar with the phrase “have you tried turning it off and on again”, please see below –

Unfortunately, anyone looking for the old computer picture frame I used won’t have much luck. I bought this frame from Urban Outfitters some time ago. Sorry. I had it stashed away for just the right moment.
For this picture frame, I measured the size of the frame window at 13.5 x 11cm, or 72 x 57 stitches. From that, and through the magic of excel, I was able to draw a basic layout. And this is when I realized the typical cross stitch ‘x’ formation was not going to cut it for the text.  

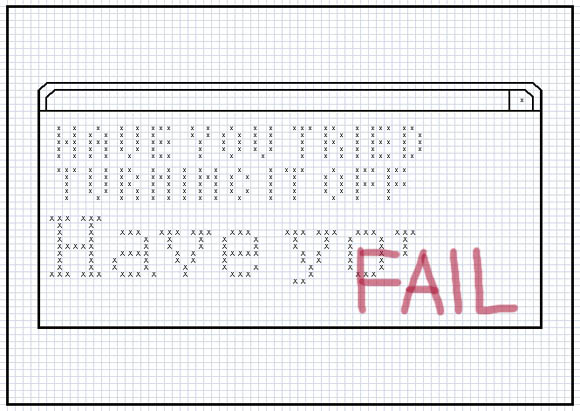
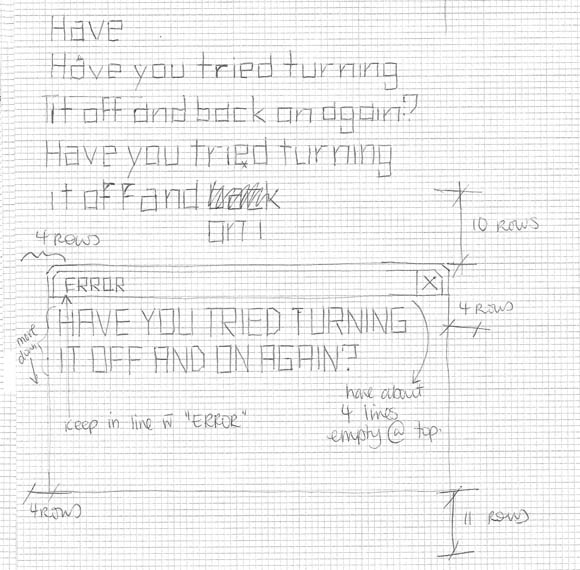
Below is my scribble process with how I came about the text format. Sometimes pen and paper just works better. I managed to find a text style much more in keeping with my old-school computer stitch. 

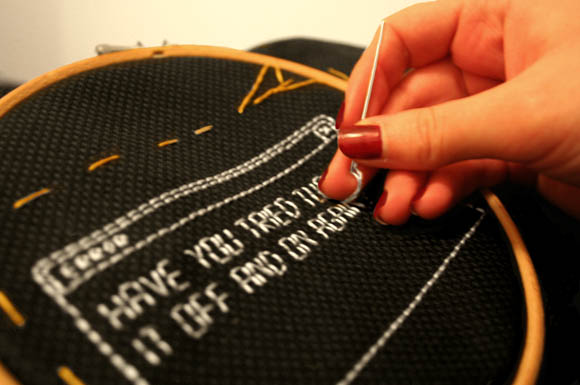
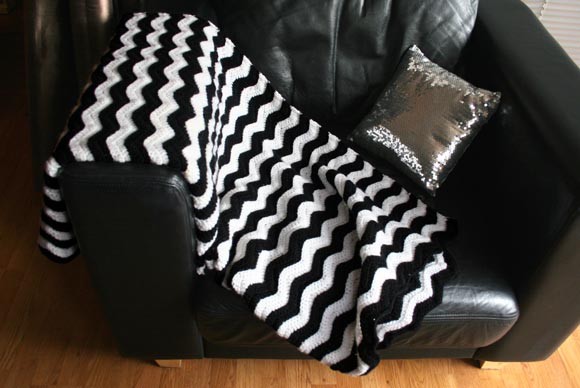
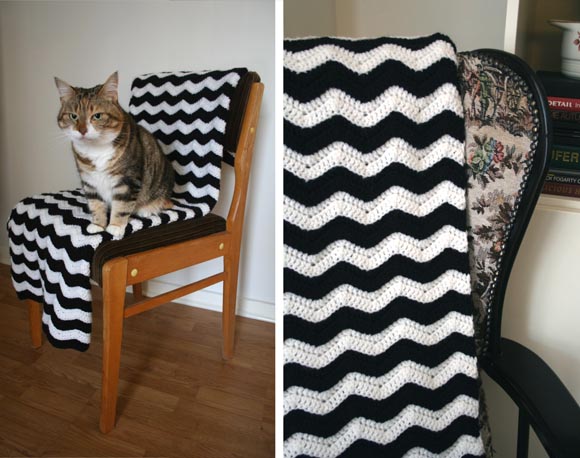
Only taking an hour to stitch, my present was complete! Fiance loves his newest nerdy addition to our living room. Below, his new geek cross stitch in action. Look at it go.
Additional note: a good piece of advice was read out at my graduation from the CEO of Microsoft Ireland – “Always be nice to nerds because chances are, one day you’ll work for one”. And in some cases, marry one 🙂

DIY – Seasonal switch plates

This little project has stood the test of time.  So far. Knock on wood. I originally made my seasonal switch plates {or ‘festive flickers’ as fiance calls them – although, I think that sounds dirty} over seven years ago, and year after year, we put them up. It only took me seven years to sit down and photograph them … 
They’re one of the first things I like to put up at Christmas, and we always get compliments on them. So below I’ve written a tutorial on how to make them, so that you too can revel in the glory of everyone saying how much a Suzie Homemaker you are. 

What you’ll need: a cereal box or supermarket pizza box {thin cardboard works best}, paint in a range of festive colors, PVA glue {to glue on glittery things. It also dries clear}, glittery things of your choice like snowflakes or stars, scissors, paint brush, a black pen, pencil, and a ruler.

Step 1: decide on a template for your seasonal switch plates. I  designed a silhouette inspired a little by Russian architecture. I have a secret fascination with Russia. Anyways, I drew my template on a folded piece of paper – when I cut out the design and opened it, it was a perfectly symmetrical template. I also cut out a square the size of my light switches. To make sure the templates fit each switch snugly, I fitted and trimmed the inside square with a pair of scissors {scalpel or exacto knife} where necessary. Step 2: with your pencil, draw a Christmassy scene. I went with a different design for each switch plate, but there’s no harm in doing the same pattern en masse. Step 3: once you’re happy with your design, paint it in. I began with the gold background, which I needed to build up with two layers of paint. Once the gold was dry, I went ahead and painted the remainder of the scene.

Step 4: When your paint has dried, use a  black pen {or fine marker} and draw an outline around your design to really make it popStep 5: attack every boring light switch in your home. 

Tip: use a small amount of blue-tack on the back of each to ensure they don’t fall off the wall, if they’re not super snug.

I’ve also done monogrammed seasonal switch plates for our bedrooms. They’re a lot less fussy/time consuming to make, and make a classier more sophisticated impact.

Happy craft hagging 🙂

Black and white afghan

At long last, my monochromatic / black and white afghan is complete! I wanted to photograph and blog it yesterday, but some unfortunate happenings came about involving homemade soup, spillage, and said afghan needed an emergency wash. But myself and blanket have made it through in one piece. Both physically, and mentally.

To date, I have to say this was the toughest thing I’ve had to photograph. I took over 150 photos of my blanket, and only four made the cut. I had some more than willing kitty props, except that Juniper {above} doesn’t exactly look happy. I promise, she’s actually a happy cat. You’ll just have to trust me. And every time I positioned the blanket to take a picture, Toshi was on it like a car bonnet.

I was so surprised with how fast I was able to get crochet this blanket. I casually crocheted it for 6 weeks, doing a couple lines each evening; I sound like a hardened crack addict. I averaged at 20 minutes per row, which works out at 30 hours of continuous crocheting. Or realistically, 6 weeks.

I crocheted until I used up all the yarn. It’s the perfect length for sitting on the couch watching tv. Snug as a bug. 97 x 137cm (38 x 54 inches). I tidied away all the crochet gobbledy-gook after the jump. Enjoy!


Pattern Note
The original Lion Brand Yarn Shaded Ripple Afghan uses twice the size of crochet hook (9mm), and half the chains (76ch). Since I used a 4.5mm crochet hook, I had to double the amount of chains. In the end, it makes up the same size blanket. Original pattern can be found here. Below are details on how I made my blanket.


Materials
400g skein of black yarn
400g skein of white yarn
Crochet hook size 7 / 4.50mm
Scissors

Abbreviations
ch(s) – chain(s)
dc – double crochet
rep – repeat(s)(ing)
st(s) – stitch(es)
dc3tog (dc 3 together) – yarn over, insert hook into st and draw up a loop, yarn over and draw through 2 loops. (Yarn over, insert hook into next st and draw up a loop. Yarn over, draw through 2 loops) twice, yarn over and draw through all loops on hook (4) – 2 dc decreased

Afghan
With black yarn, ch 152.
Row 1 – dc in 4th ch from hook, *dc in next 4 ch, dc3tog, dc in next 4 ch, 3 dc in next ch; rep from * 10 more times, dc in next 4 ch, dc3tog, dc in next 4 ch, 2 dc in last ch – 12 ripples.
Row 2 – ch 3, turn, dc in first dc, *dc in next 4 dh, dc3tog, dc in next 4 dh, 3 dc in next dh; rep from * 8 more times, dc in next 4 dh, dc3tog, dc in next 4 dh, 2 dc in top of turning ch. Change to white.
Rows 3-90 or until you run out of yarn – rep row 2, continuing in color sequence.

Fasten off, weave in ends, and get your snuggle on!